
Before you begin assembling an AR-15 lower receiver, lay out your tools and get them organized. This will save you a lot of time later. Here’s what you’ll need:
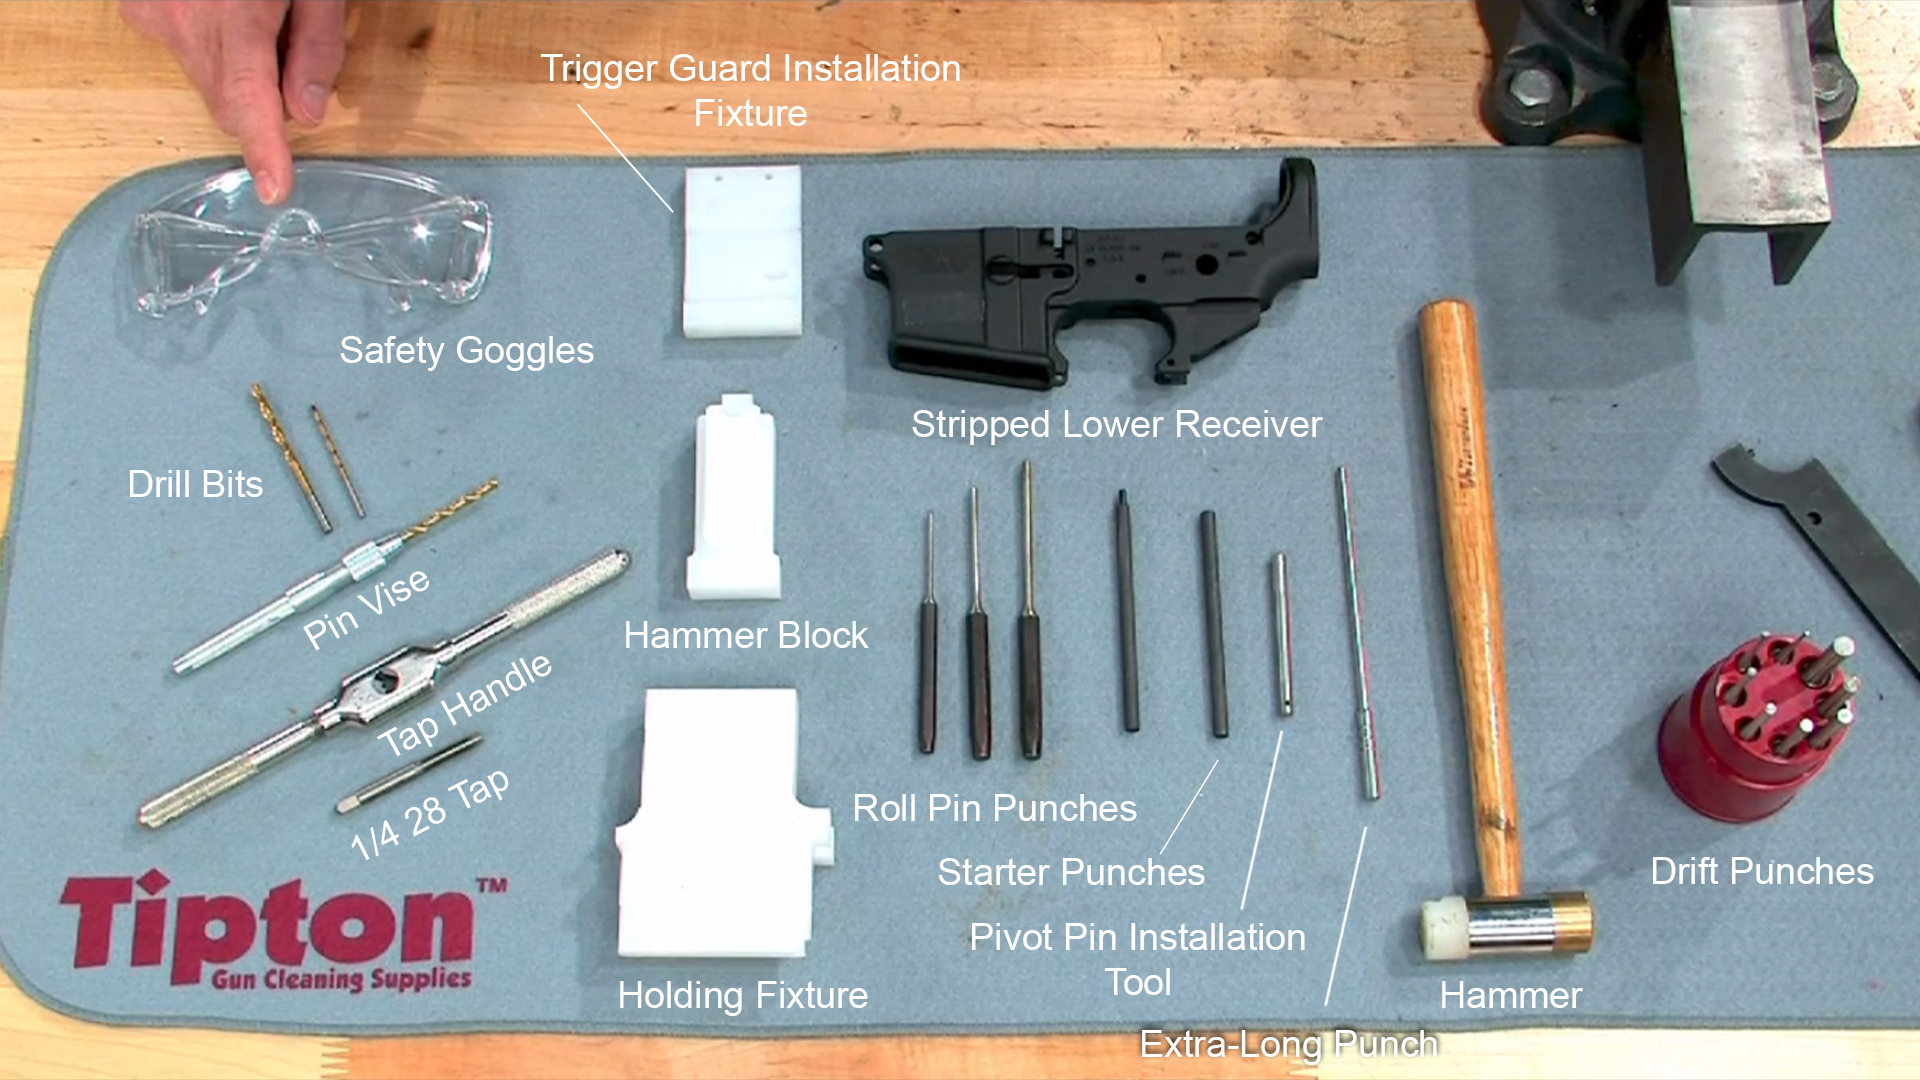
God only gave you one set of eyes so always wear safety glasses to protect them. You’ll need some drill bits, a pin vise, a 1/4”-28 tap, and a tap handle to prep the lower receiver for assembly. A holding fixture, hammer block, and a trigger guard installation fixture will protect the finish during assembly. You’ll also need a hammer, drift punches, roll pin punches, and starter punches. A pivot pin installation tool along with an extra-long punch make some otherwise impossible tasks pretty simple in addition to an AR-15 combo wrench.
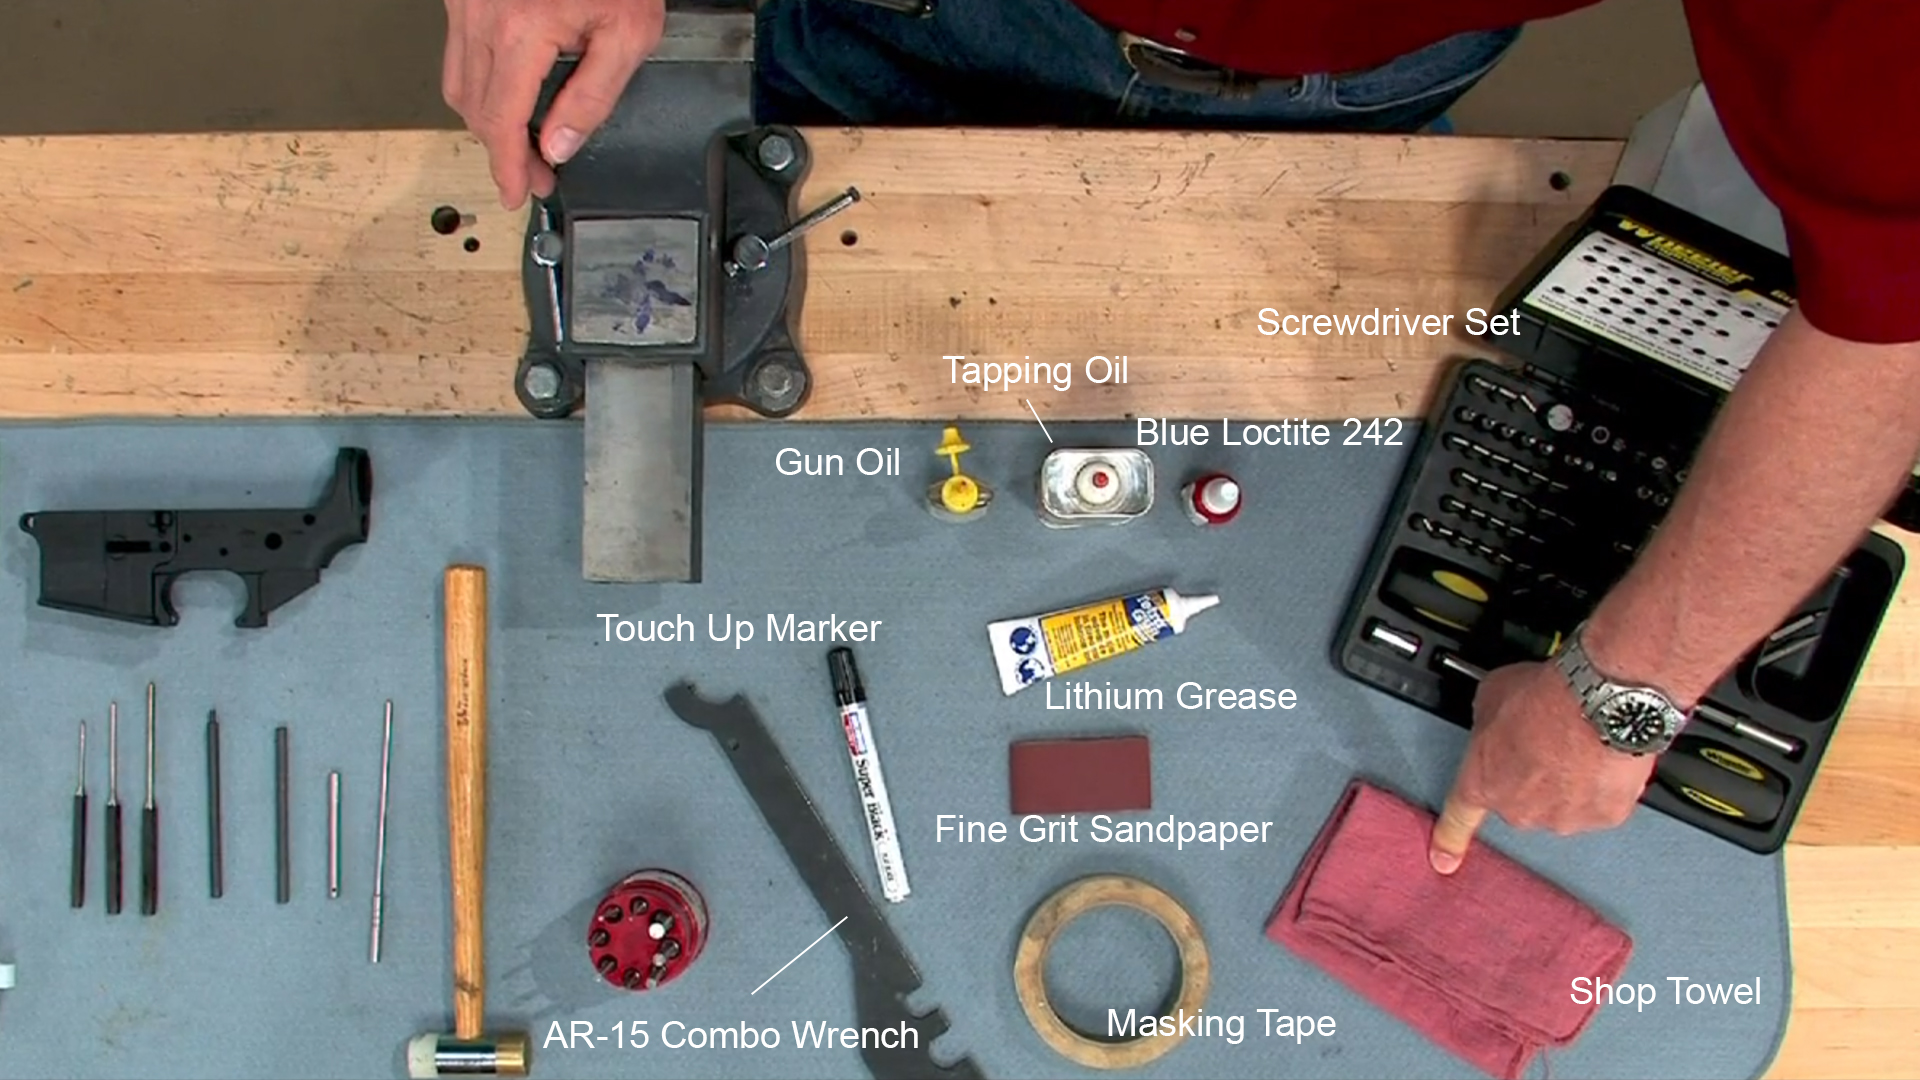
Make sure you have a touch-up marker, masking tape, fine-grit sandpaper, gun oil, lithium grease, tapping oil, Blue Loctite, a good screwdriver set, and a shop towel.
Having the right tools helps assure a quality job, and you can find all these at MidwayUSA. So let’s get started.
Prep Work

This prep work is essential before you start the actual assembly. Also, a drop of oil on each pin will make assembly easier. Start with a careful inspection. If there are any problems or defects, you want to find them before you begin any work. Detent and pin holes will occasionally have burs, machining chips, or finish build-up inside them, which should be removed.
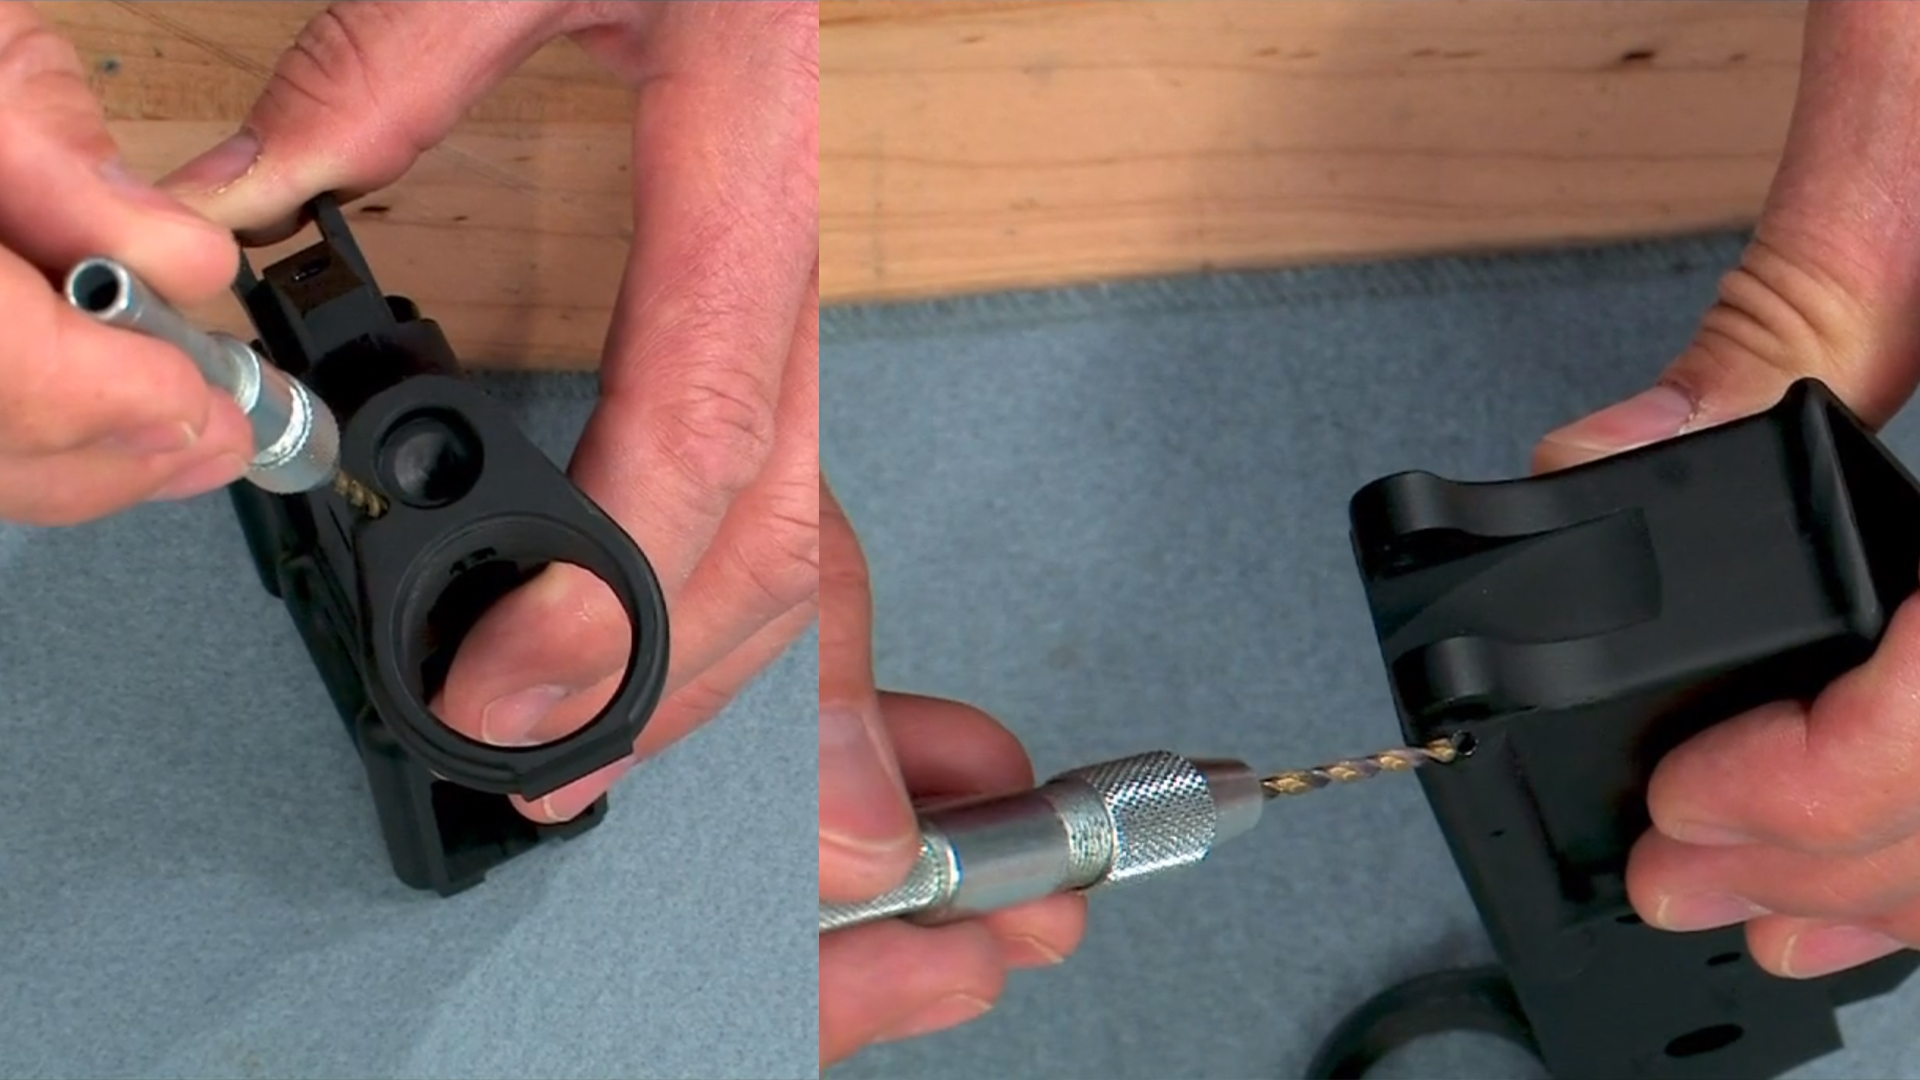
I like to use a #40 drill in a pin vise to ream out the pivot and takedown detent holes, a #22 drill for the safety detent hole, and a #23 drill for the hammer and trigger pin holes. Just a turn or two with your fingers will do the job. Be sure to look for and clean out any chips or finish before you move on.
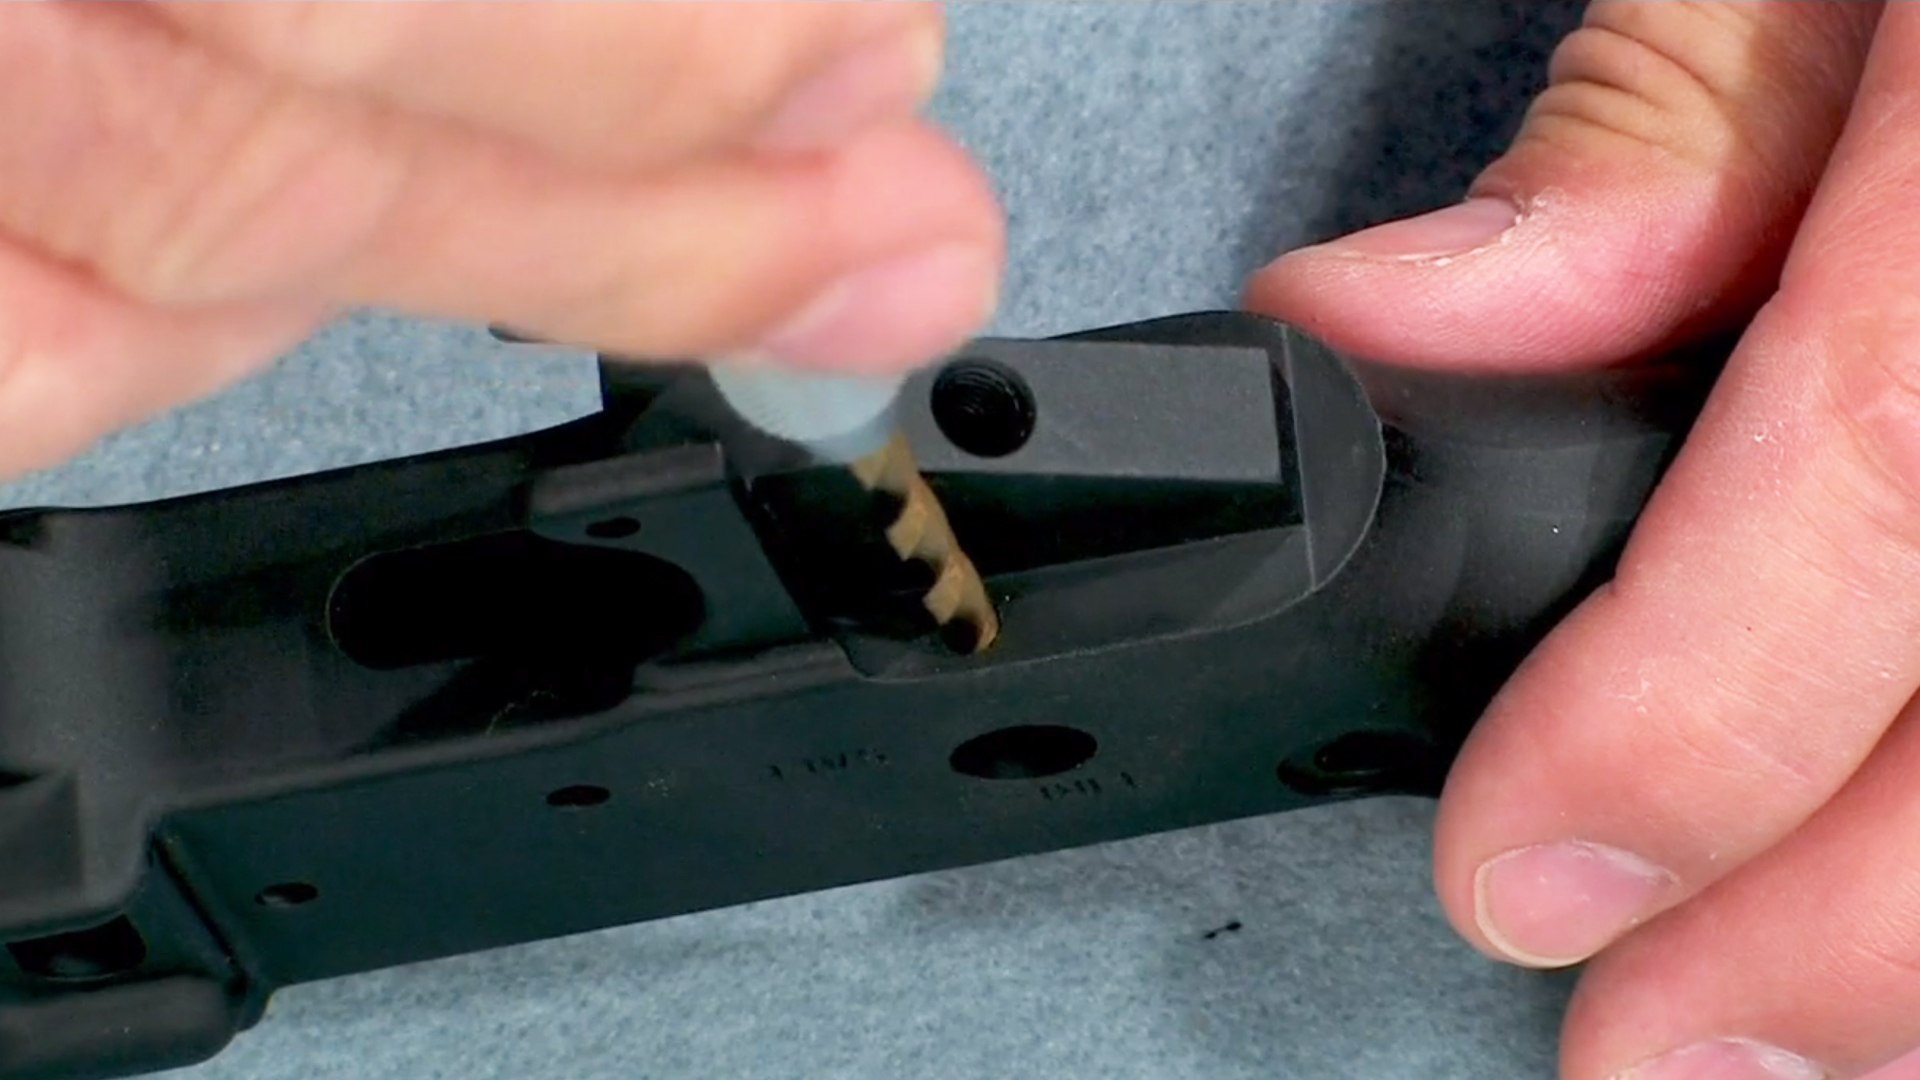
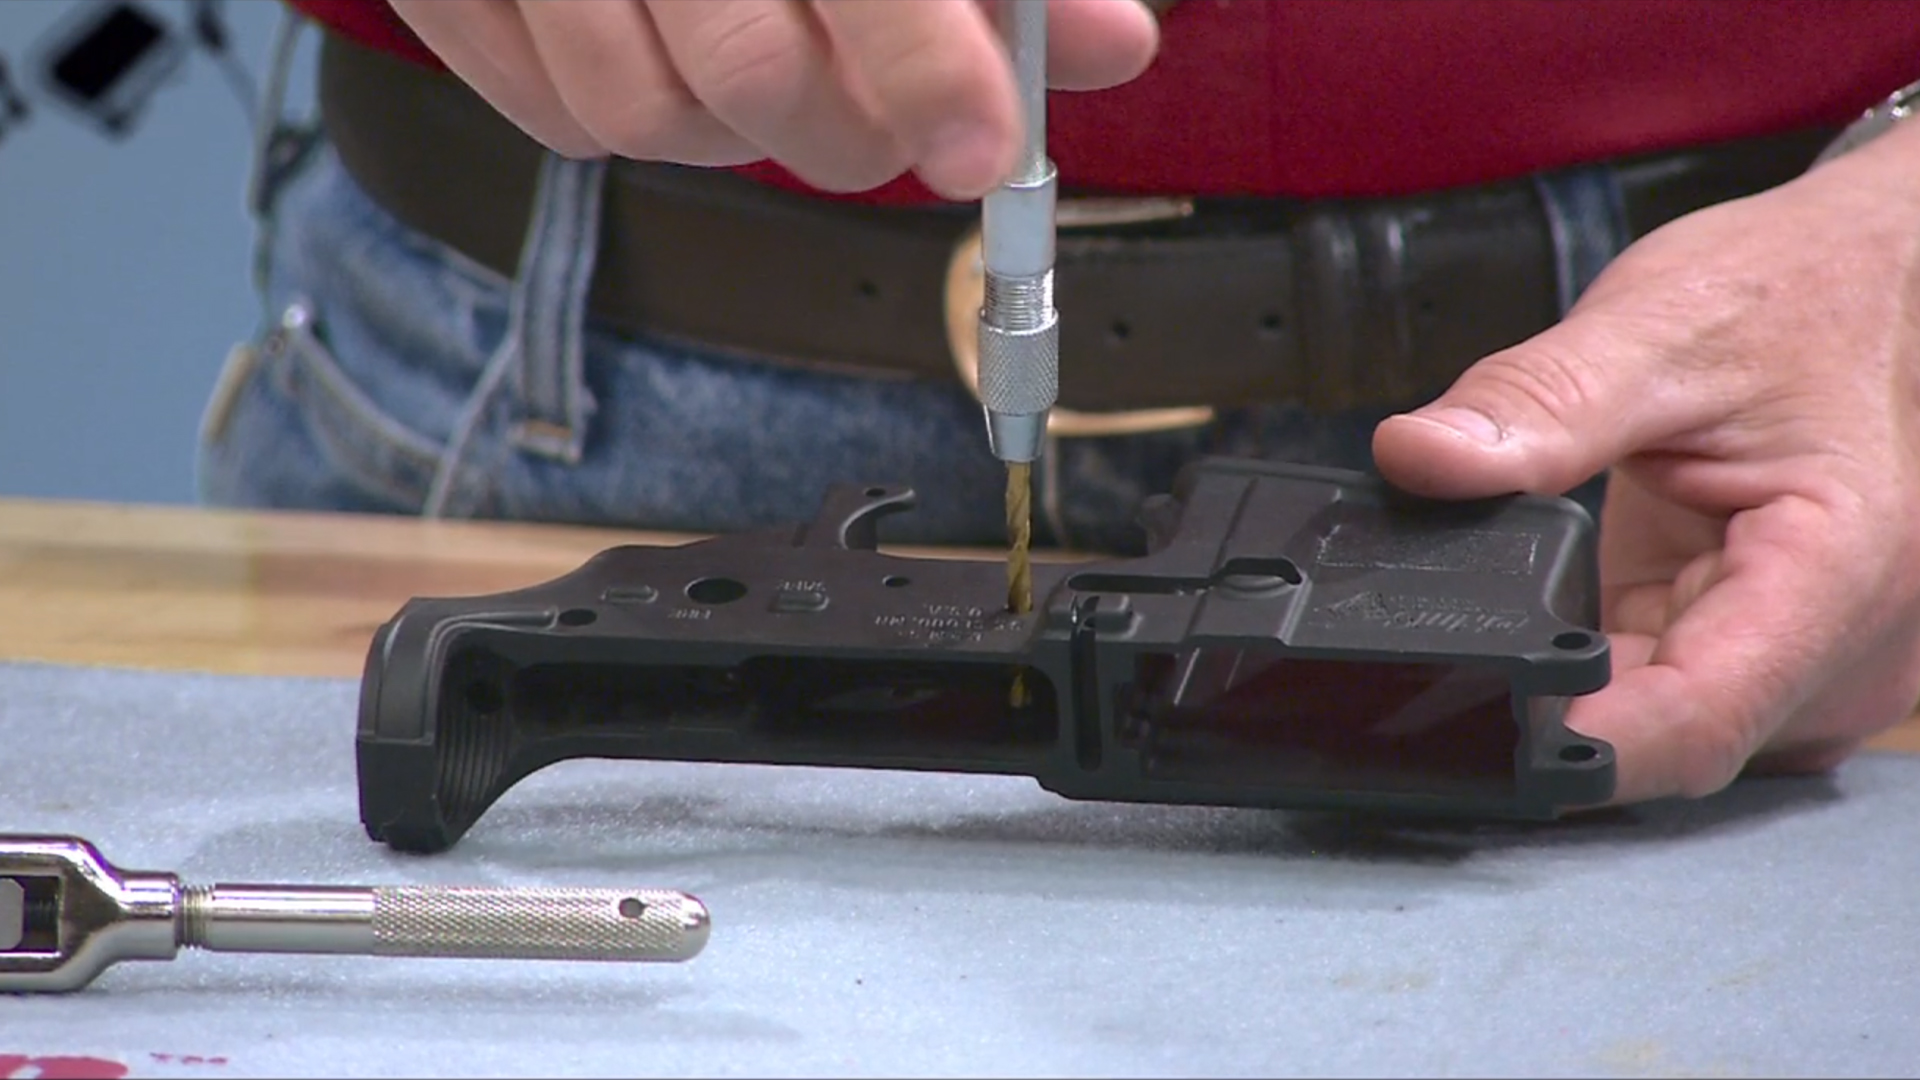
A bit of tapping oil and a 1/4″-28 tap is used to clean out the threads for the pistol grip screw. This may help make installation of the screw a bit easier. Now we can start assembling our lower receiver.

Trigger Guard
The trigger guard is the first piece we’ll install. Begin by positioning the front of the trigger guard into the lower receiver. This part has a spring-loaded detent that’s pinned in place.
Align the guards so the end of the detent will project into the hole on the right side. Now, carefully depress the detent and slide the guard up and between the two tabs or ears. To support the ears I’m using a simple fixture by AR-Stoner. This fixture is machined to provide support to the ears while I drive in the roll pin. If the ears are left unsupported, it’s easy to break one off. Once you break off an ear the lower receiver is just scrap! Always use a fixture for support. The hole in the trigger guard must be properly aligned with the holes in the ears. Begin with the roll pin starter punch, then switch to a standard roll pin punch. A roll pin punch has a small protrusion on the tip that keeps it centered on the roll pin, preventing it from slipping and marring the finish. Now drive it the rest of the way in. The pin should not protrude from either side. Installing the trigger guard is fairly simple, and you can see how important is to support the receiver during this process.
Magazine Release
The magazine catch, or release, is located above the magazine well on the lower receiver. You’ll want to use some masking tape to protect the finish in case something slips during installation. An action block like this one from CrossTac functions like a magazine:
To hold the lower while you assemble the components, just clamp the block in a vise and then slip the lower onto it via the magazine well.
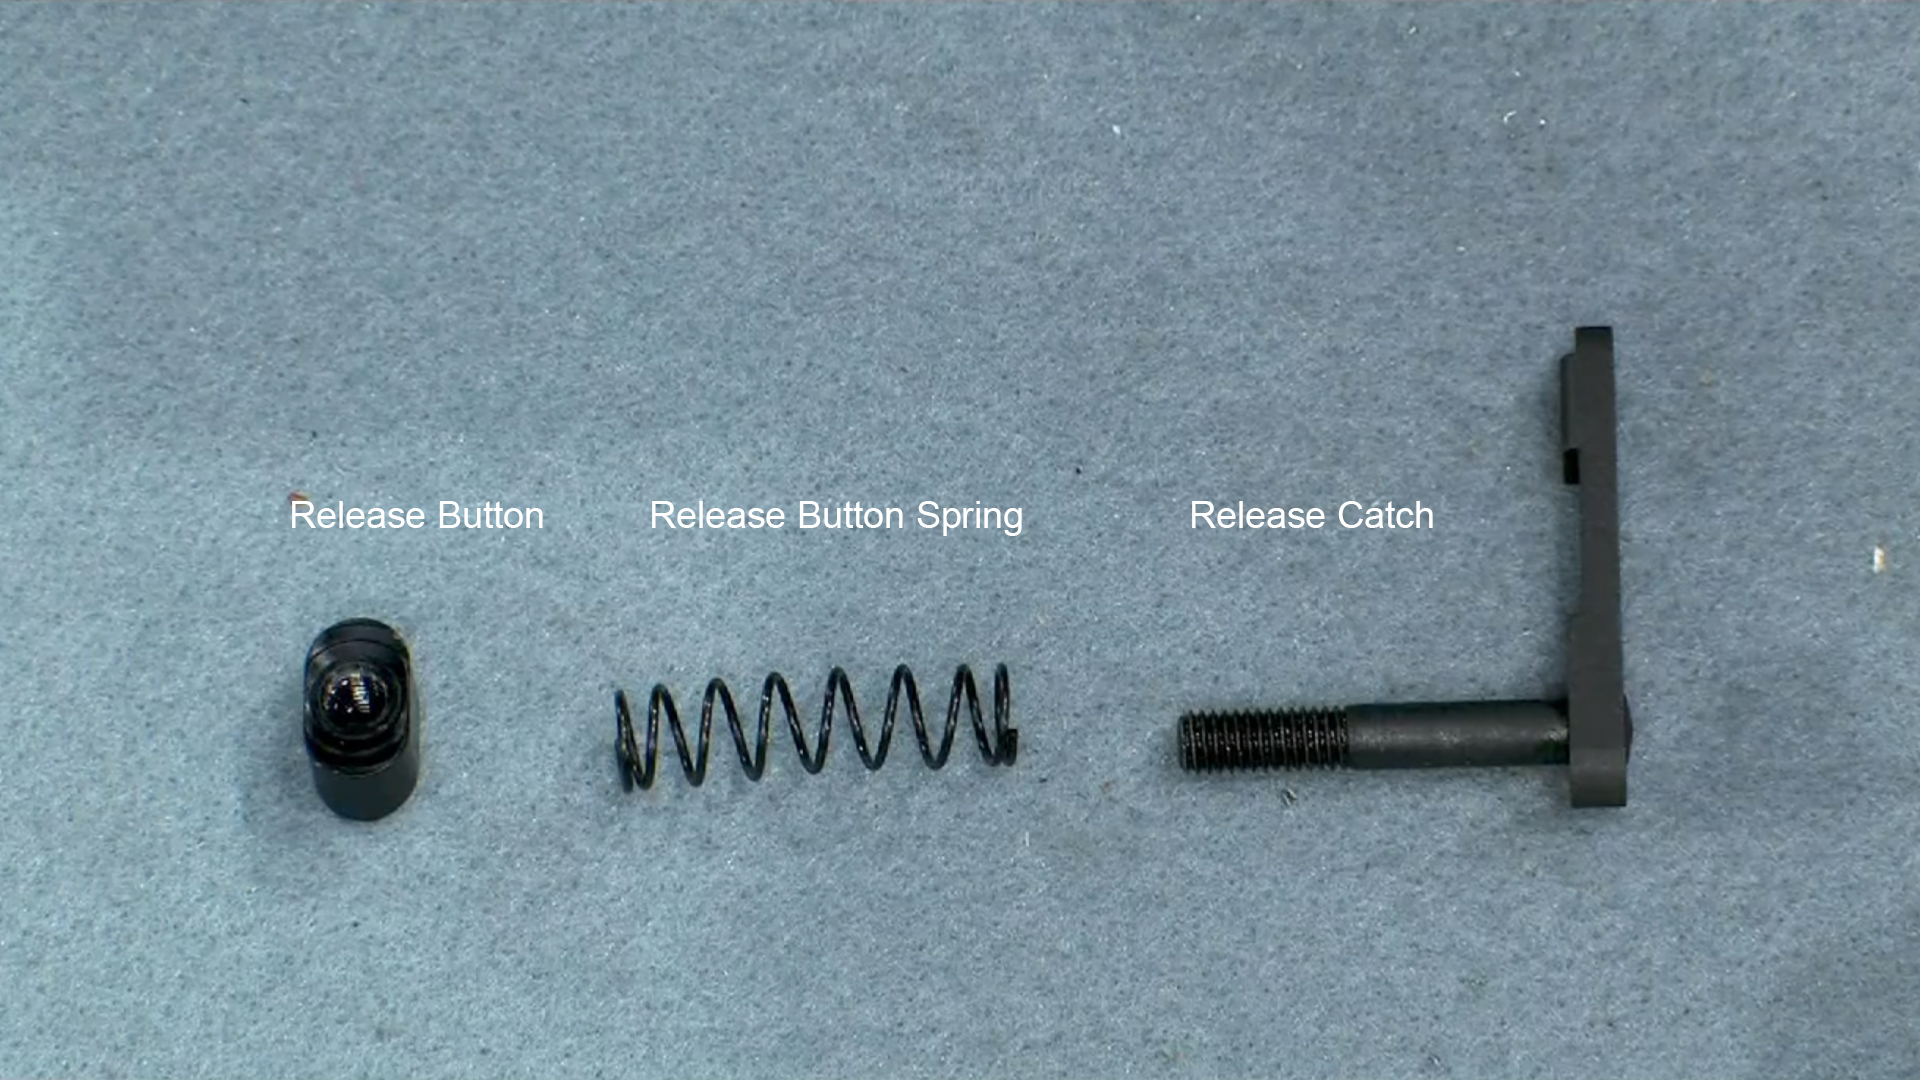
The magazine release assembly is made of only three parts: the spring, the release button, and the body. Lubricate the spring first and place it on the right side of the receiver the release button is installed next with the serrated side facing out. Simply oil the threads on the catch and insert the release button in the right side of the receiver on top of the spring. The secret to installing the release body is this wooden dowel rod–it allows you to hold the button below the outside surface of the receiver. Place the part partially into the receiver and turn the body with your fingers, engaging the screw threads.
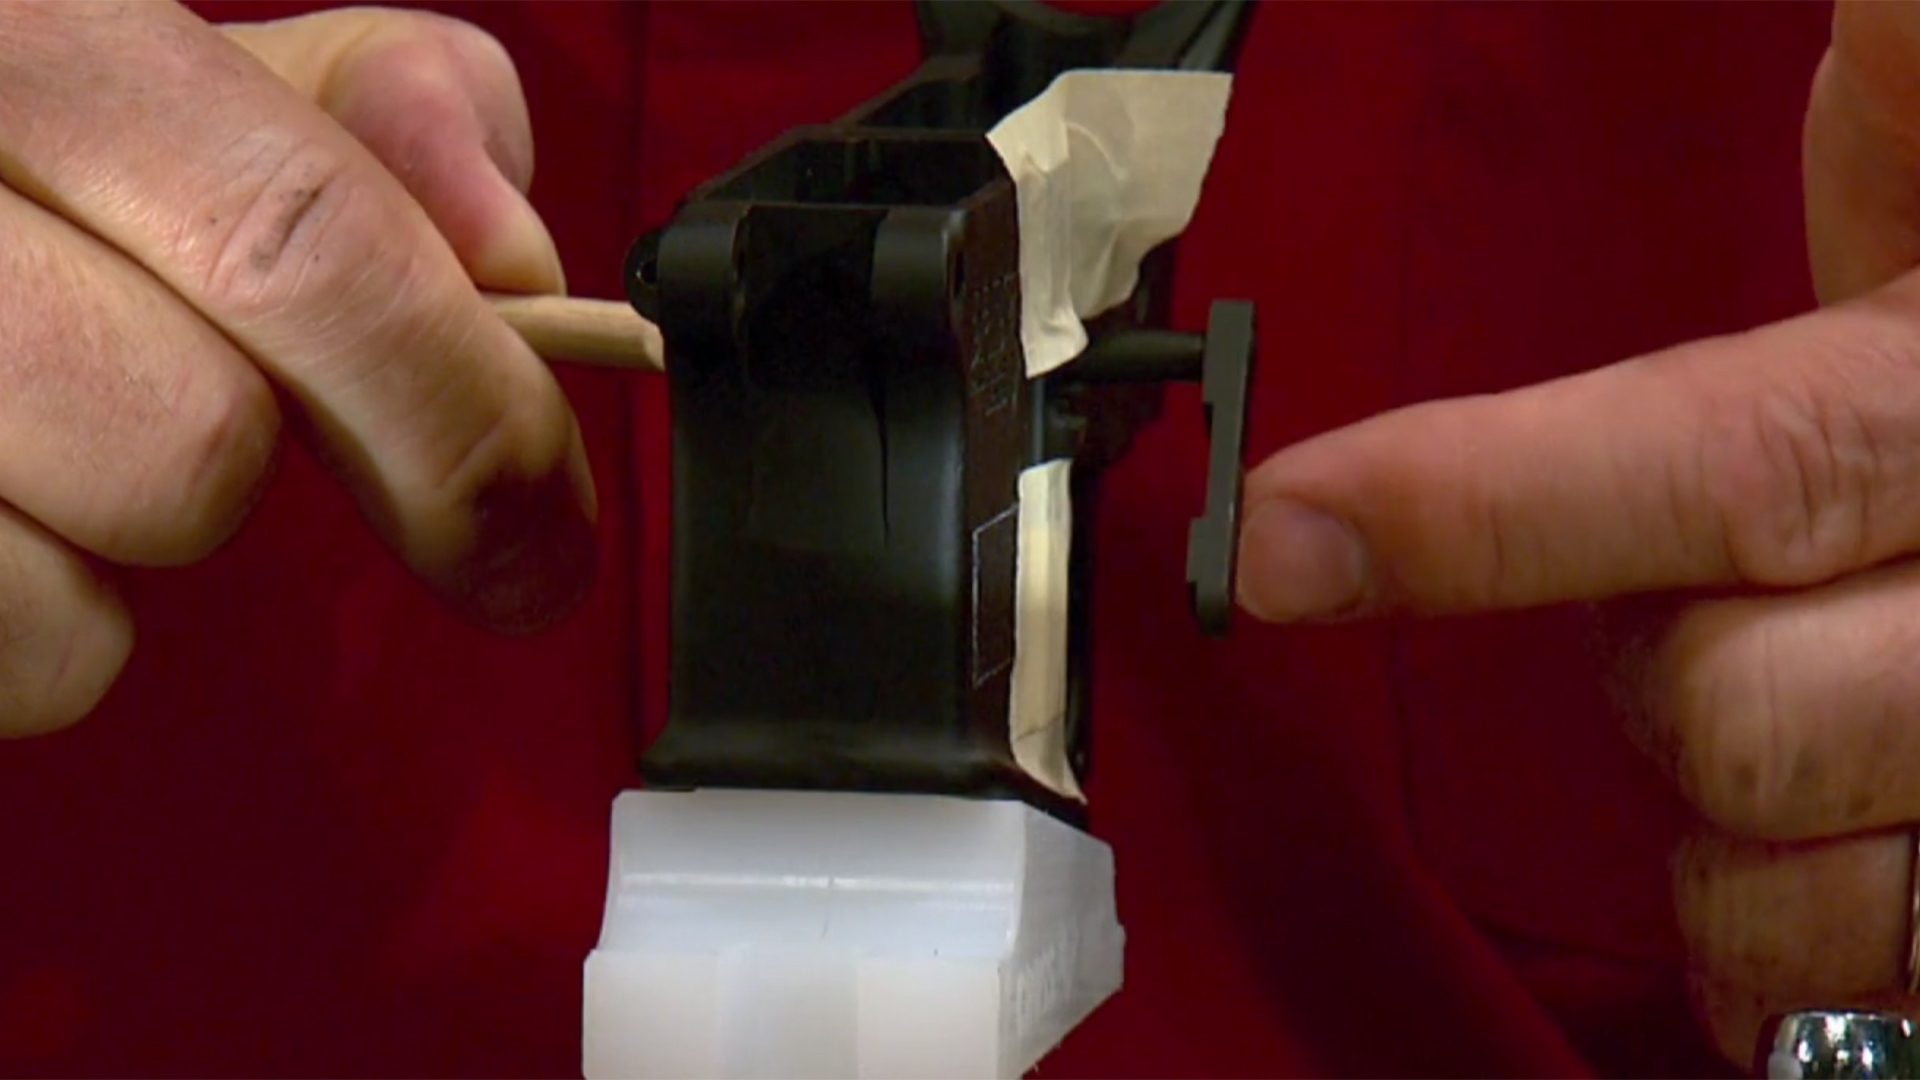
The end of the screw should be flush with the outside surface of the button now. The magazine release secures the lower to the action block just like it holds the magazine. Pushing the magazine release allows easy removal. You still need to function test the magazine release with a real magazine.
All that’s left is to remove the tape. Now that we have the magazine catch installed, we’re ready to install the bolt stop.
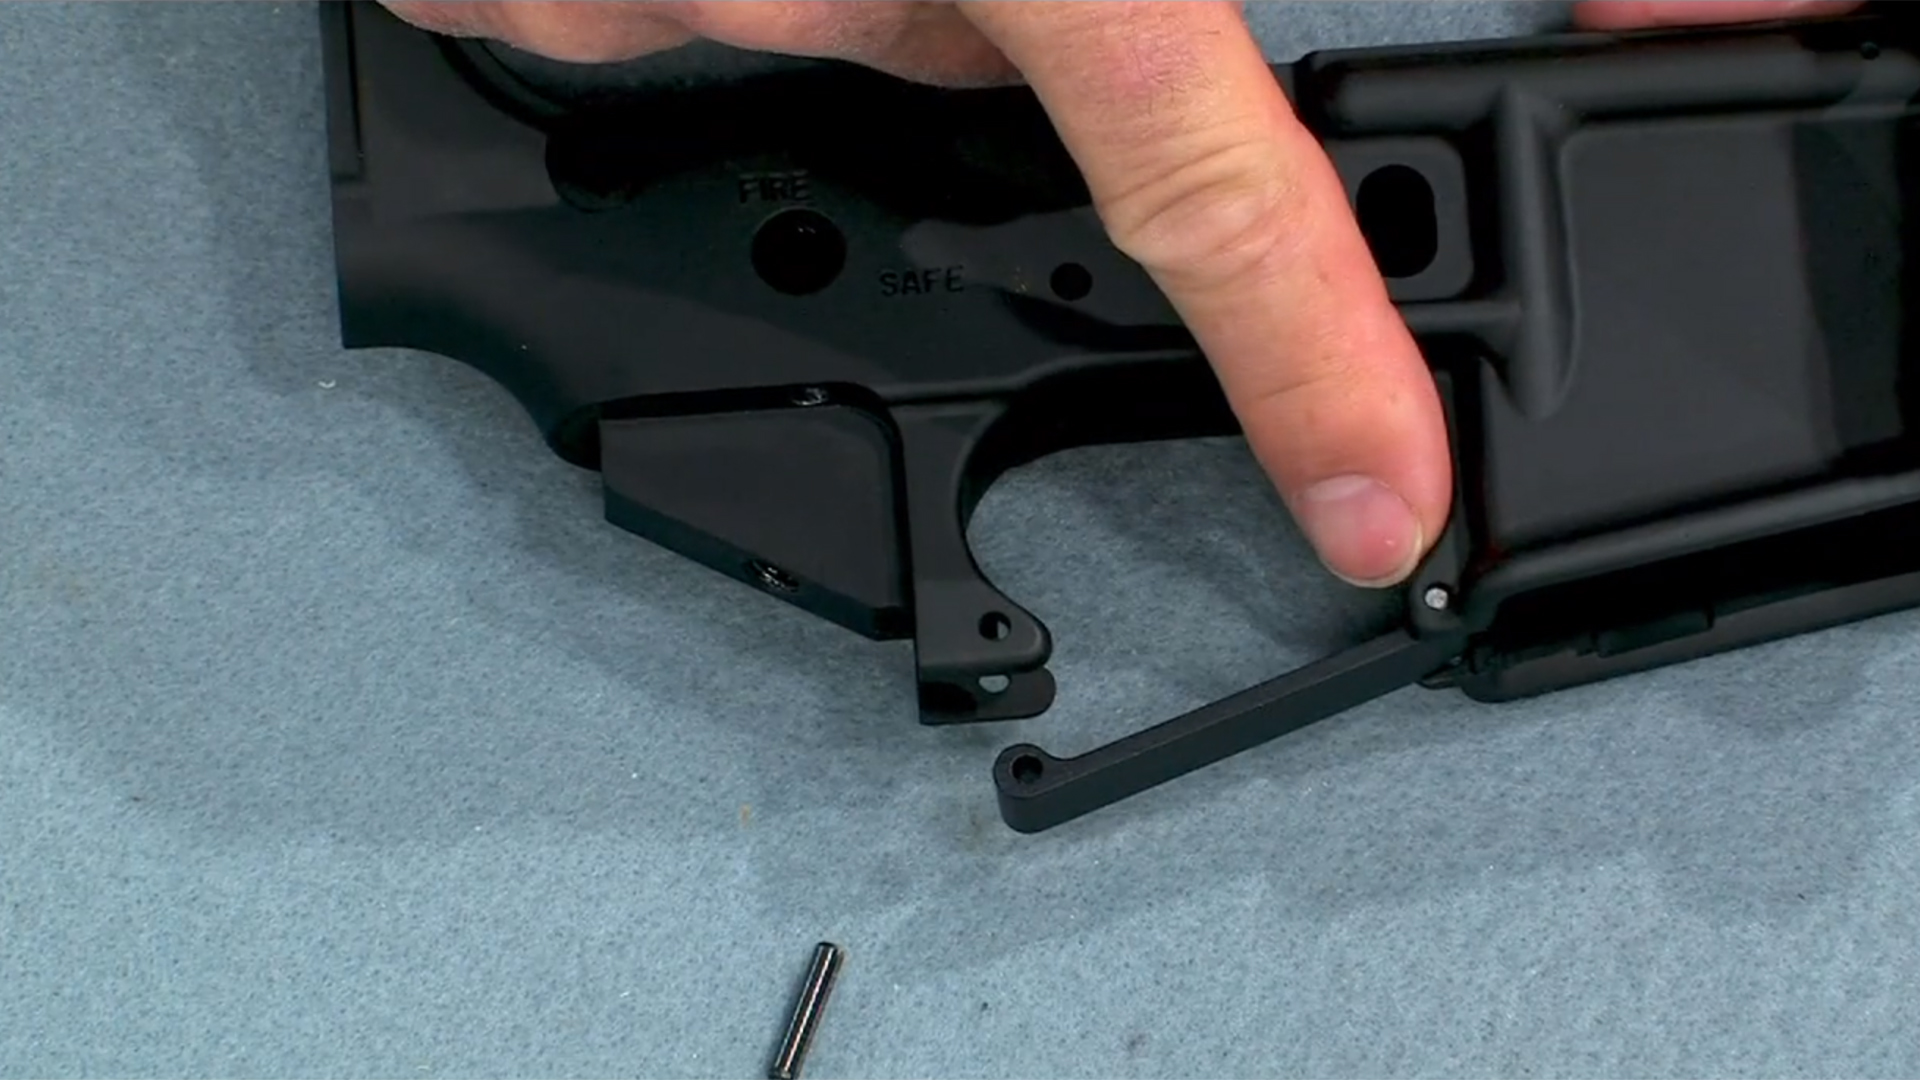
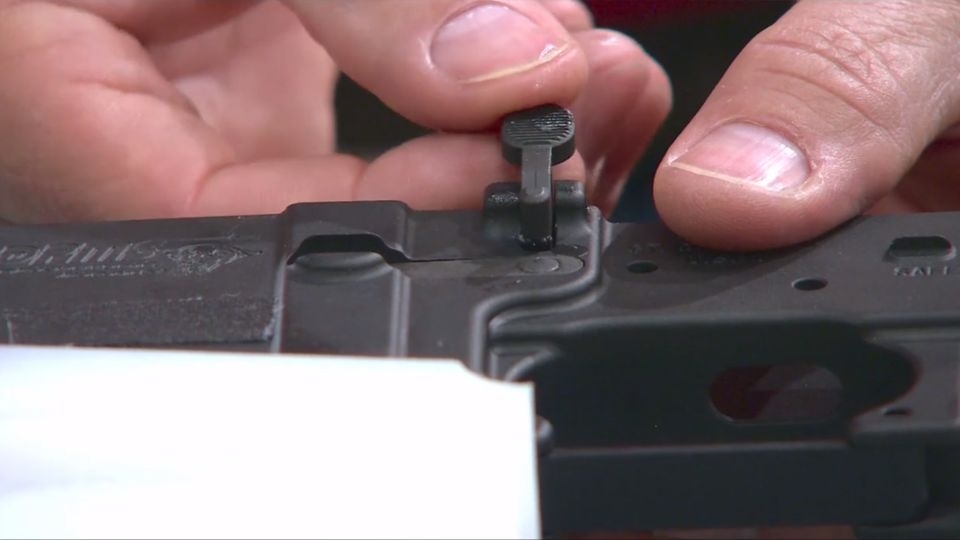
Bolt Stop
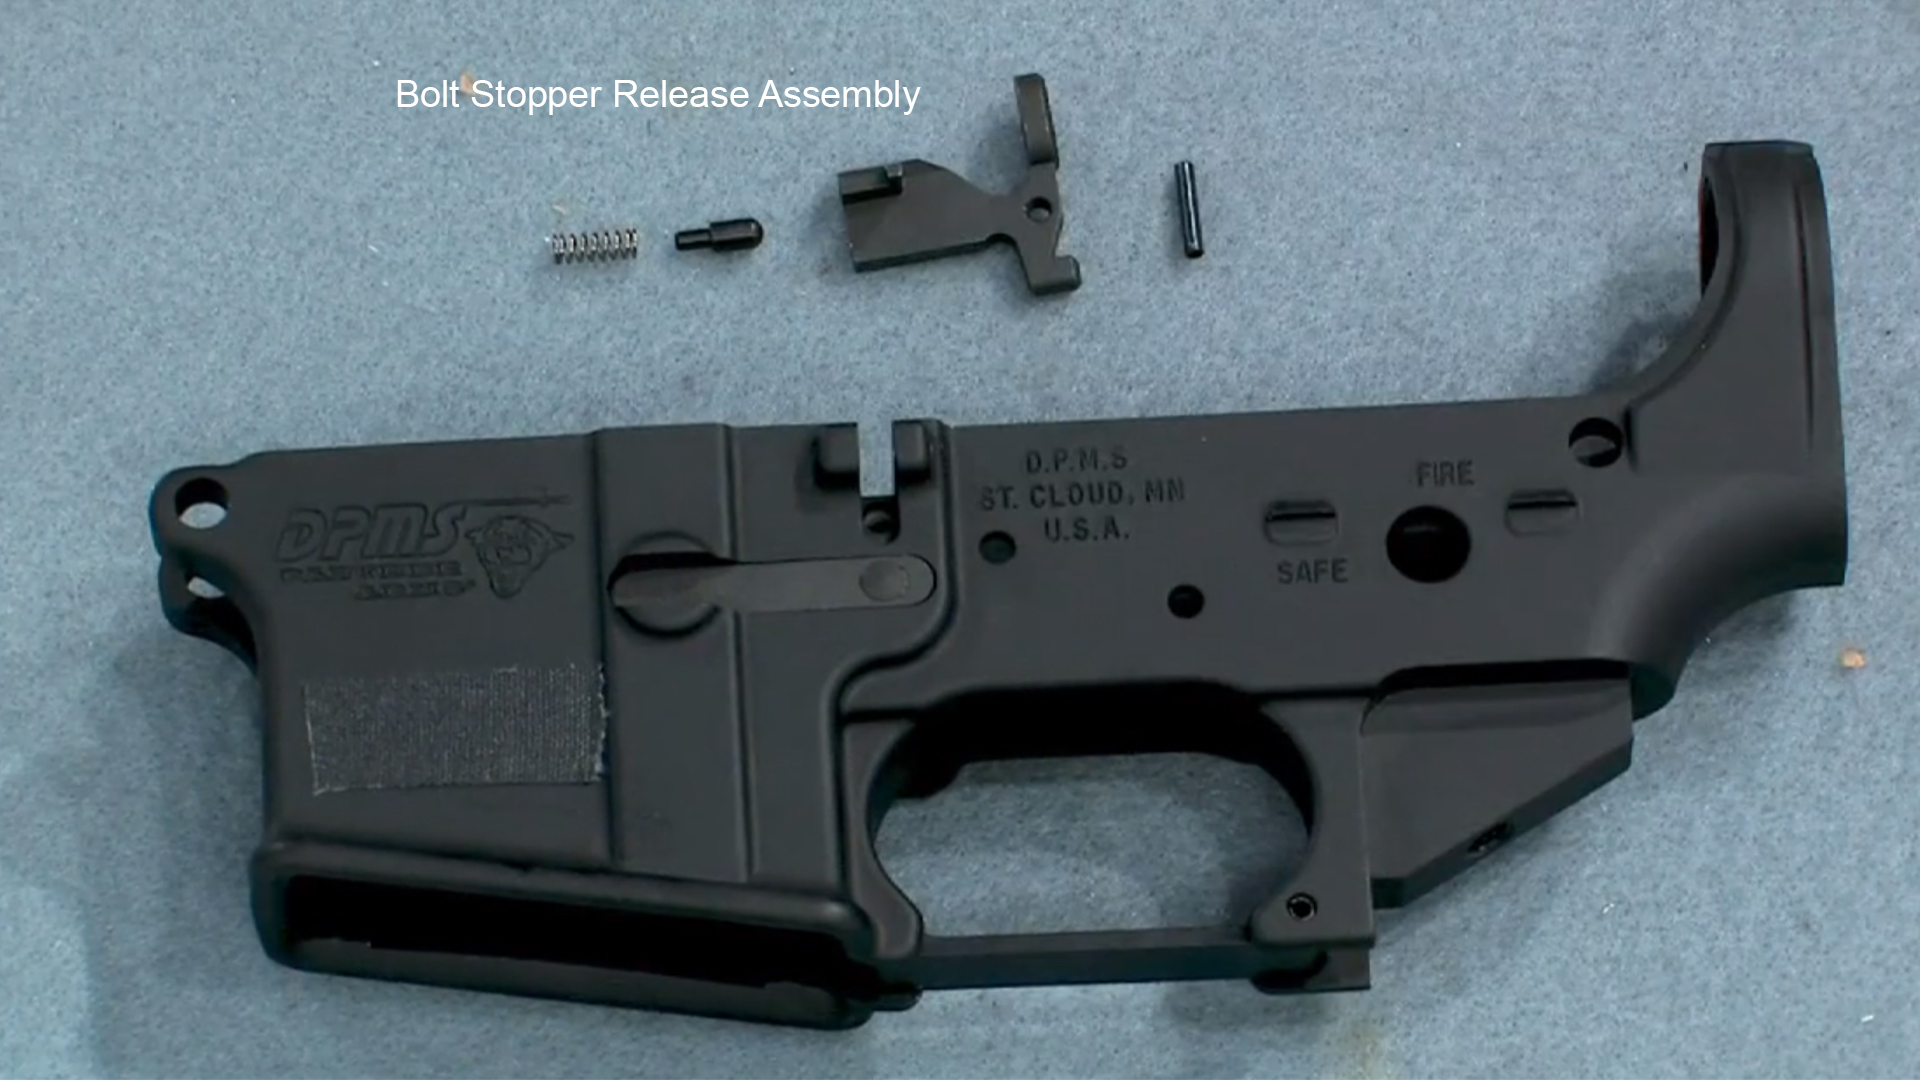
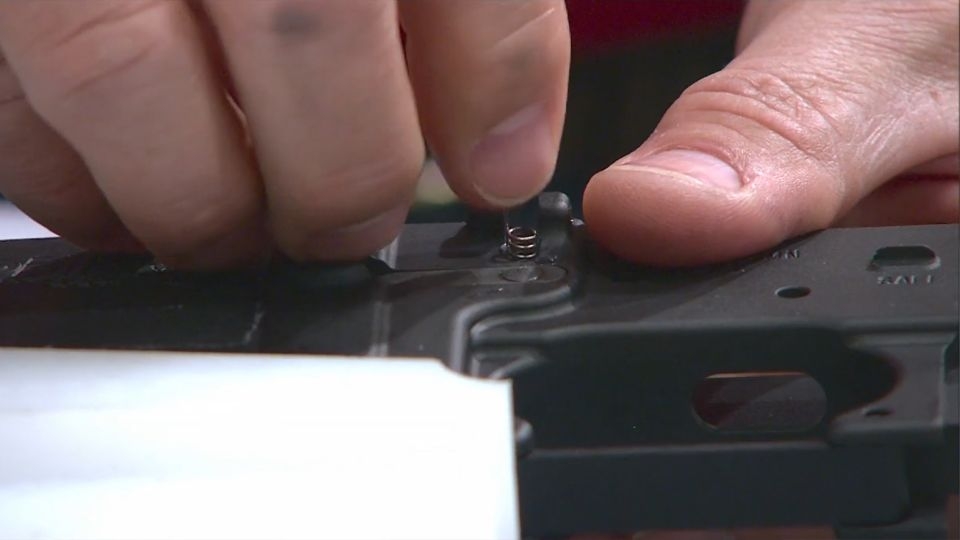
Installing the bolt stop requires attention to detail because the roll pin is tight-fitting and in a difficult location to reach. Be patient. The bolt stopper release assembly is made of four parts: the release, the roll pin, the plunger, and a spring. Oil the roll pin first then lightly grease the spring and plunger. The action block will secure the lower during this assembly. Place the spring in its recess followed by the plunger then the bolt stop.
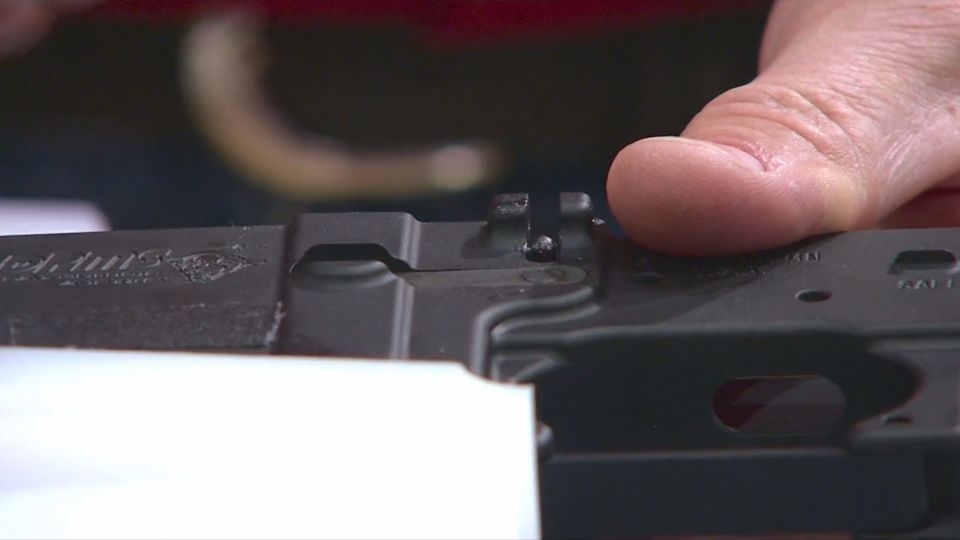
Now install the hammer block.
Stand the receiver on end and secure it in a vise. Everything is held in place with this roll pin and the leading edge should be well-beveled.
Due to the location of the pinhole, an extra-long roll pin starter will help prevent marring of the finish. A little masking tape is also a good idea, should your punch slip off the pin. Start the pin with the starter punch then drive it the rest of the way home with an extended drive punch.
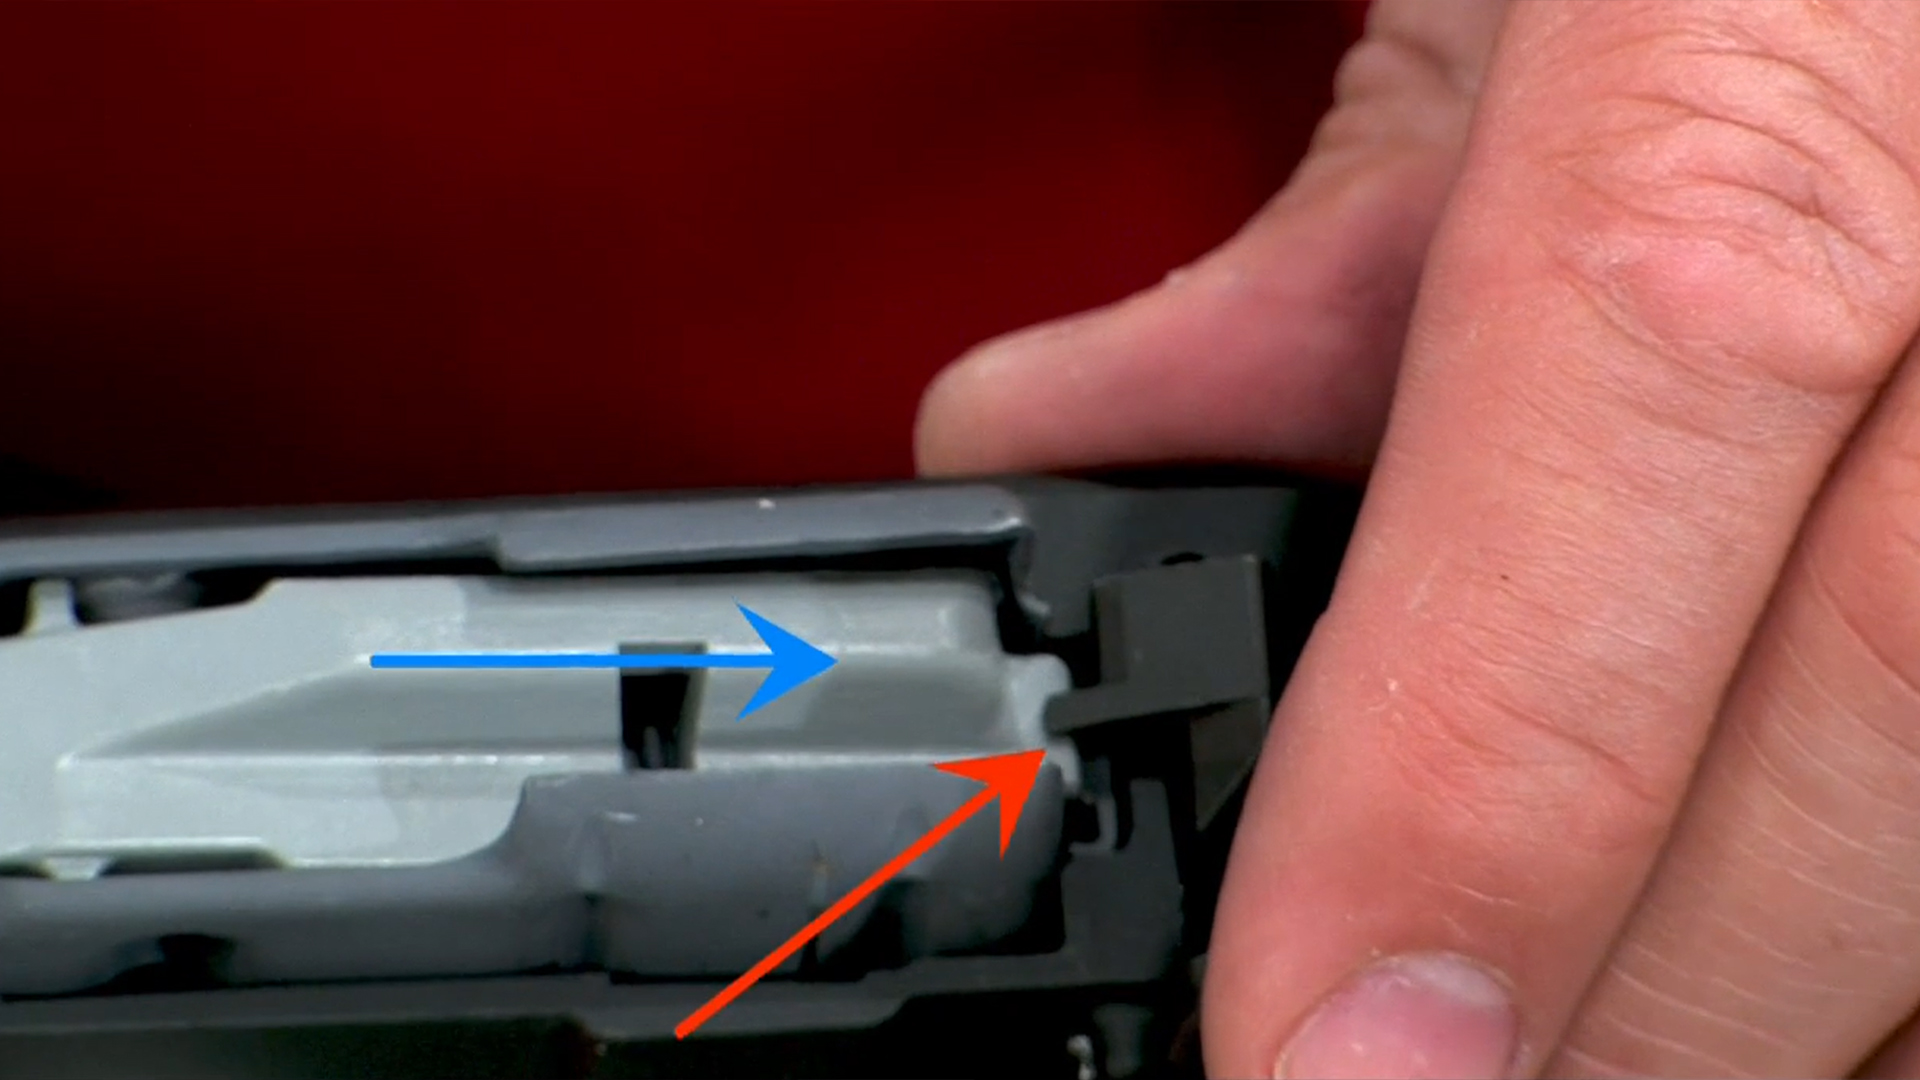
The pin should protrude slightly from both ends. Now you need to check for function. Insert a magazine and make sure that the top of the follower engages the lip of the bolt stop, forcing it upward. This is what stops the forward movement of the bolt when the magazine is empty.
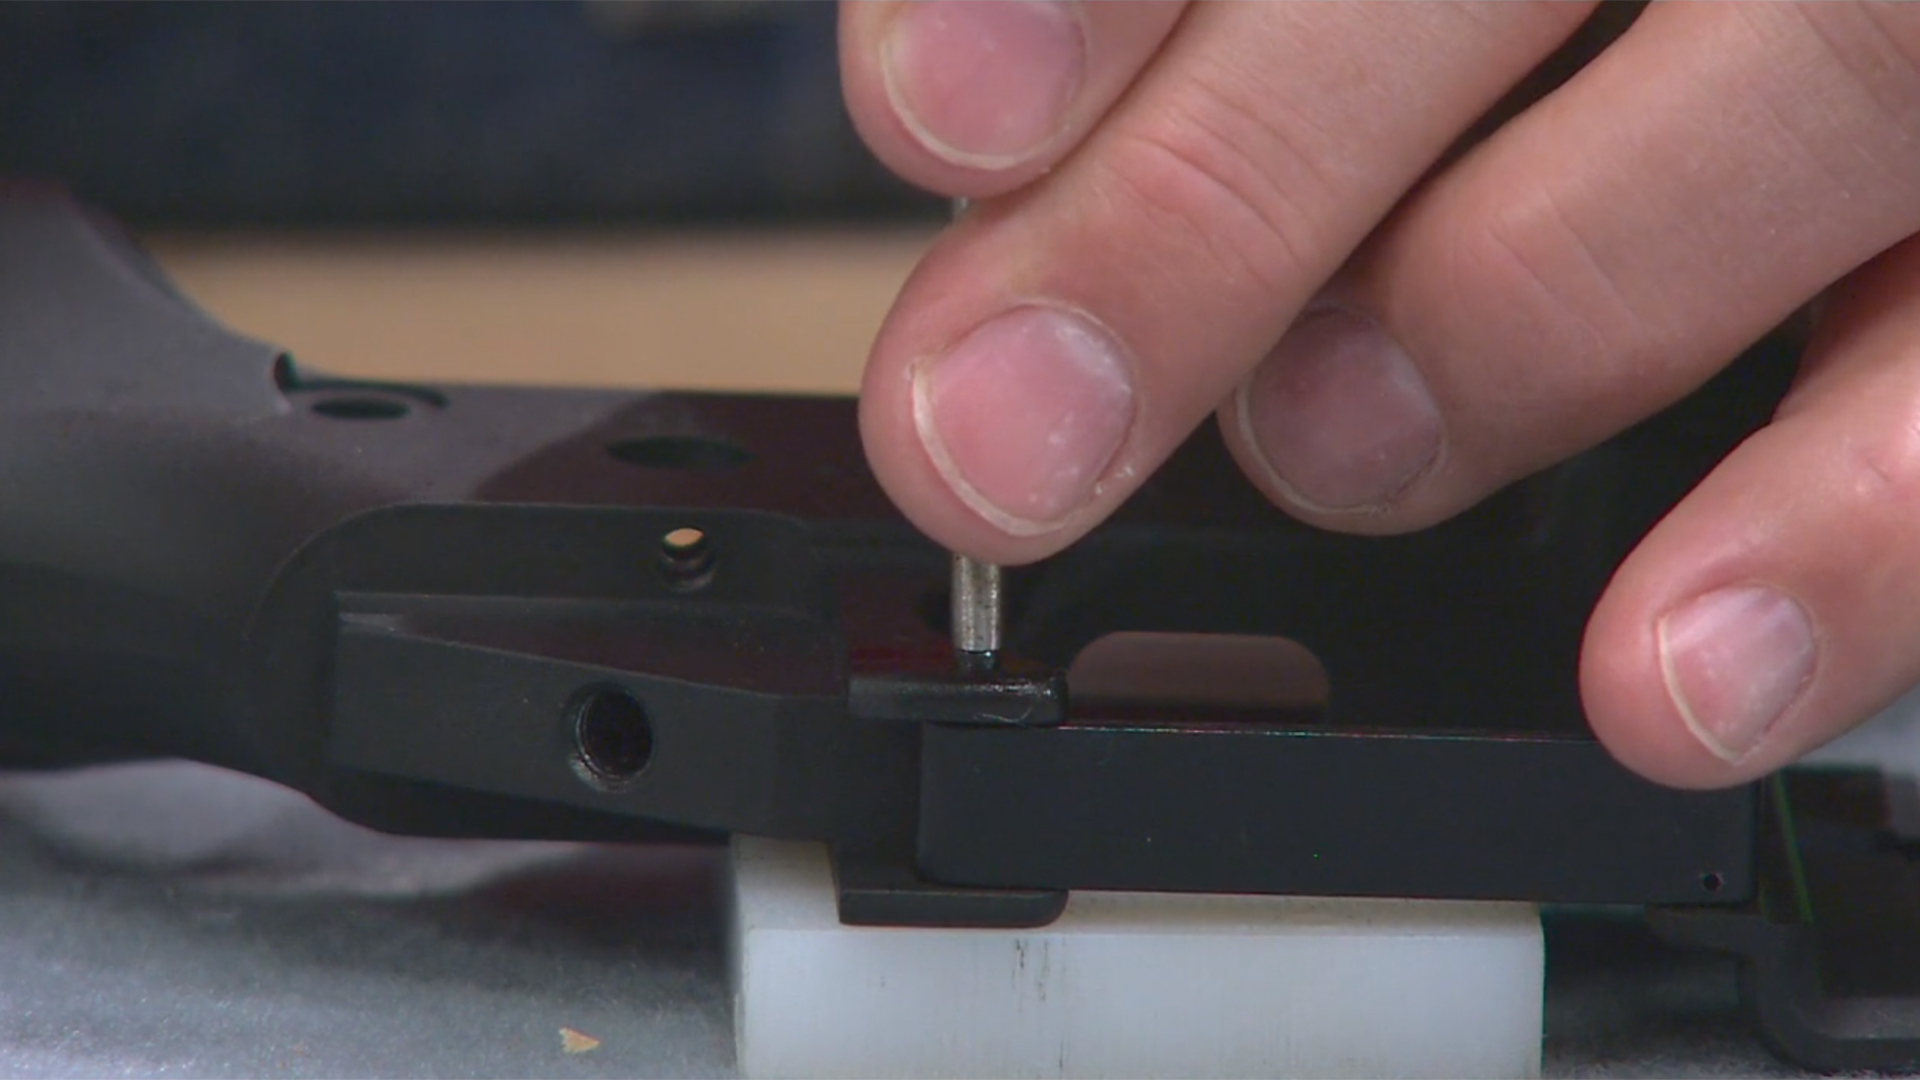
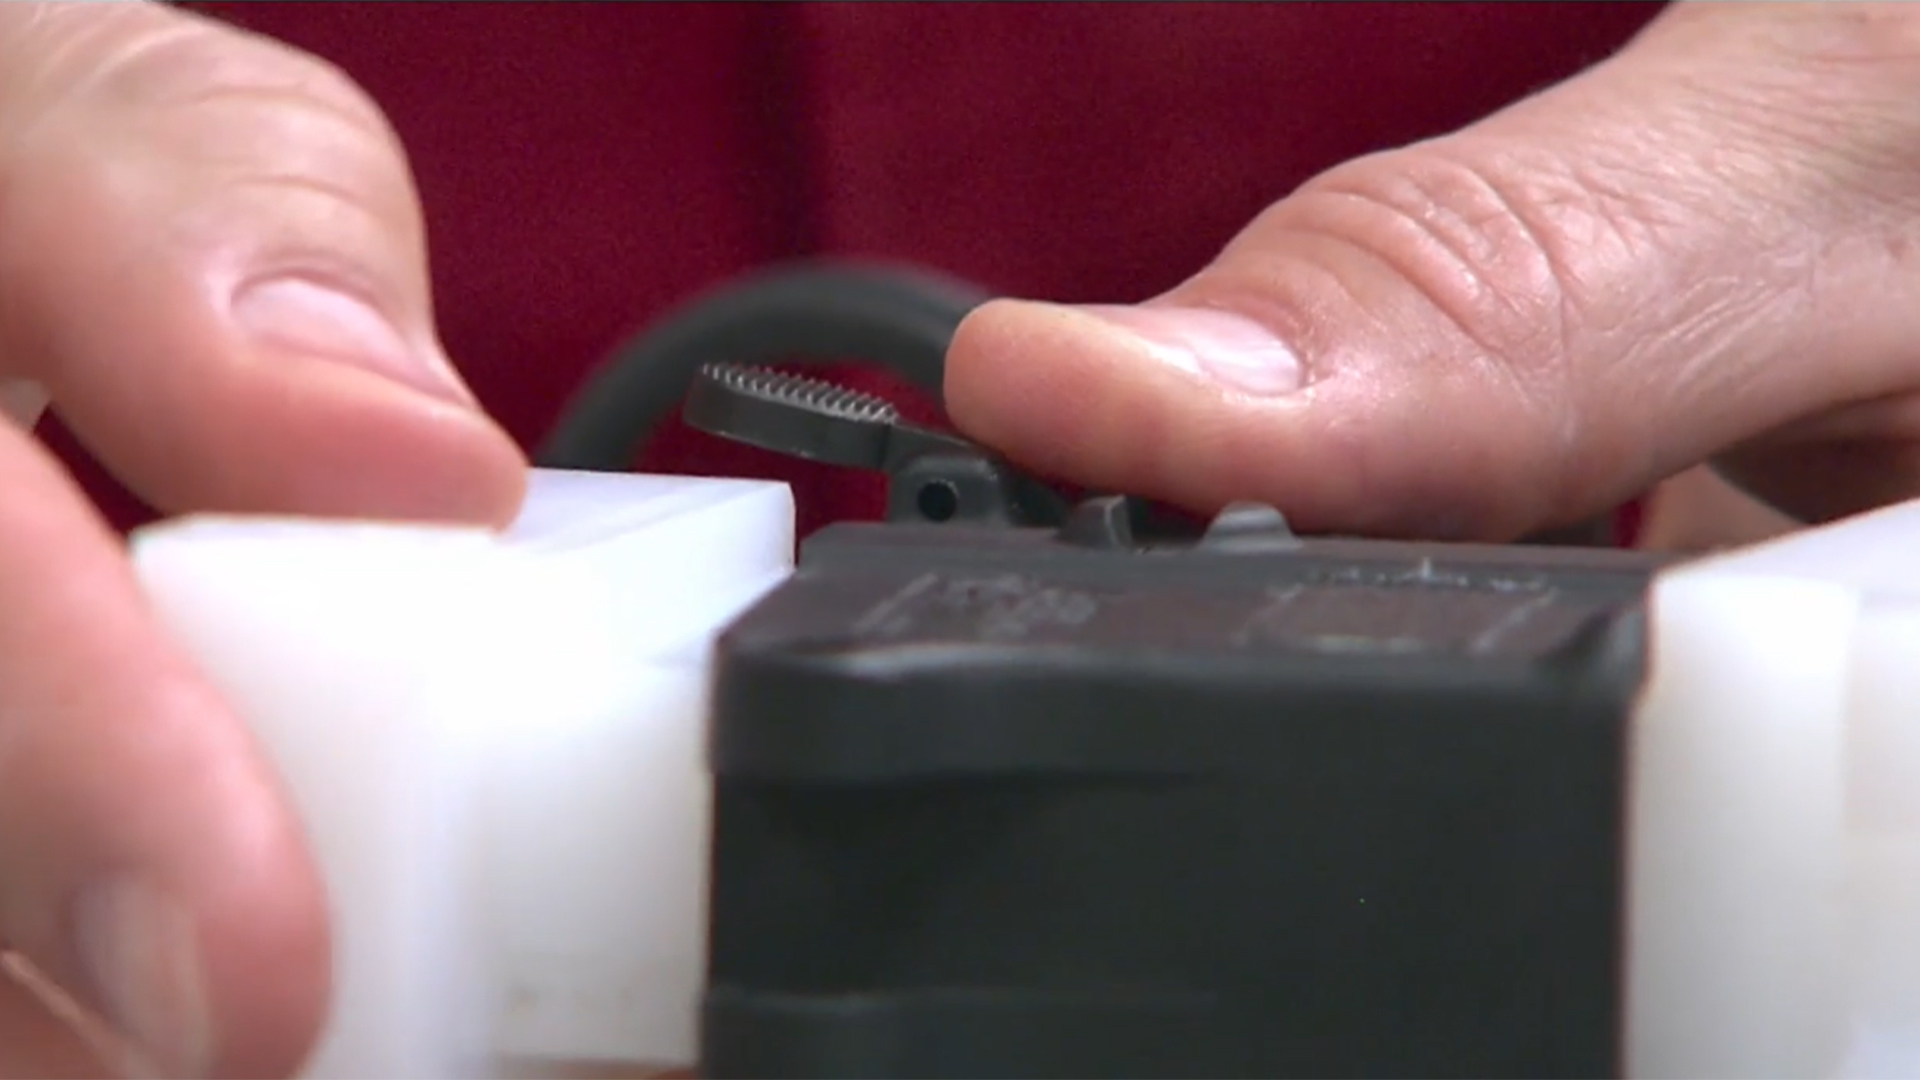
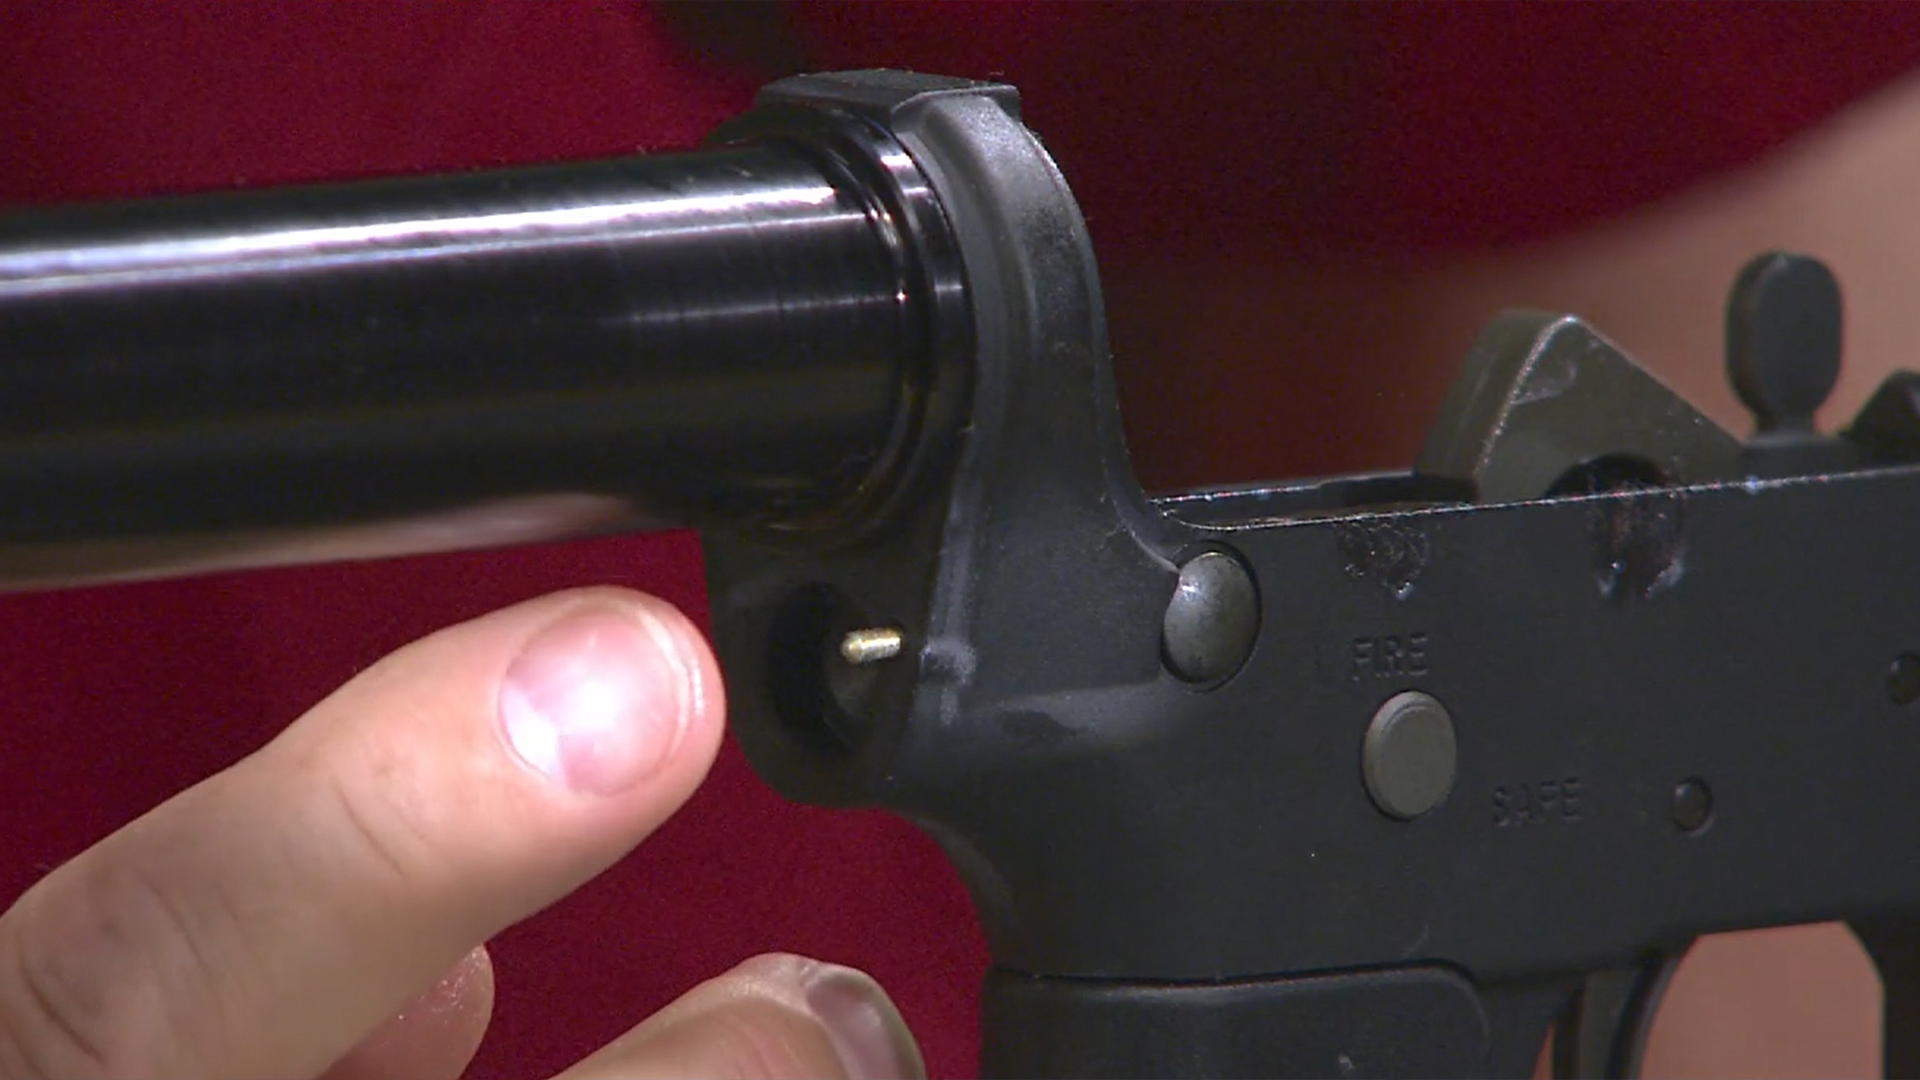
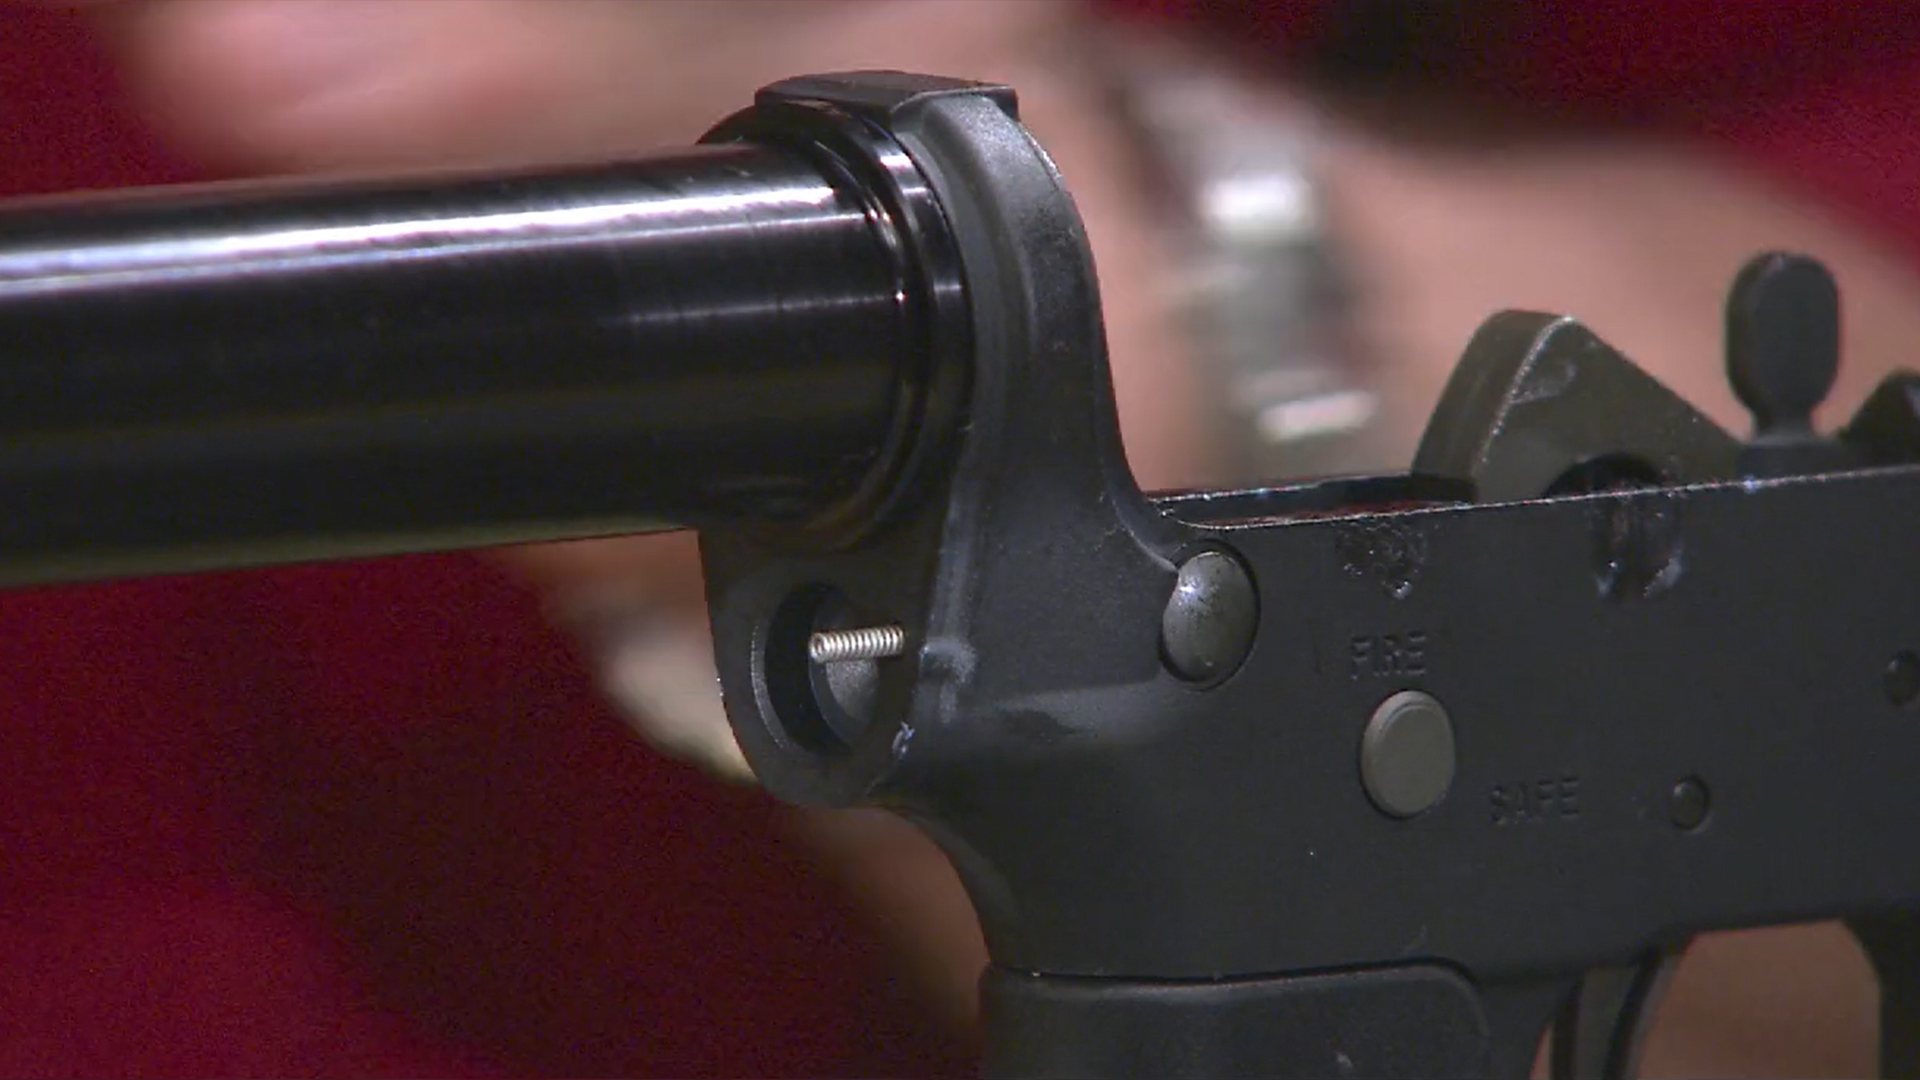
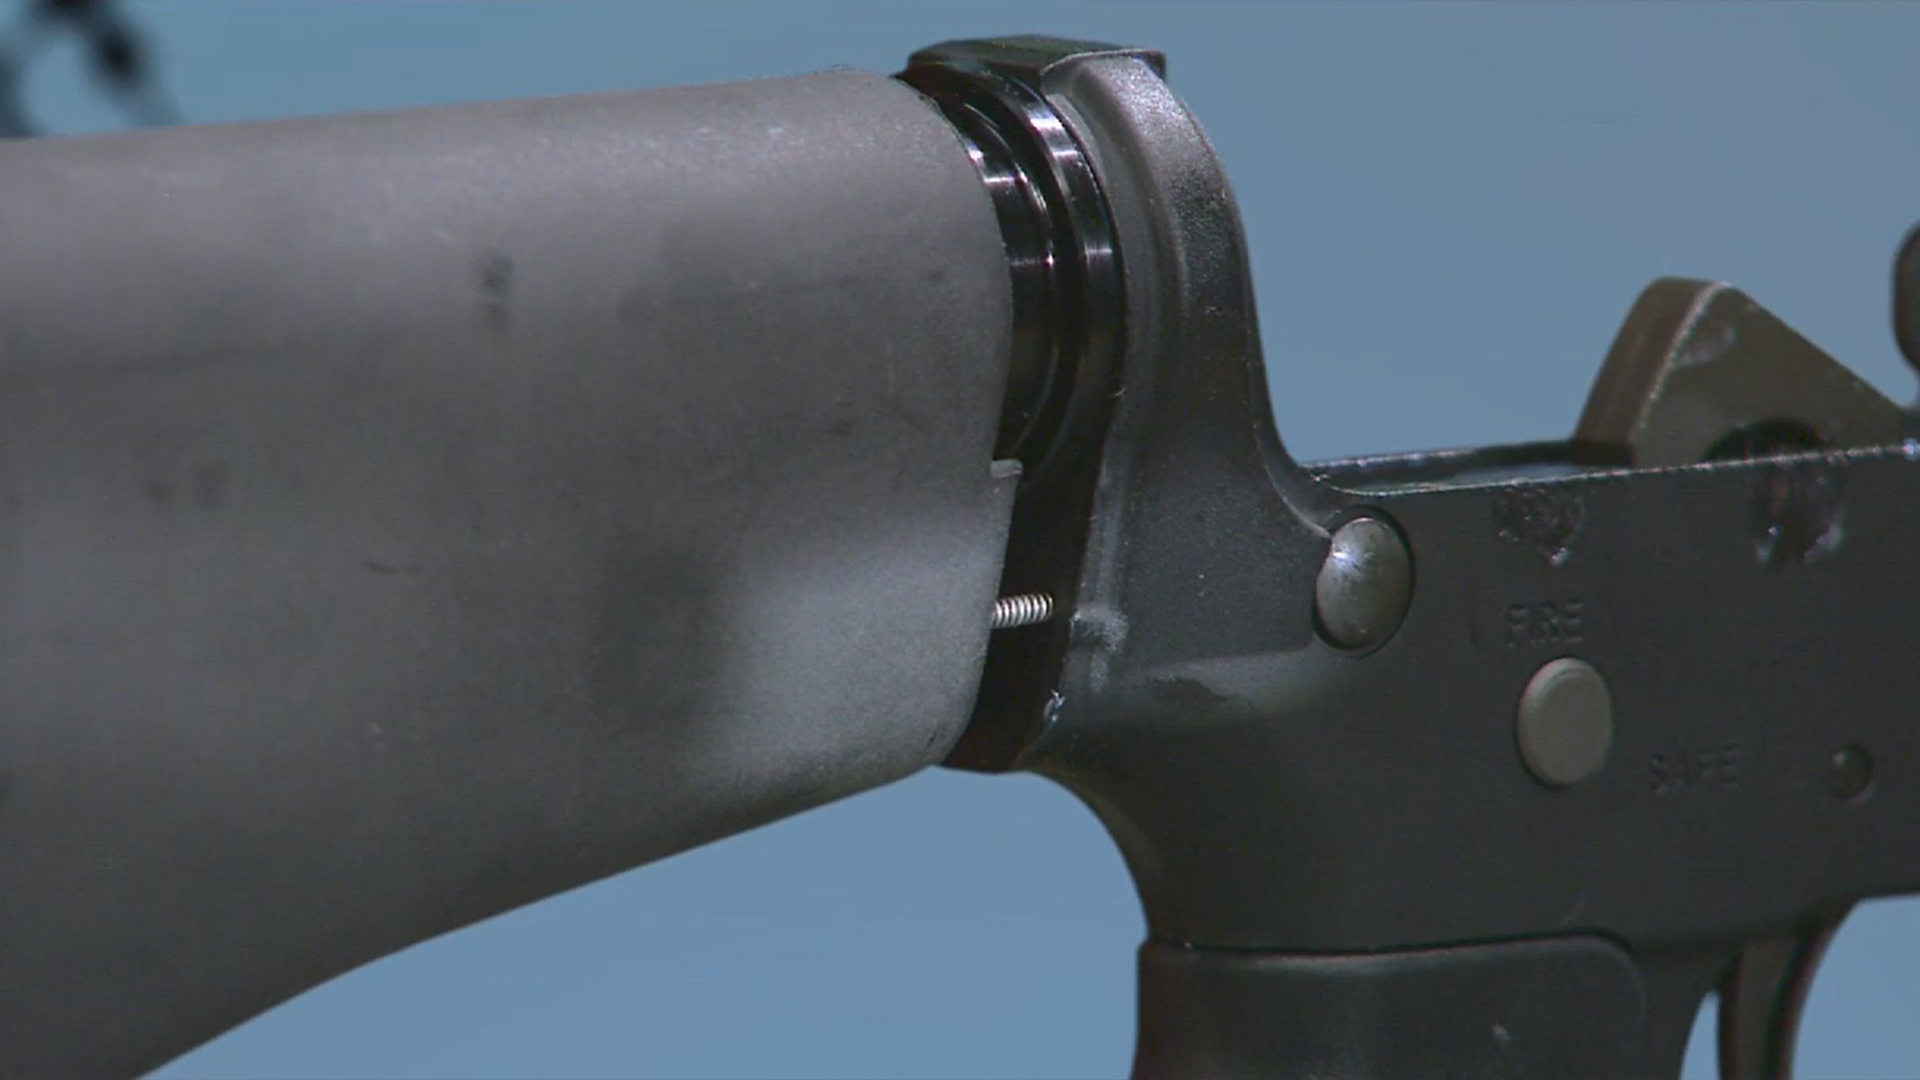
Pivot Pin
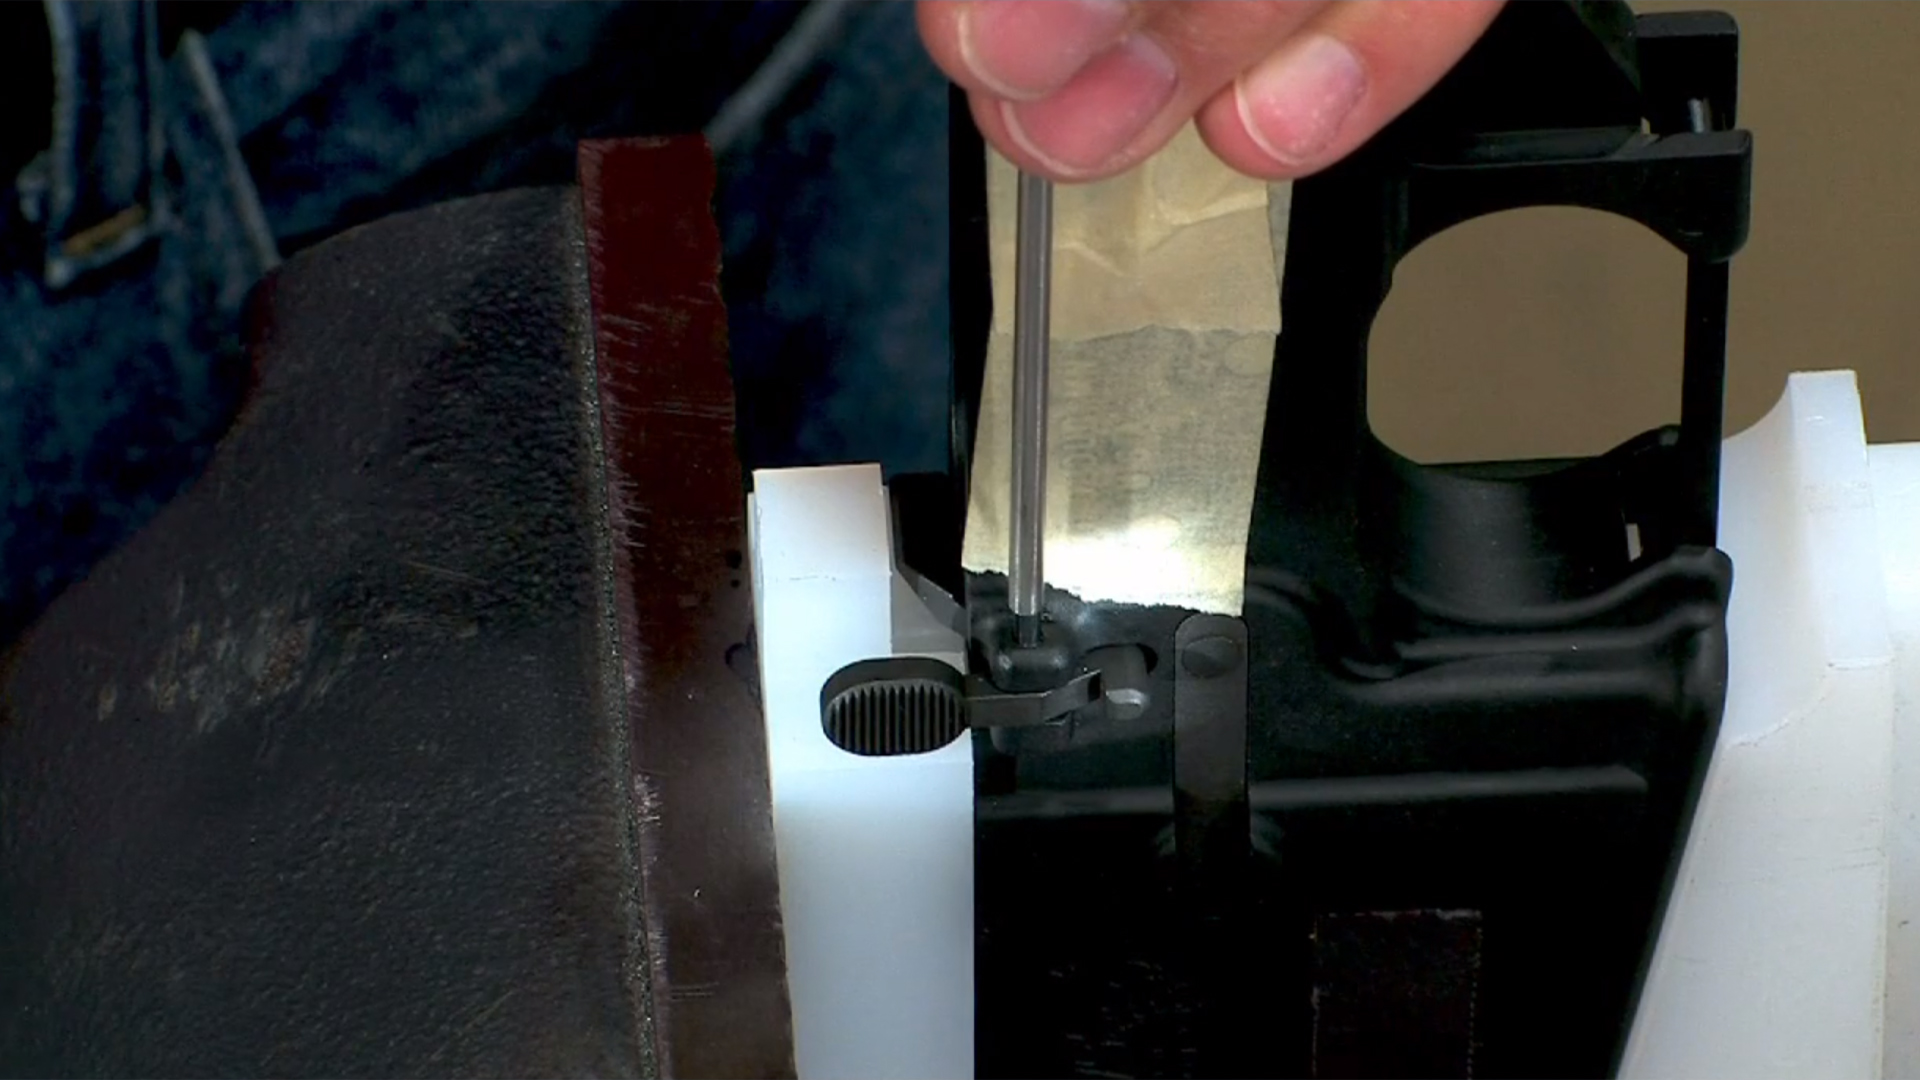
Installing the pivot pin is a simple process on this rifle. Some Colt receivers, however, use a screw rather than a detent to secure this pin. Start the assembly by lubricating the pivot pin with oil and applying some grease to the spring and detent. This job is almost impossible without a pivot pin installation tool. To use, simply insert the tool through the pivot pin bosses on the front of the lower and line up the hole in the tool with the detent hole in the lower.
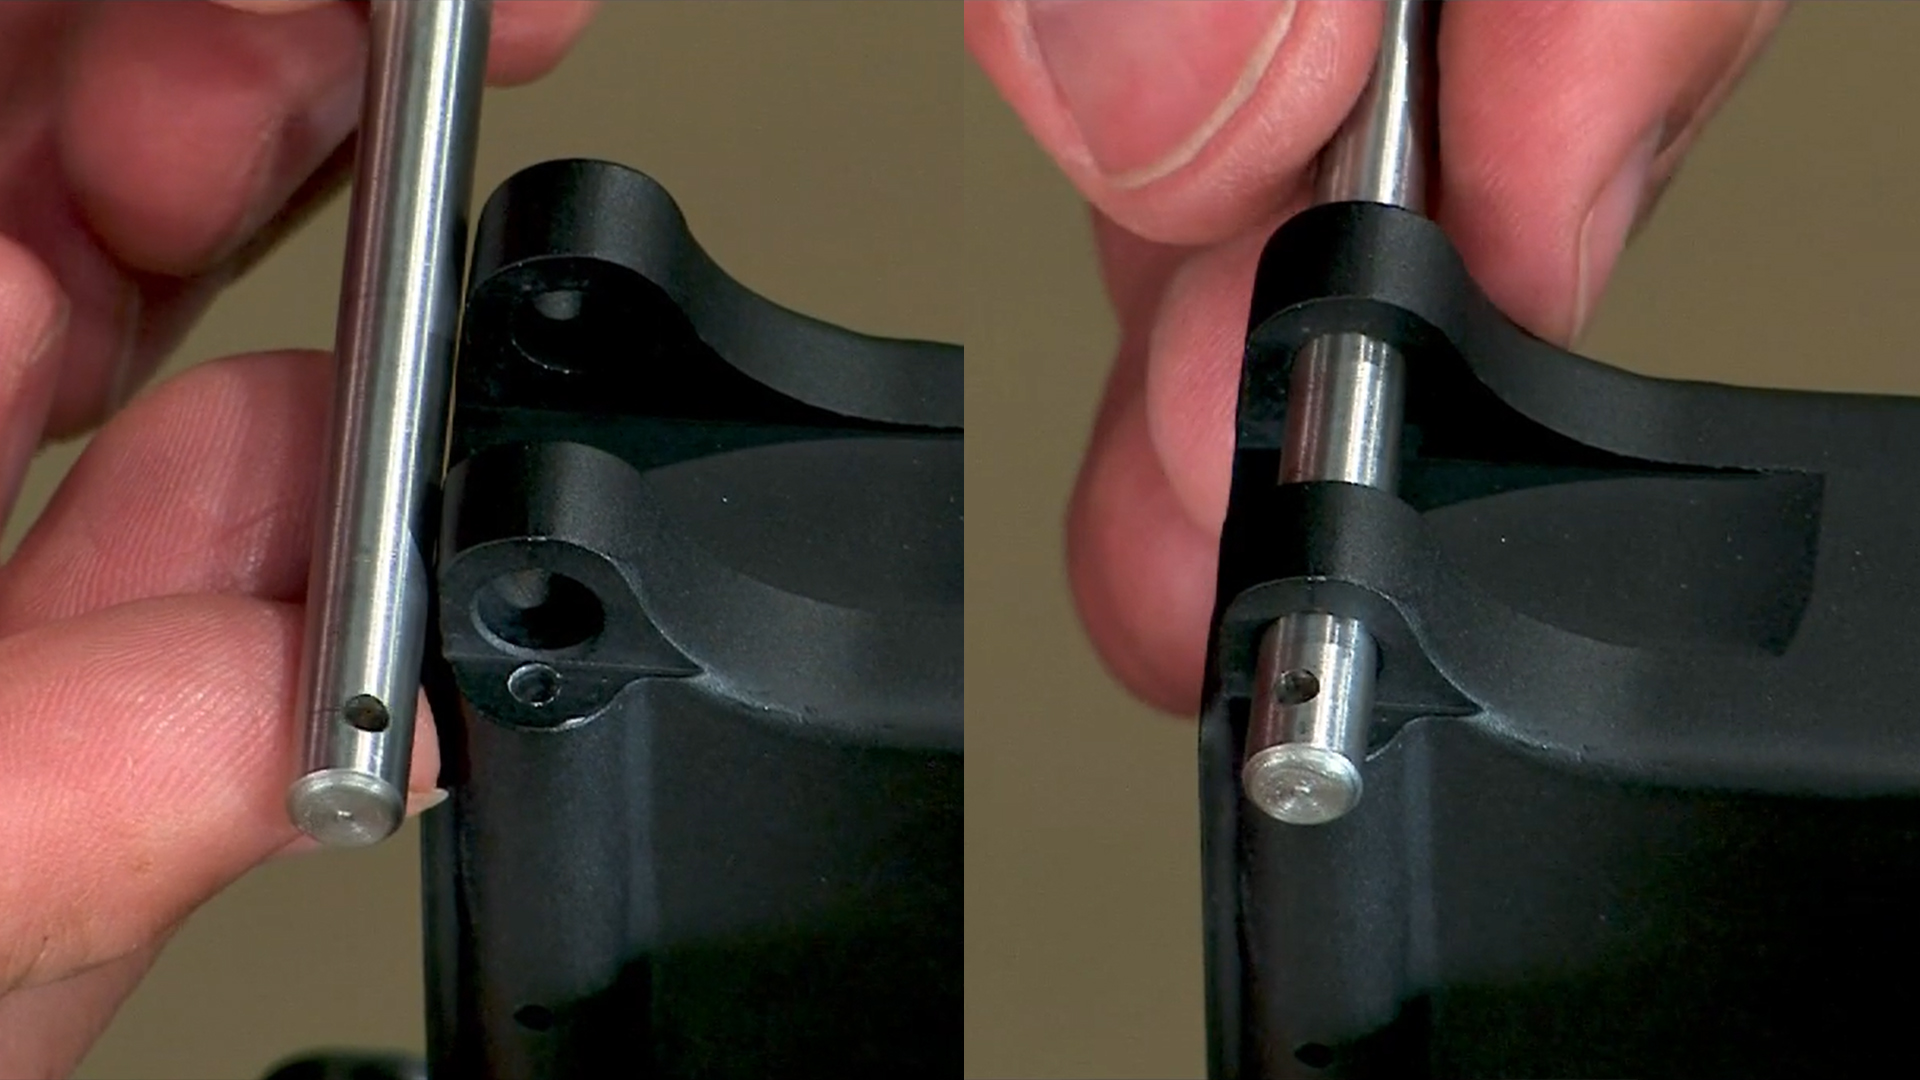
Now insert the spring, then the detent. Depress the detent with a small punch until the detent is just completely inside the detent hole then rotate the tool carefully to capture the detent with the tool. The detent rides in the groove in the pivot pin. Insert the pivot pin, pushing the installation tool out as you go.
Now you can rotate the pivot pin until the detent snaps into the groove. The pin is now properly installed and captured by the detent.
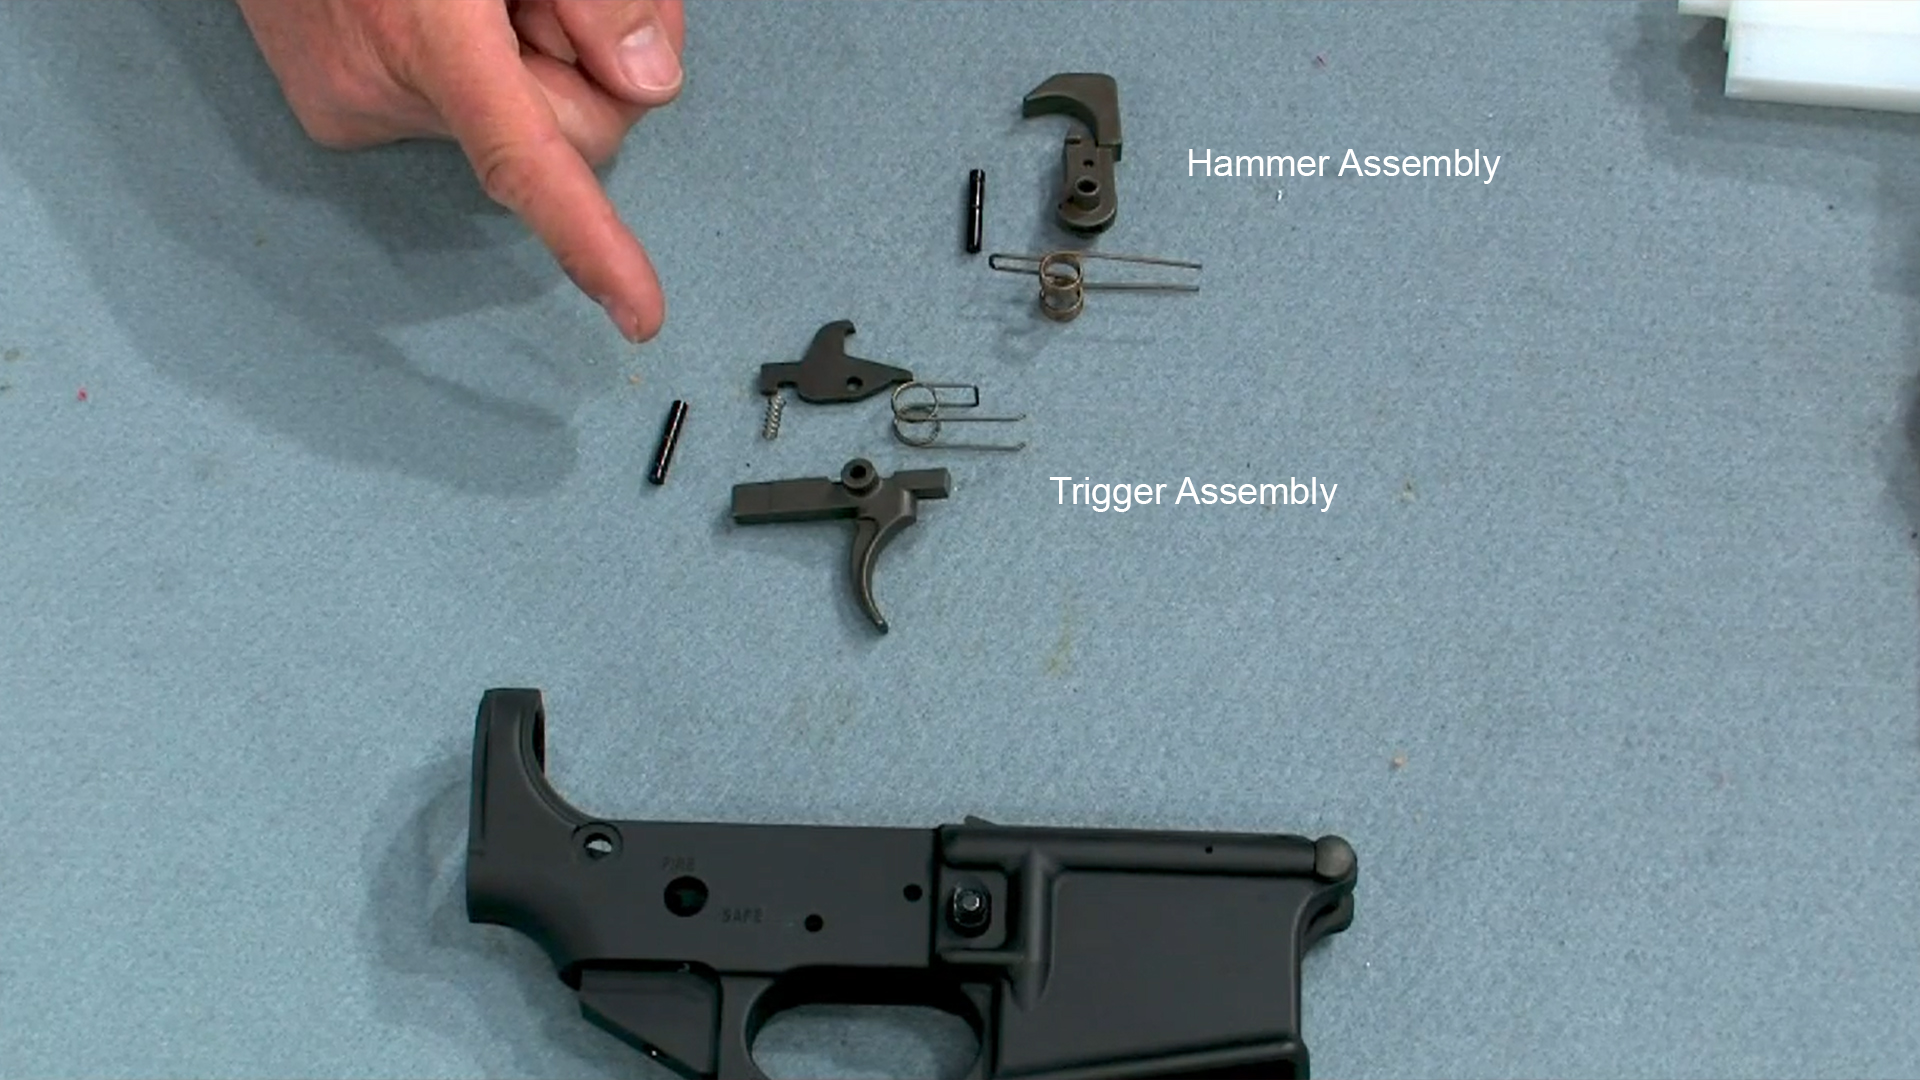
Fire Control System
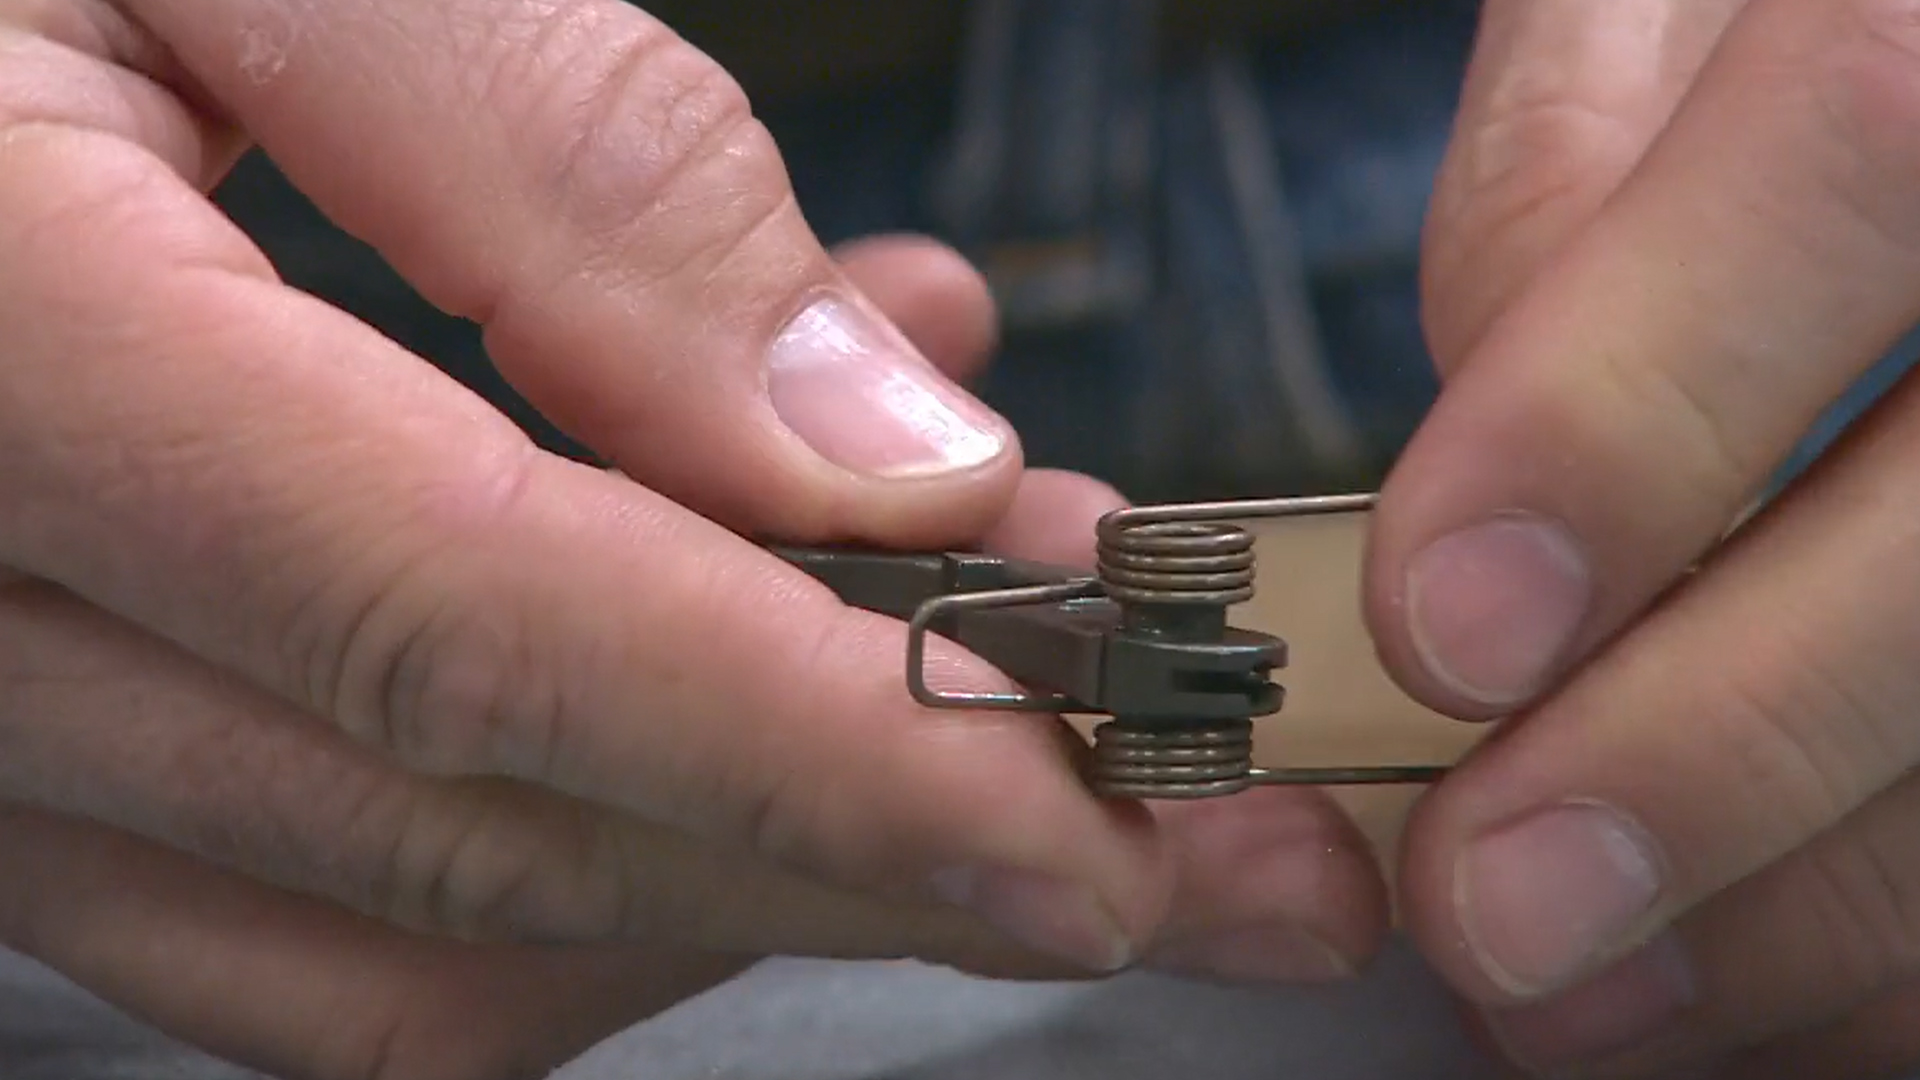
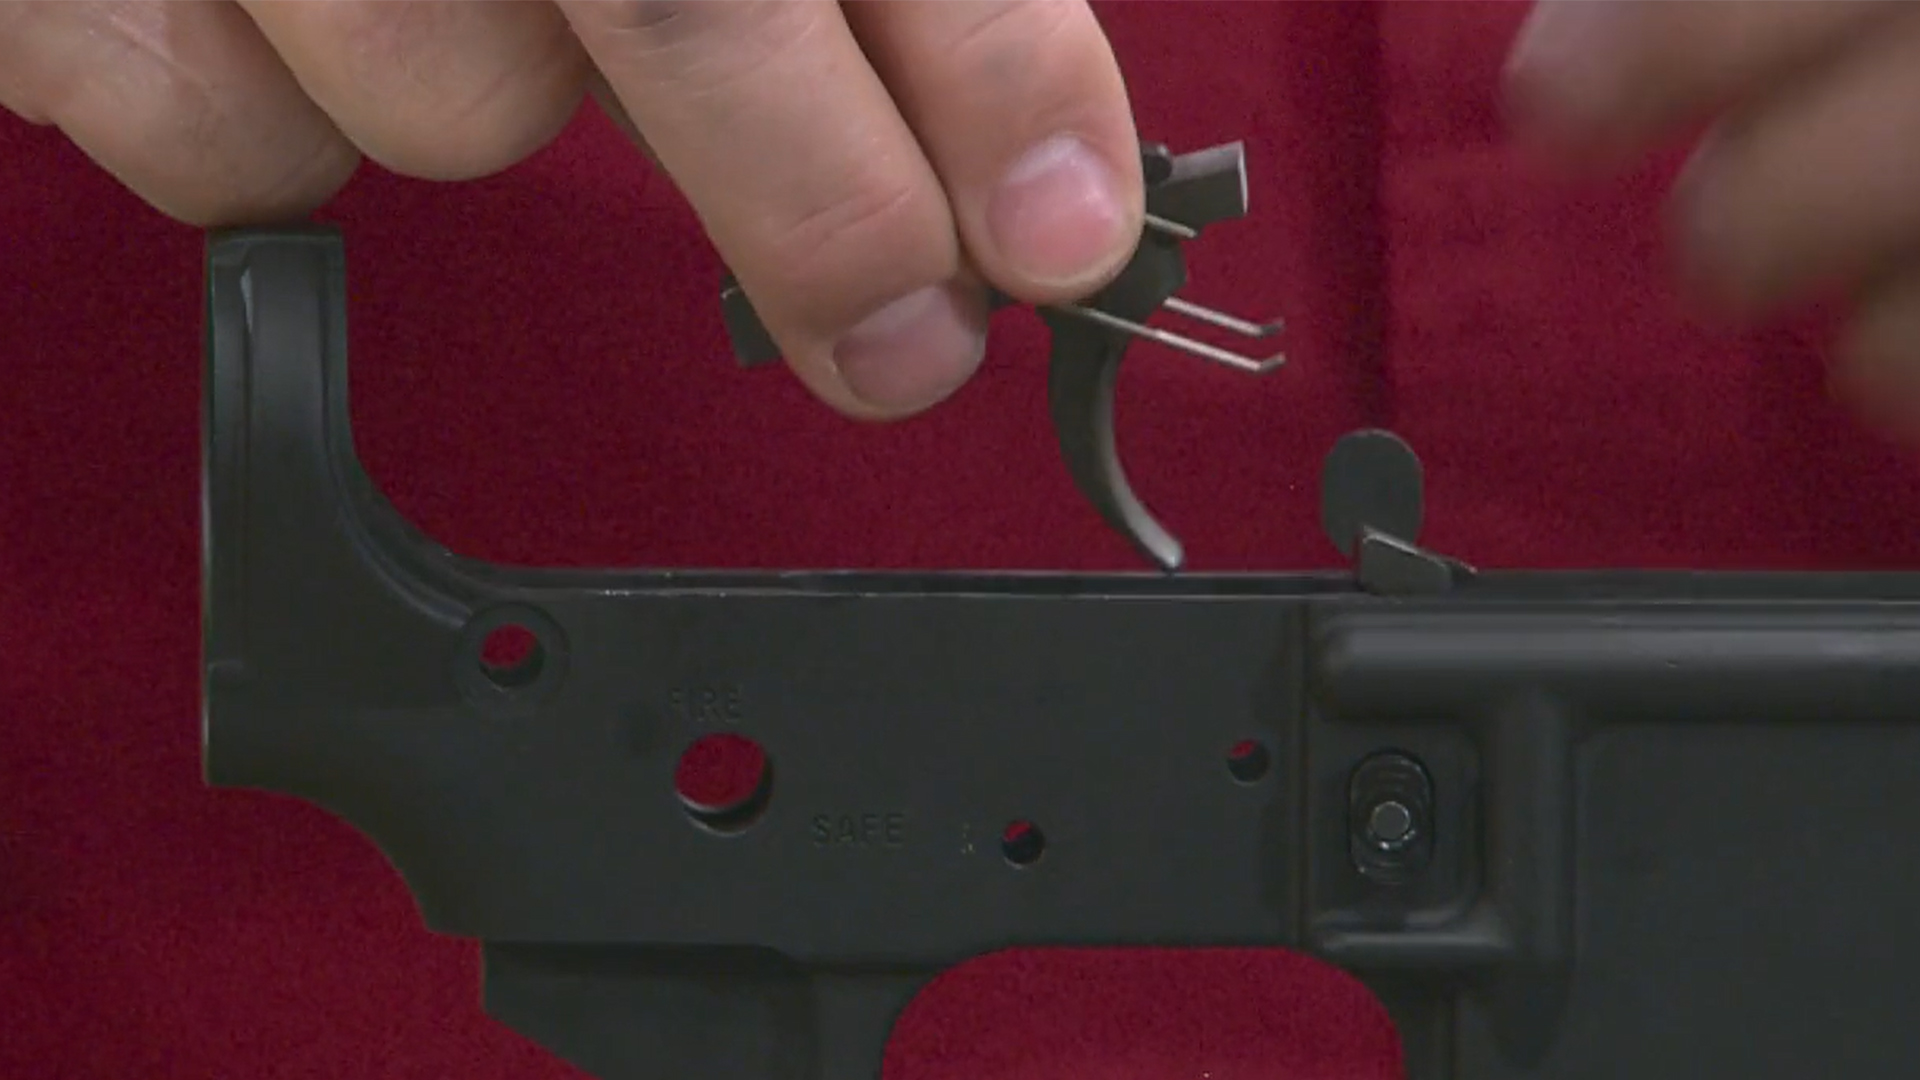
The fire control system consists of the trigger assembly and the hammer assembly. Each is straightforward and easy to install. Here are the fire control parts. They are made up of the trigger, trigger spring, disconnector, disconnector spring, a pair of hammer trigger pins, the hammer, and the hammer spring.
Start by securing the lower onto the action block. Insert the large end of the disconnector spring into the blind hole on the top rear of the trigger. The disconnect rides in the groove on top of the trigger with the hook facing forward. And install a temporary slave pin to secure the parts. Push on the disconnector, checking that it pivots smoothly and doesn’t bind.
Orient the trigger spring with the legs to the front. Slip the crossbar under the front of the trigger and the spring loops over the studs on the sides. The loops on the hammer spring slip over the studs on the side of the hammer with the open end of the spring to the front and the closed end to the rear.

Now carefully position the trigger assembly into the lower until the holes line up. Now insert one of the hammer trigger pins into place from the left side of the receiver, ungrooved end first. This will drive out the slave pin.
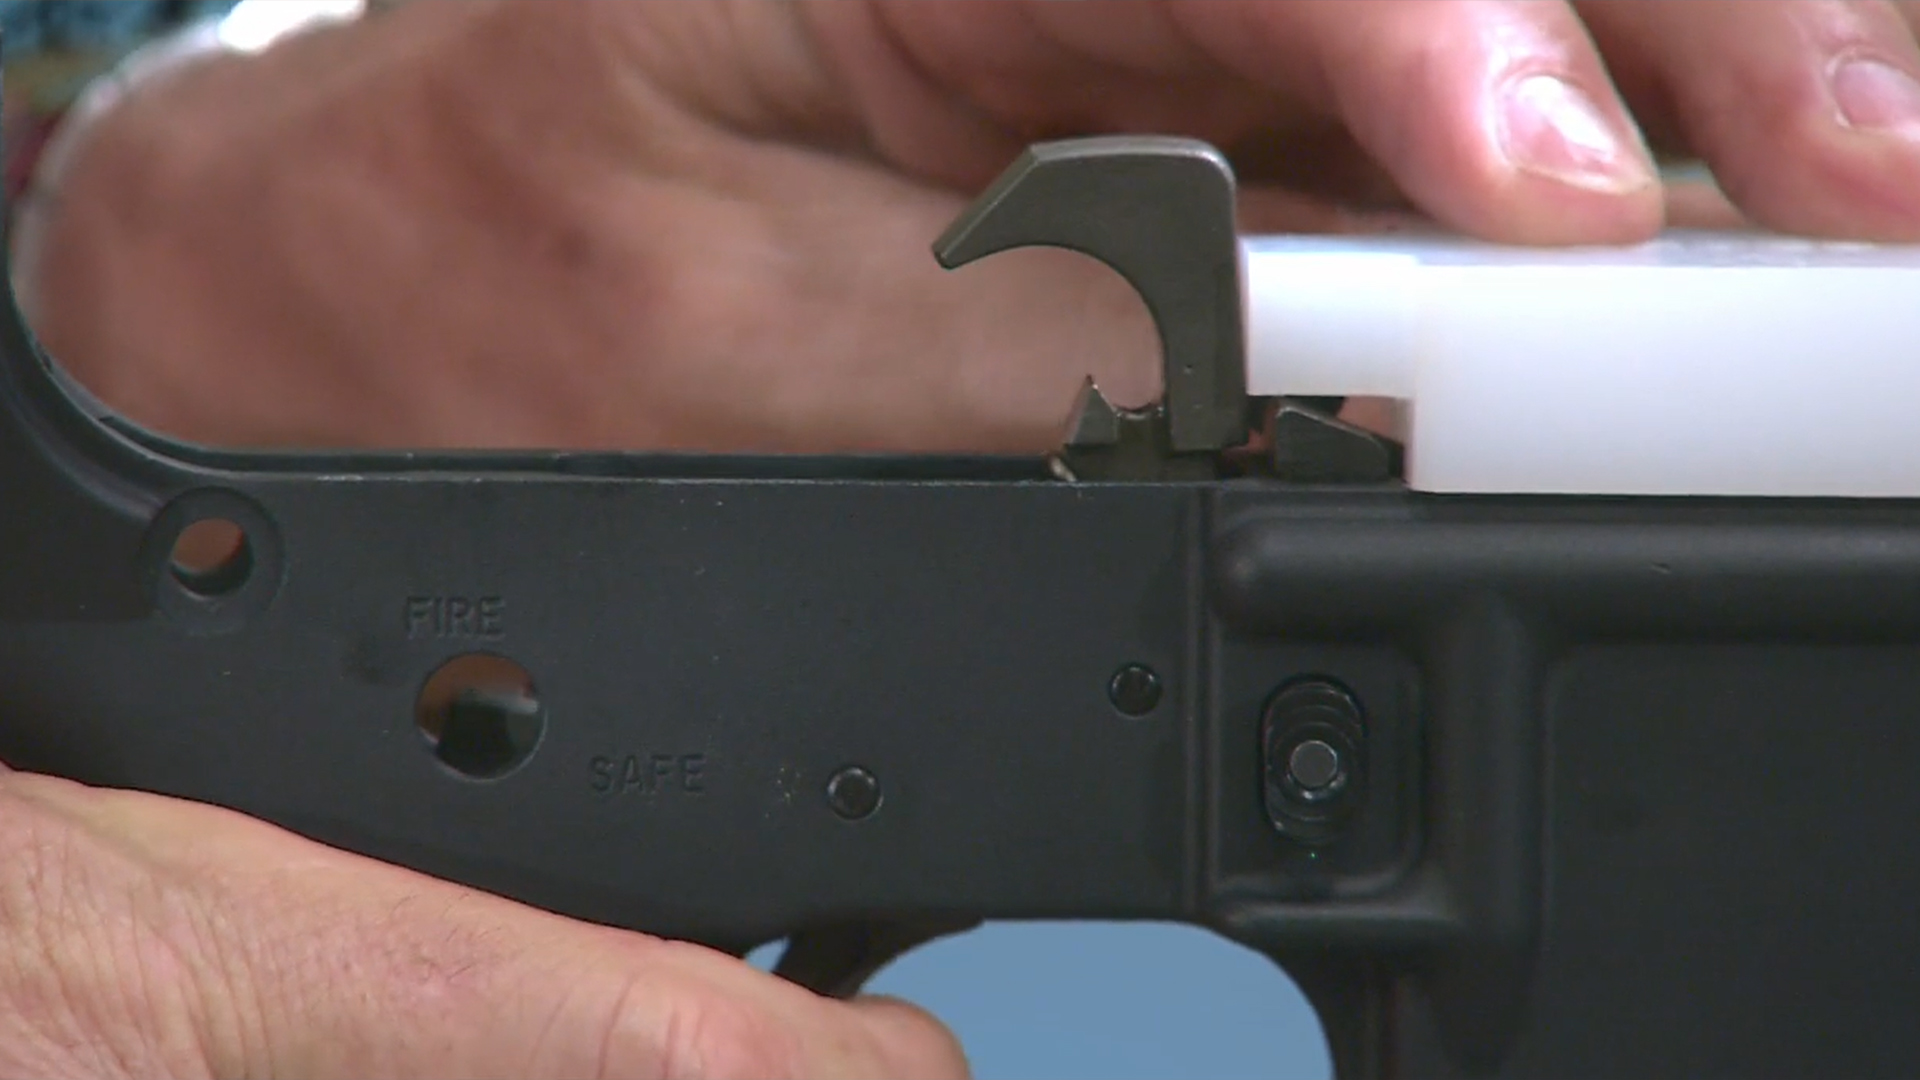
Now position the hammer into the receiver with the legs of the spring resting on the pin, holding in the trigger, then drive the pin in place with a nylon hammer. Carefully cock the hammer, making sure it doesn’t slip forward and strike the frame. Use a hammer block–it prevents the hammer from damaging the thin section of the magazine well when dry firing. Never dry-fire a partially assembled AR without this block. Now you can function test the fire control assembly.
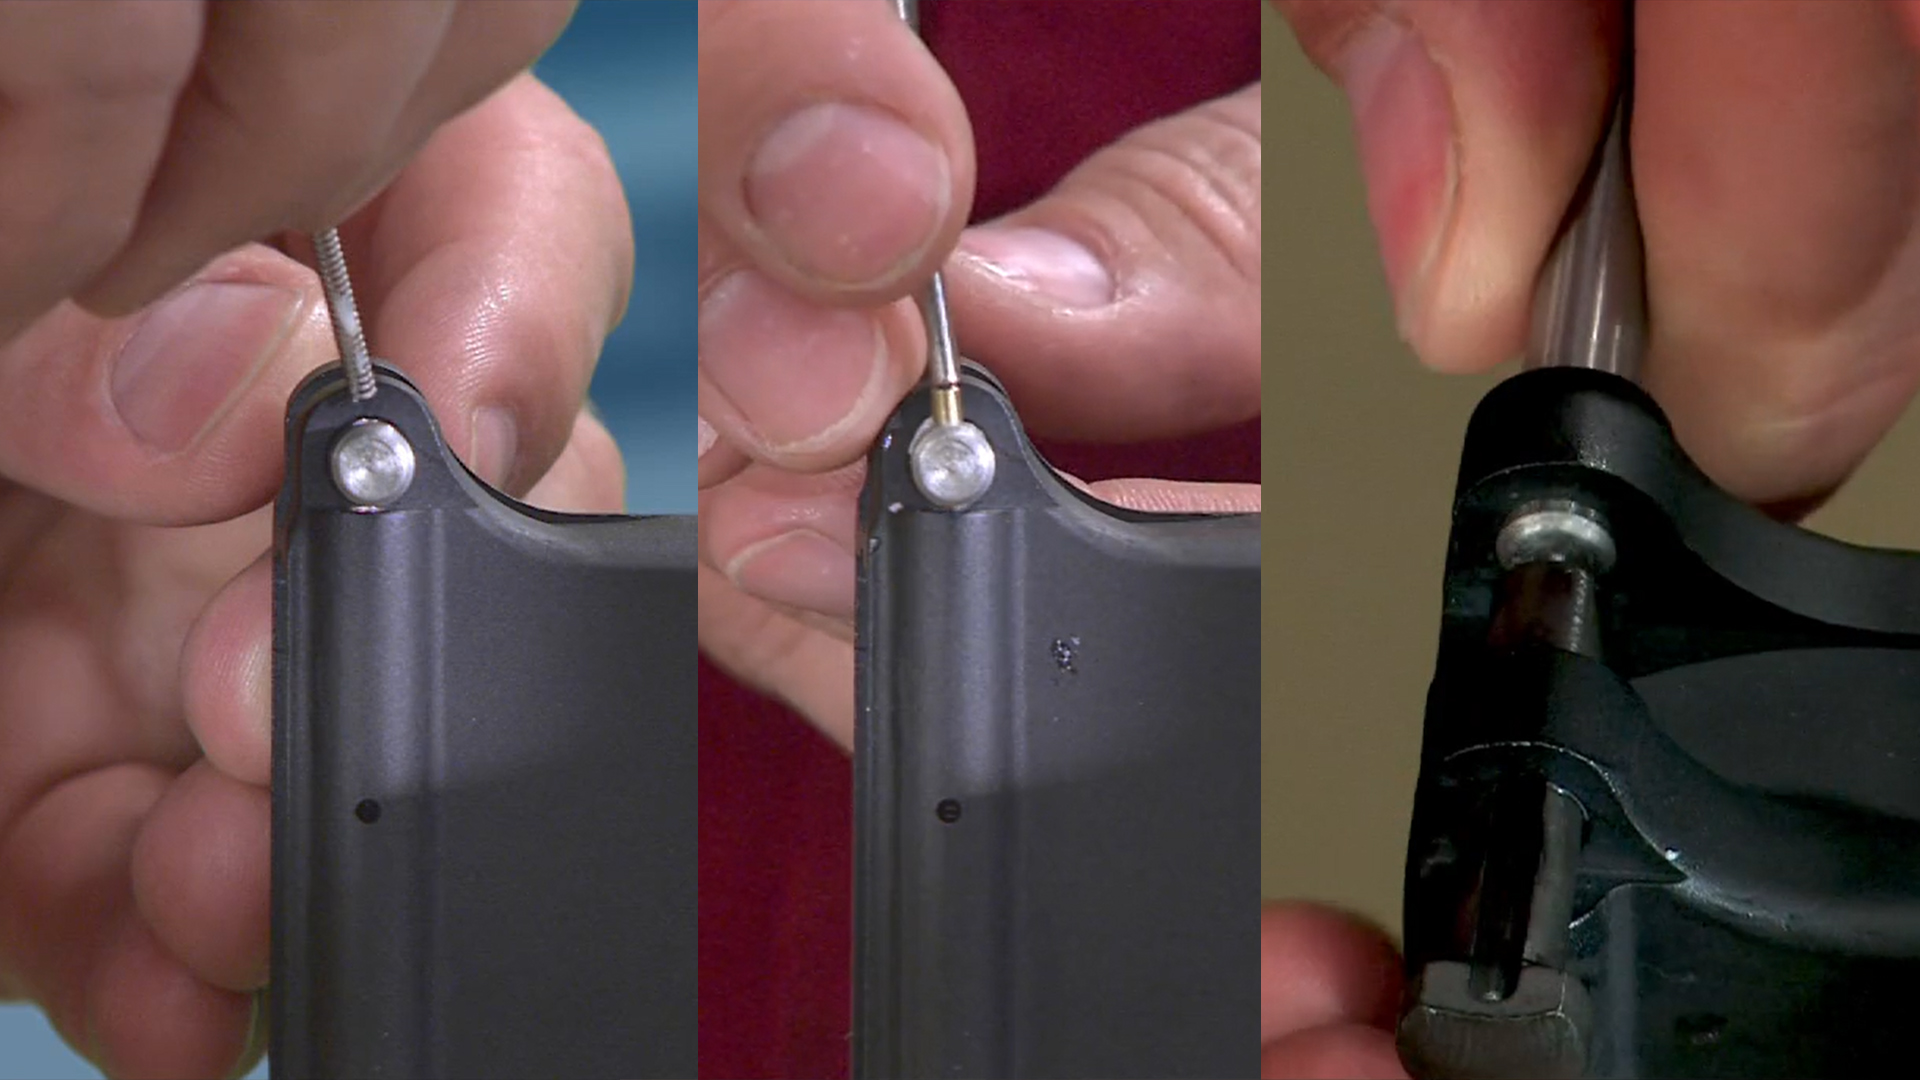
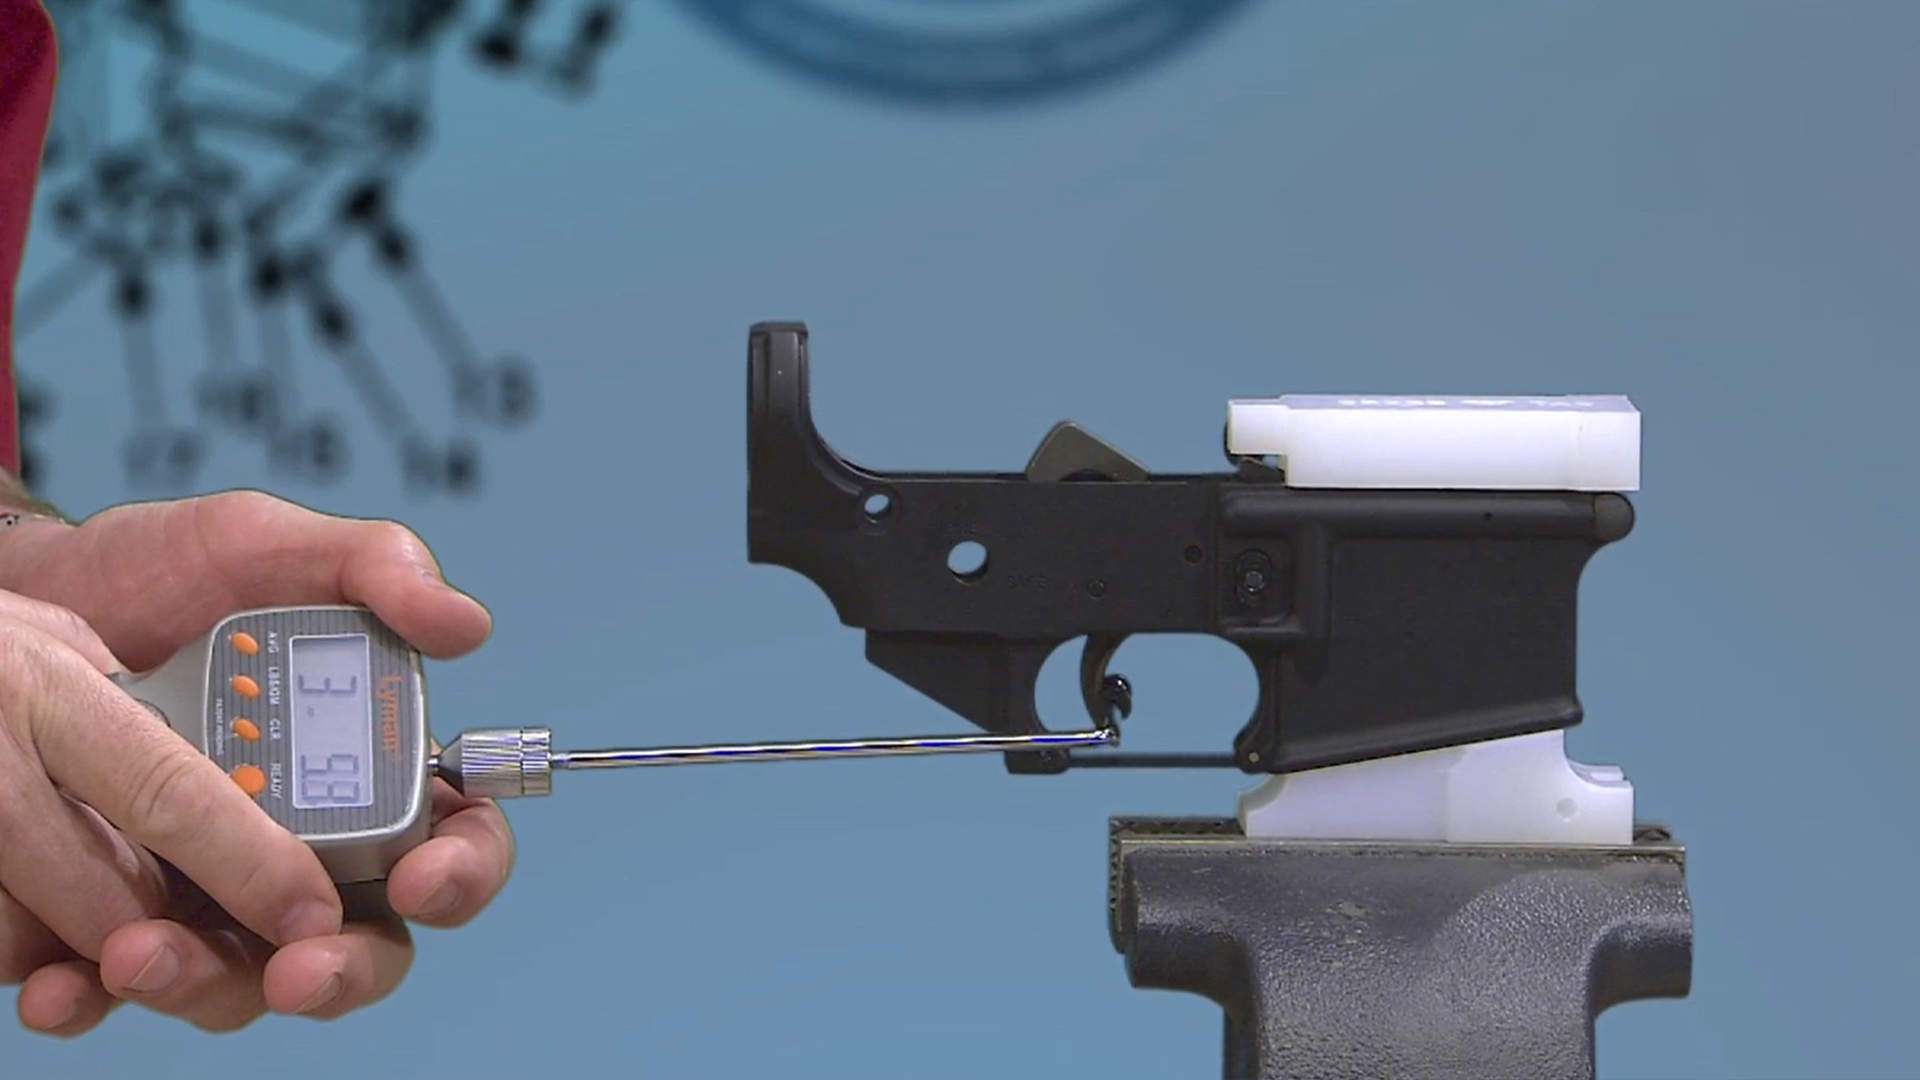
Always check the trigger pull with a gauge. This one is about eight and a half pounds, pretty typical for a standard AR trigger.
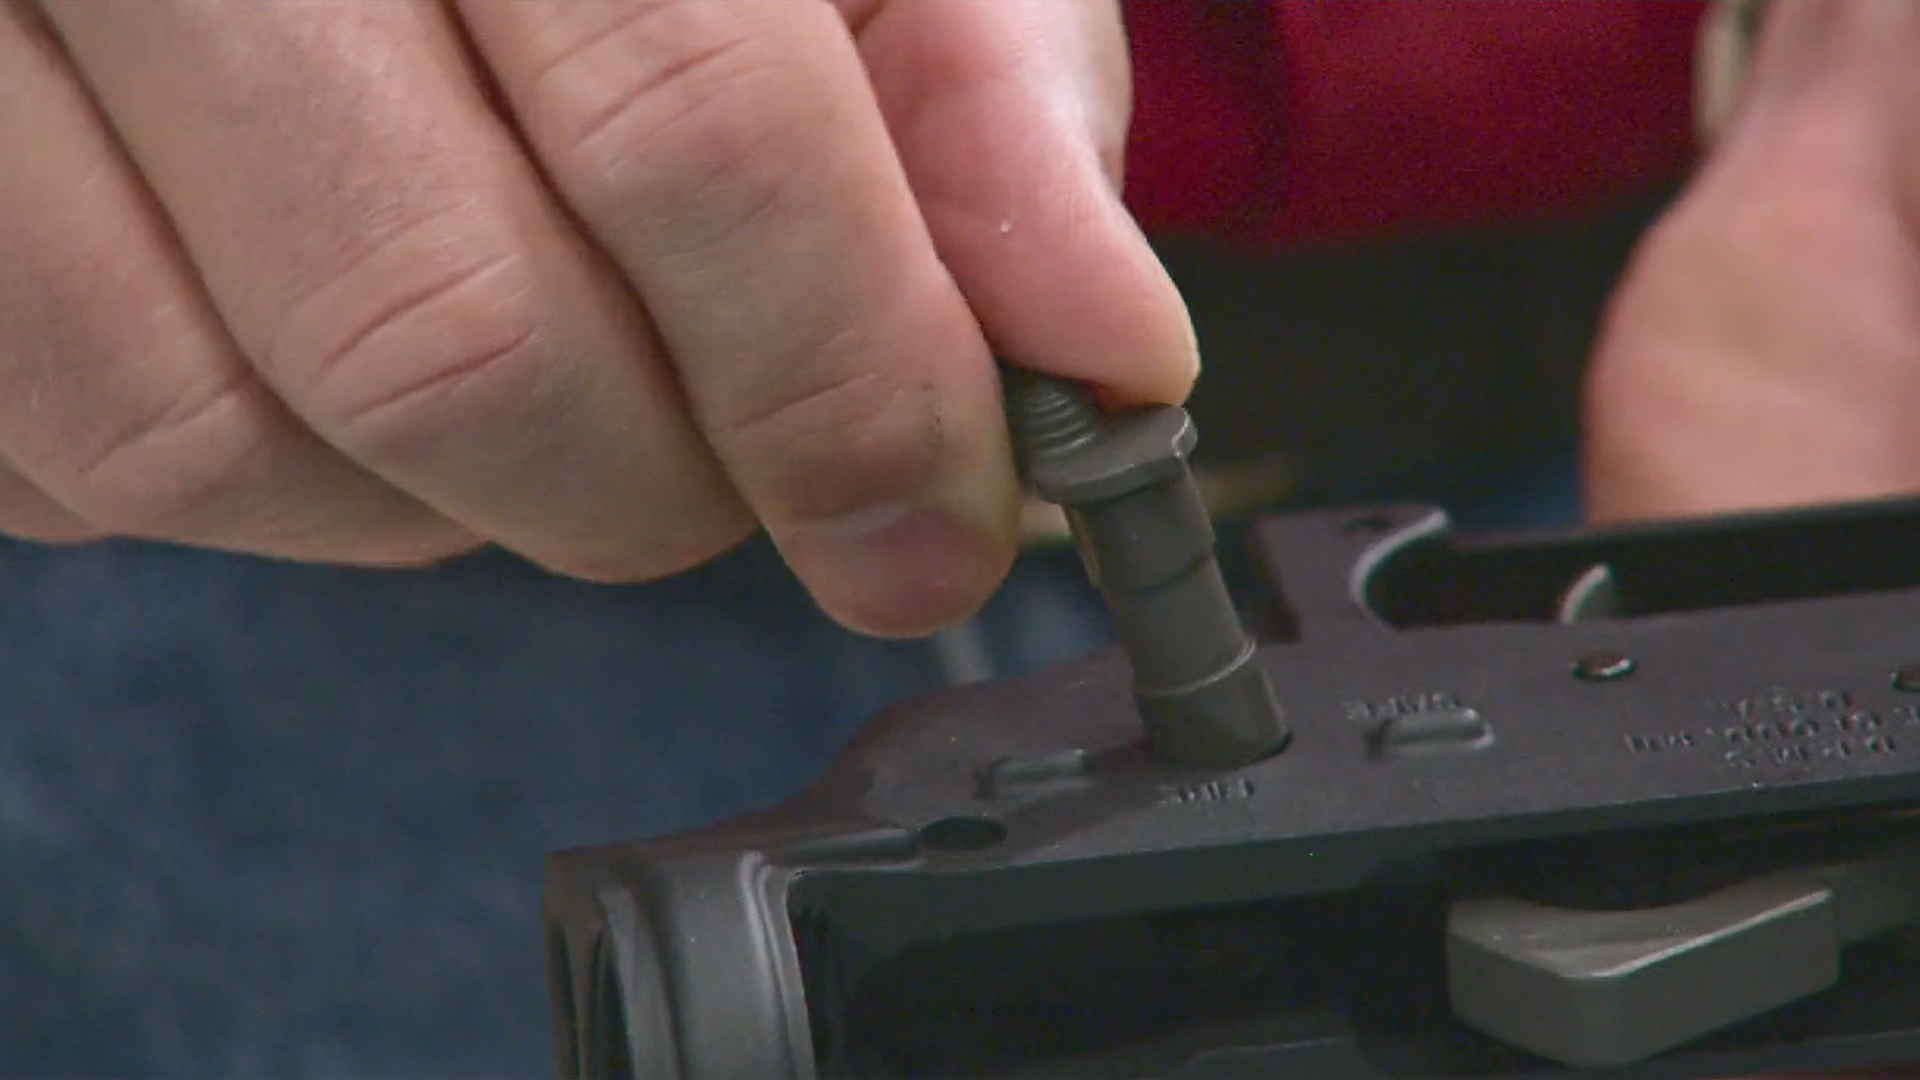
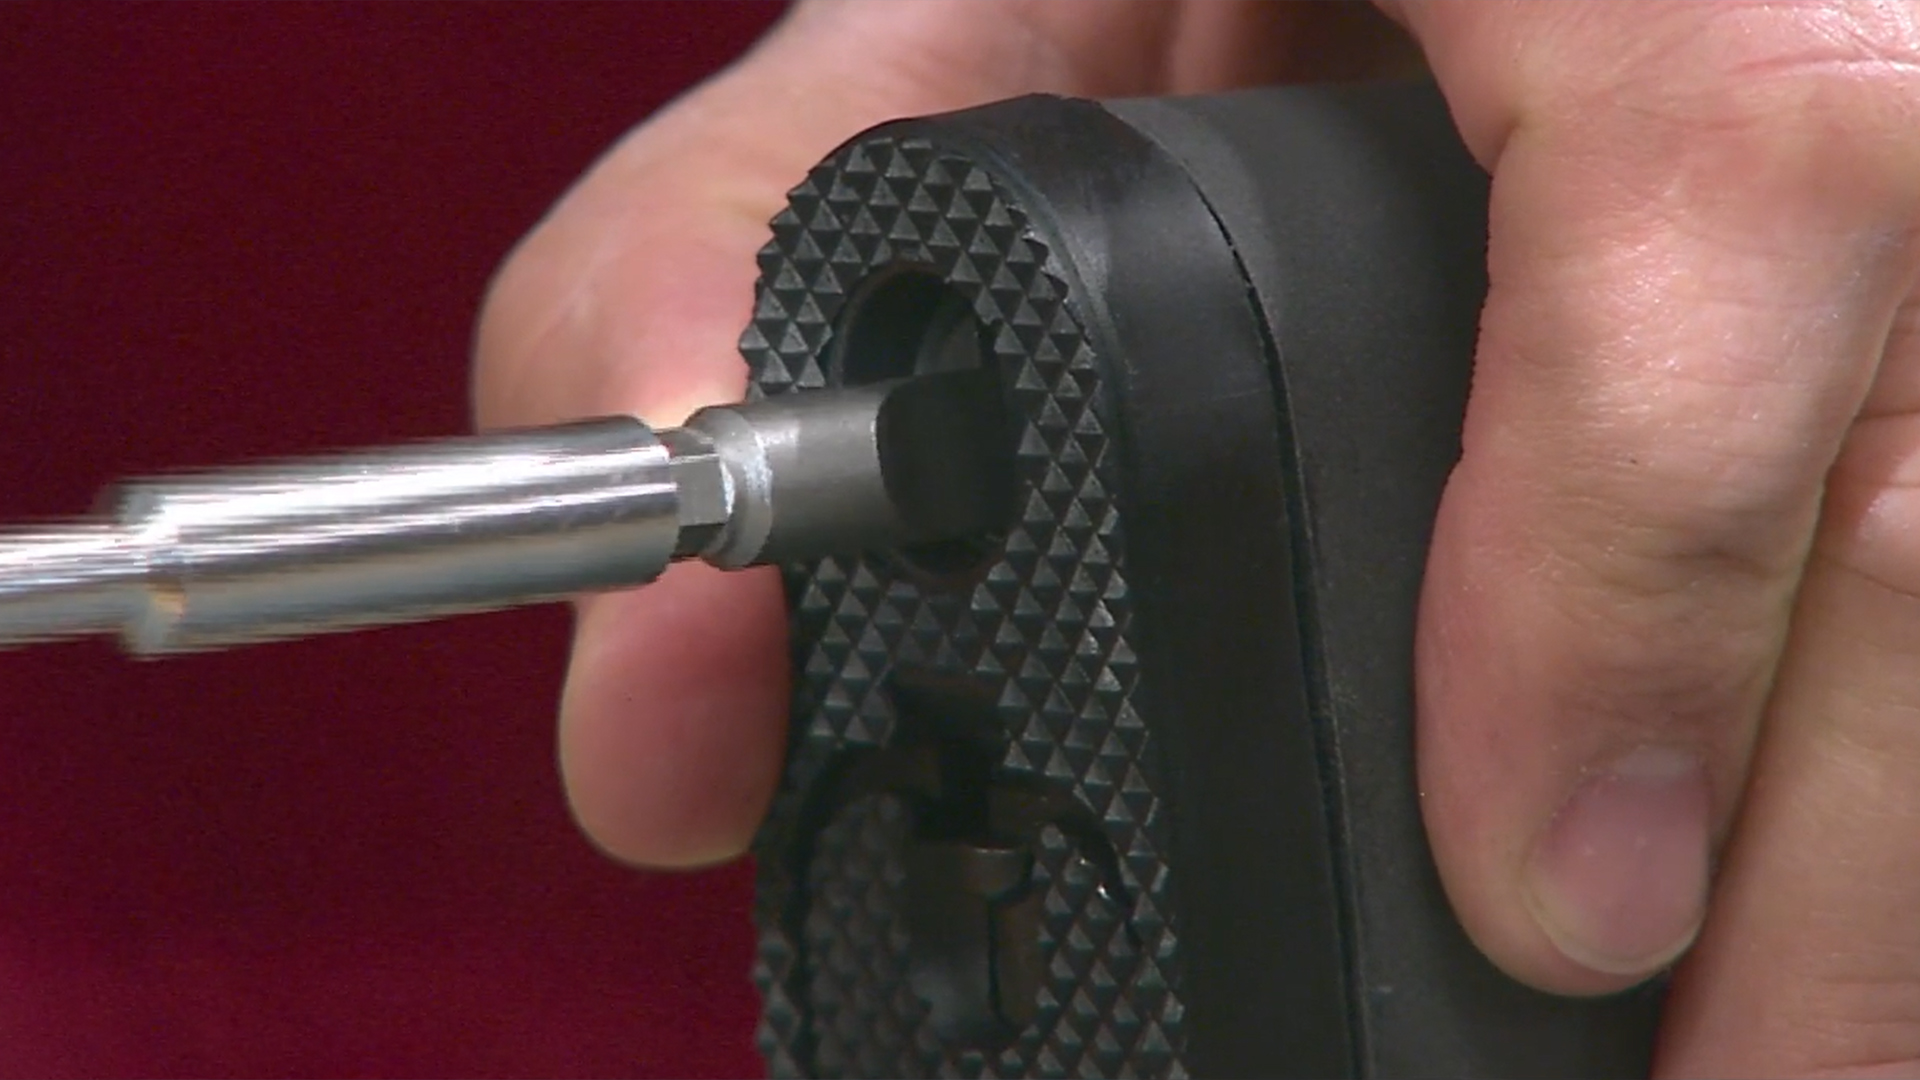
Because the pistol grip contains the safety detent, you need to install the safety and the pistol grip at the same time. Here are all the parts neatly laid out:
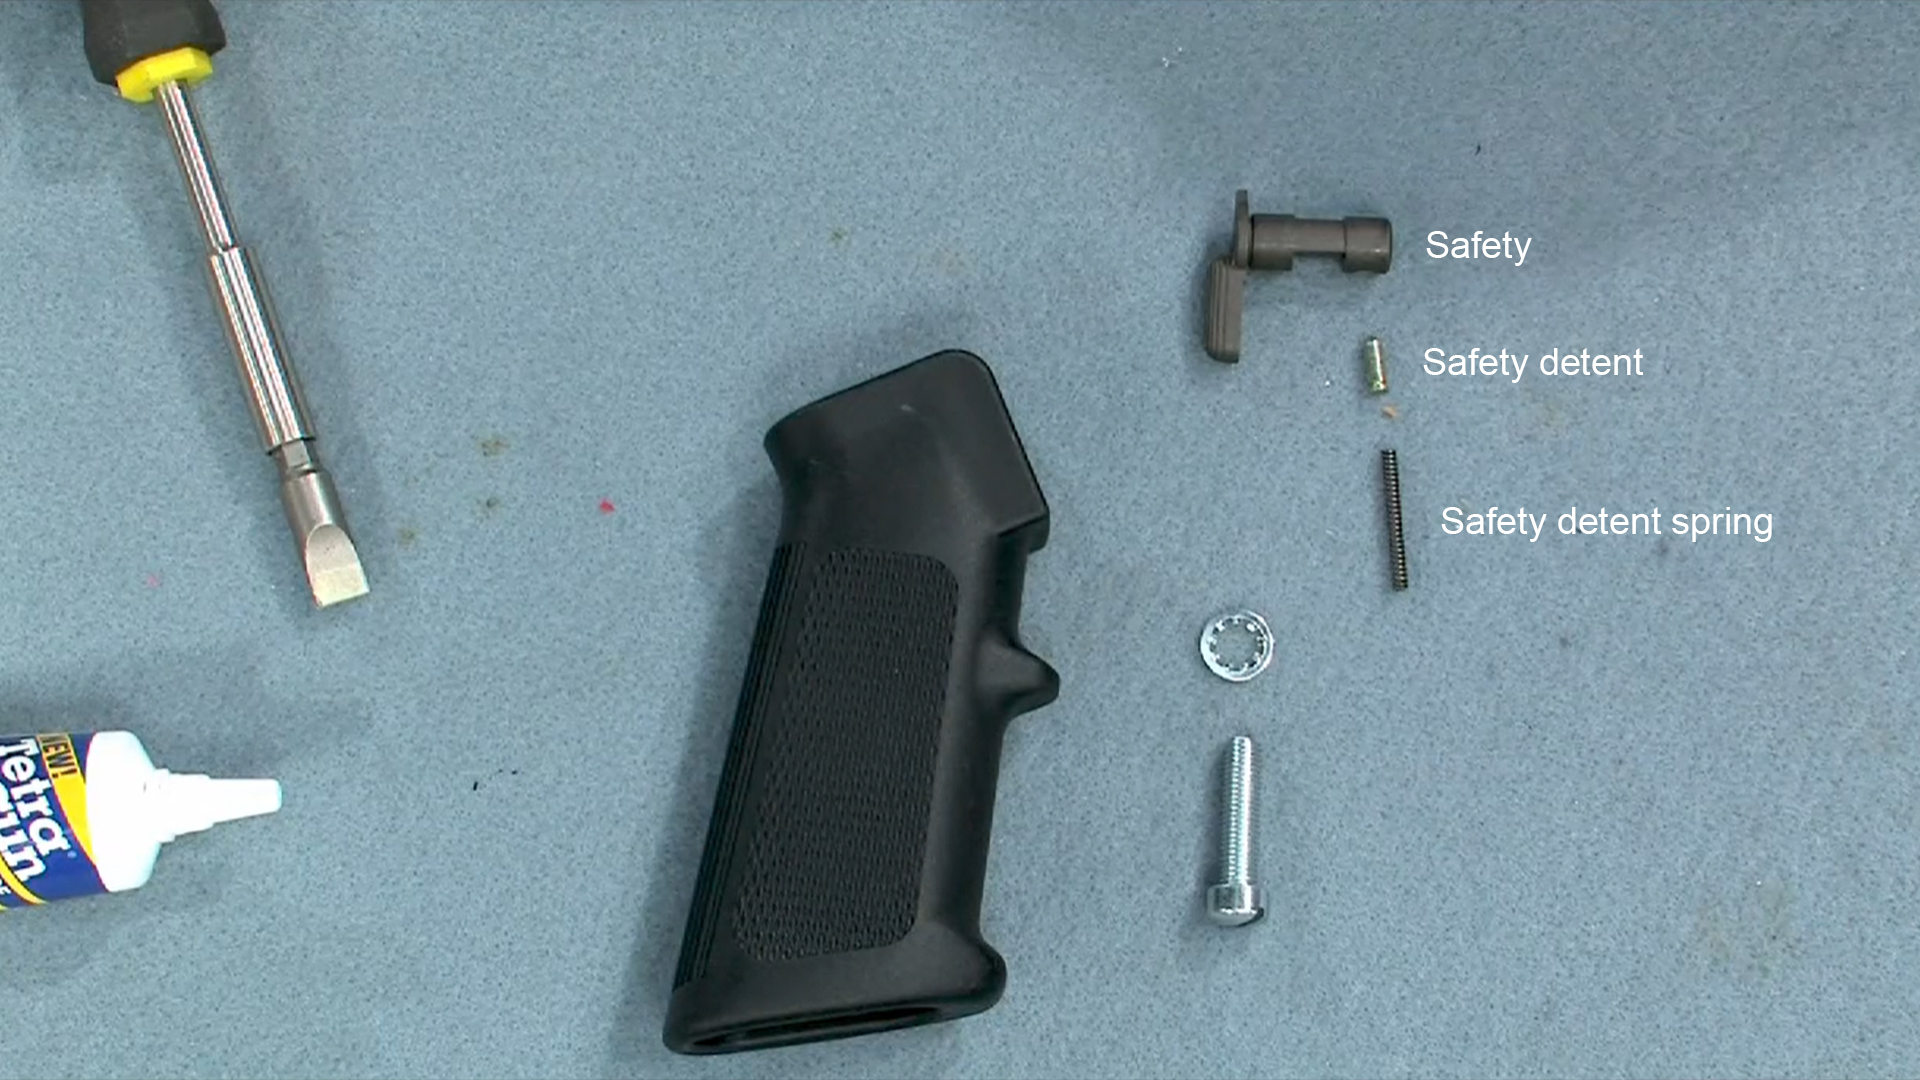
The first step is to cock the hammer. Then, you need to put a little oil on the safety and some light grease on the detent and detent spring. Insert the safety and the lower from the left side and secure the receiver on a hammer block that is held in the vise.
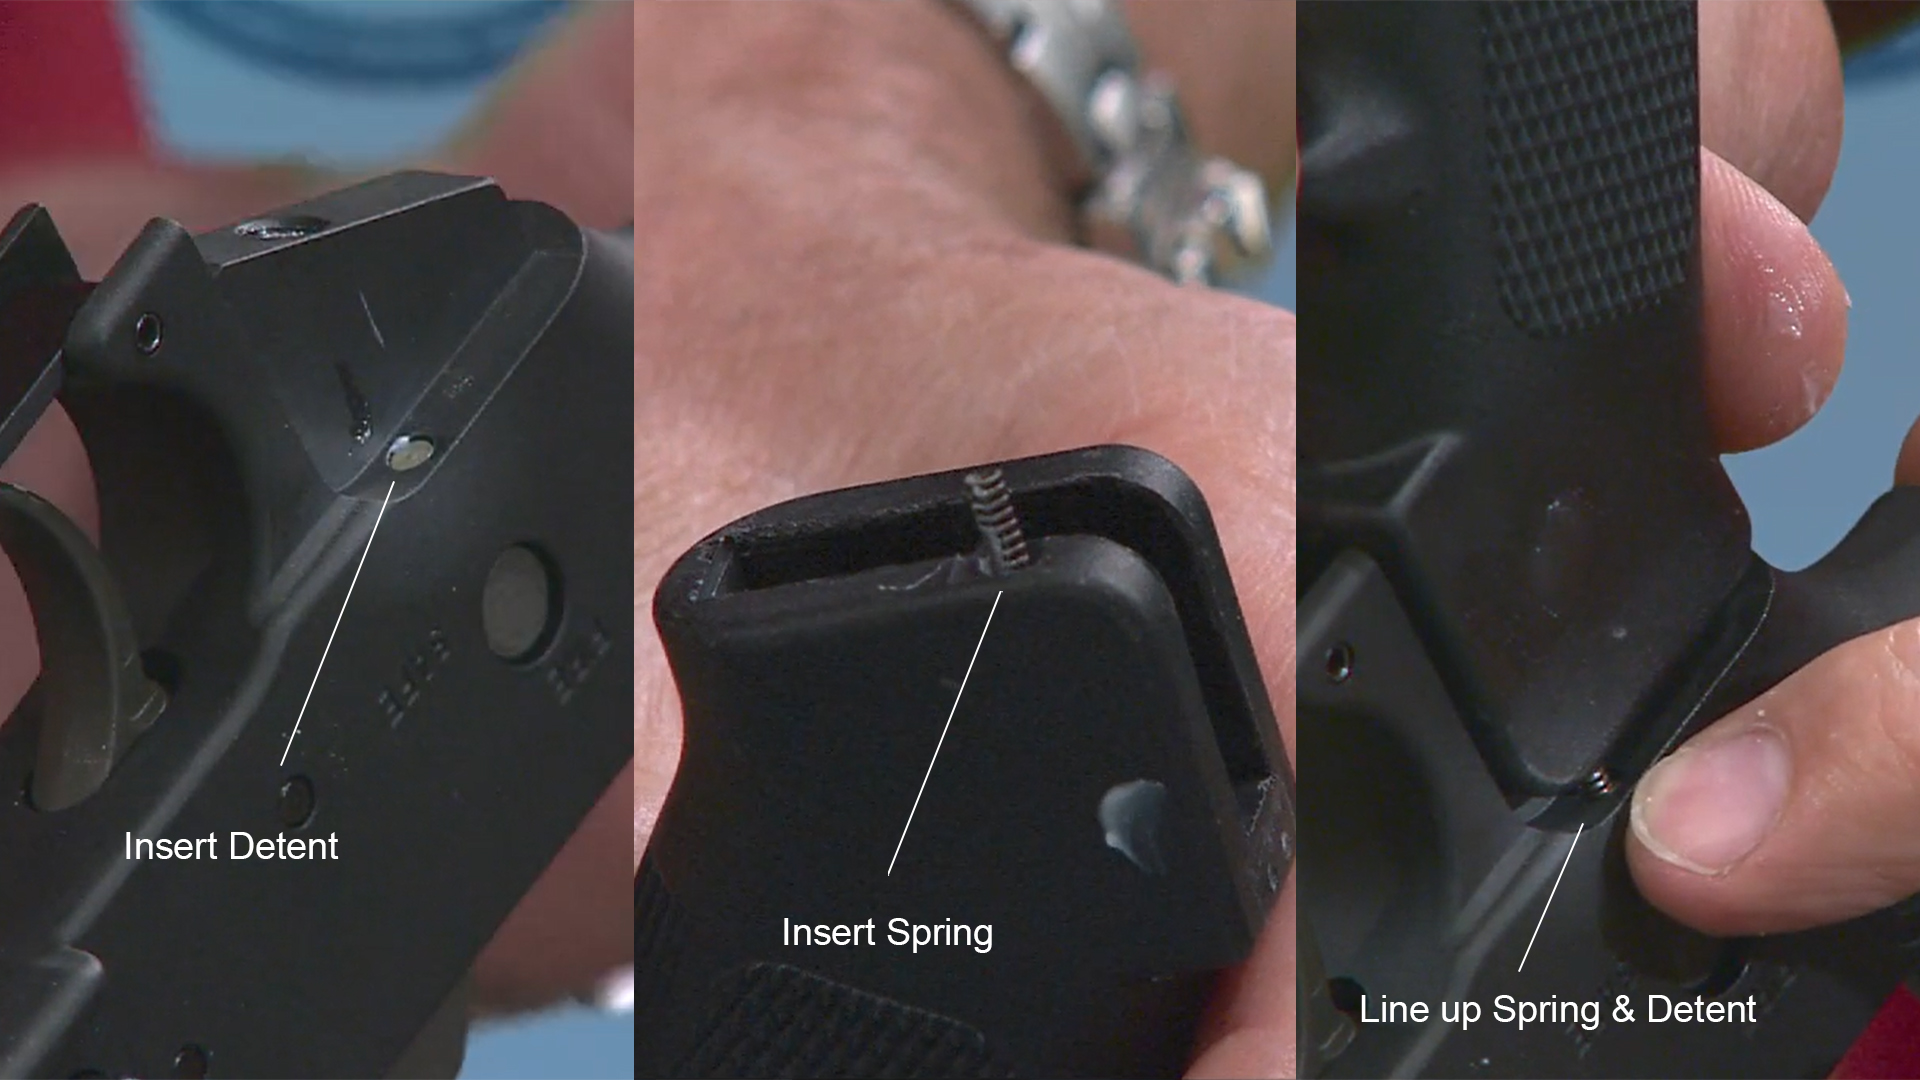
Insert the safety detent then the safety detent spring in the hole in the pistol grip. Line the spring up with the hole in the lower and slide the pistol grip into position.
Here’s a tip that may save some frustration. Tape the end of the screwdriver with masking tape, then force the bit into the screw slot. This will hold the grip screw making it easier to install. Be sure to check the safety several times for proper functioning.
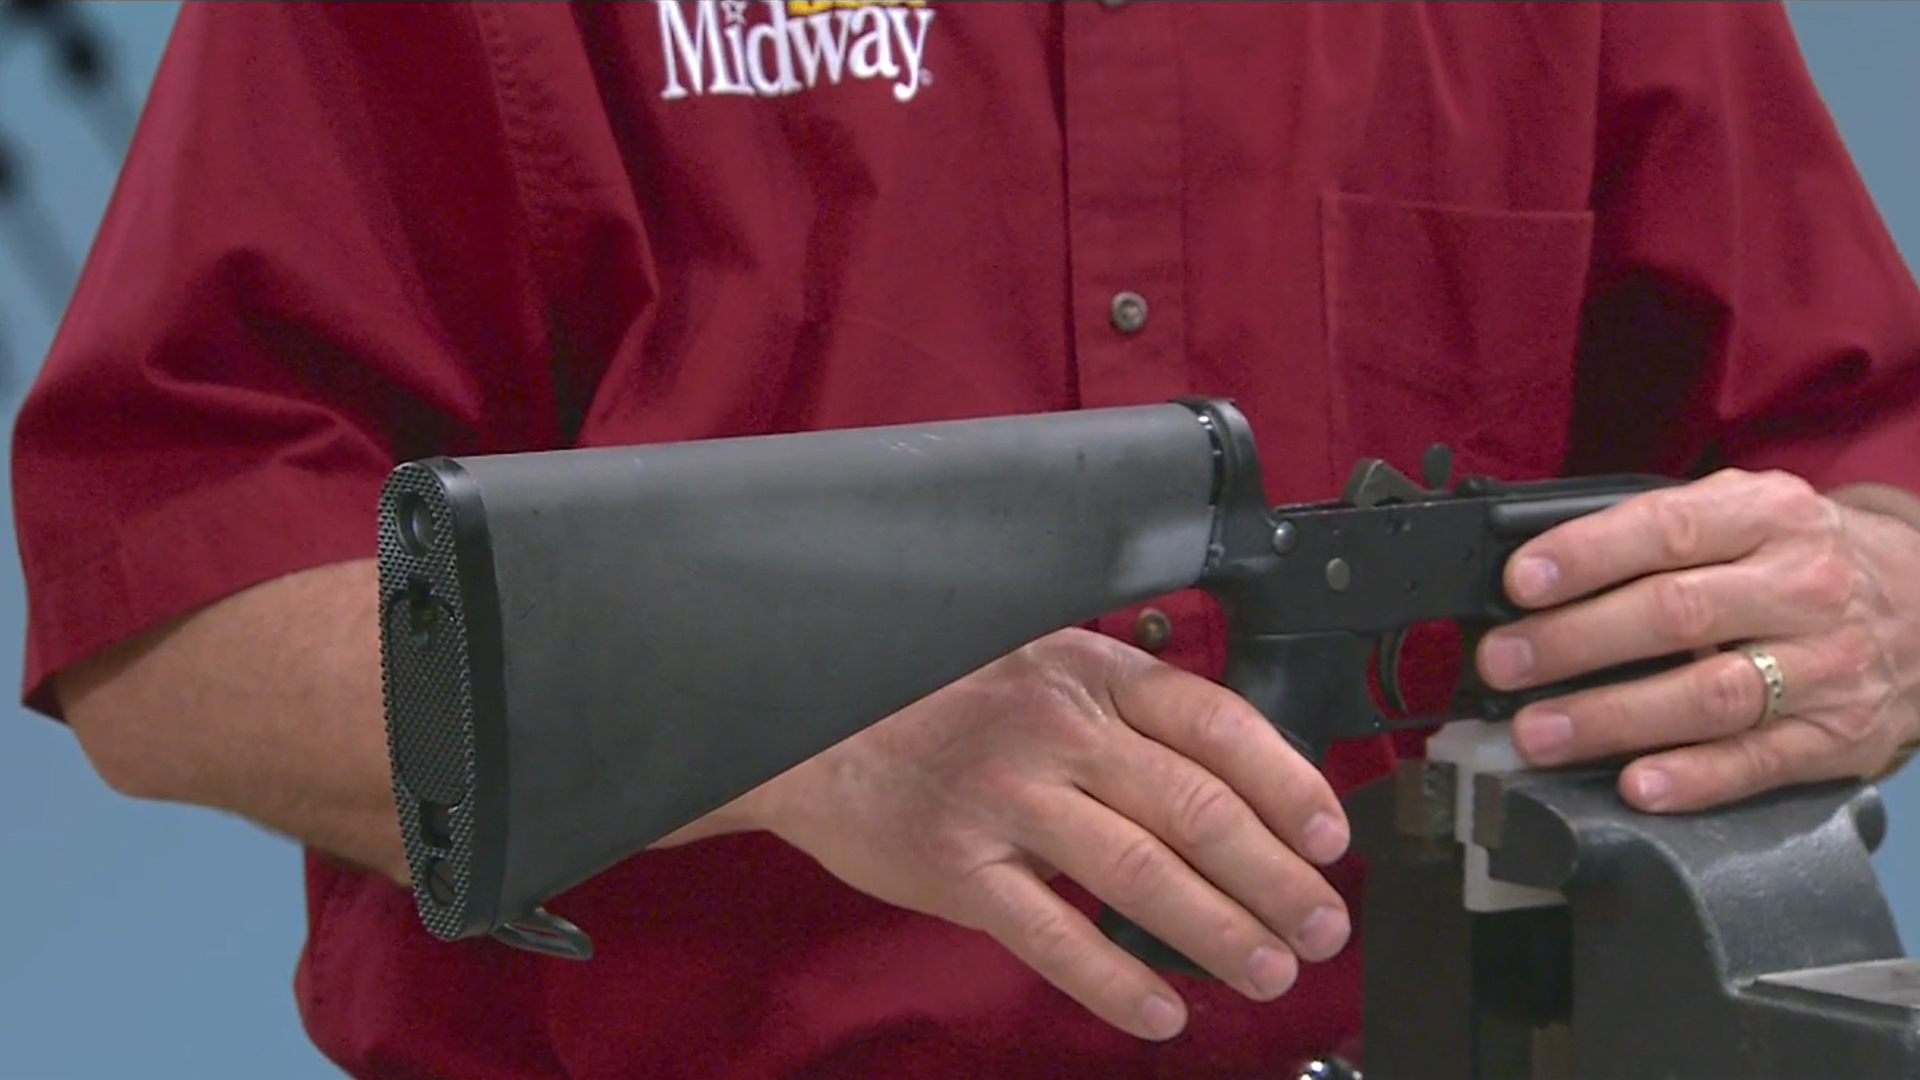
Buffer Tube and Buttstock
The buffer tube absorbs the energy from the rearward movement of the bolt and slams it back in the battery for the next shot.
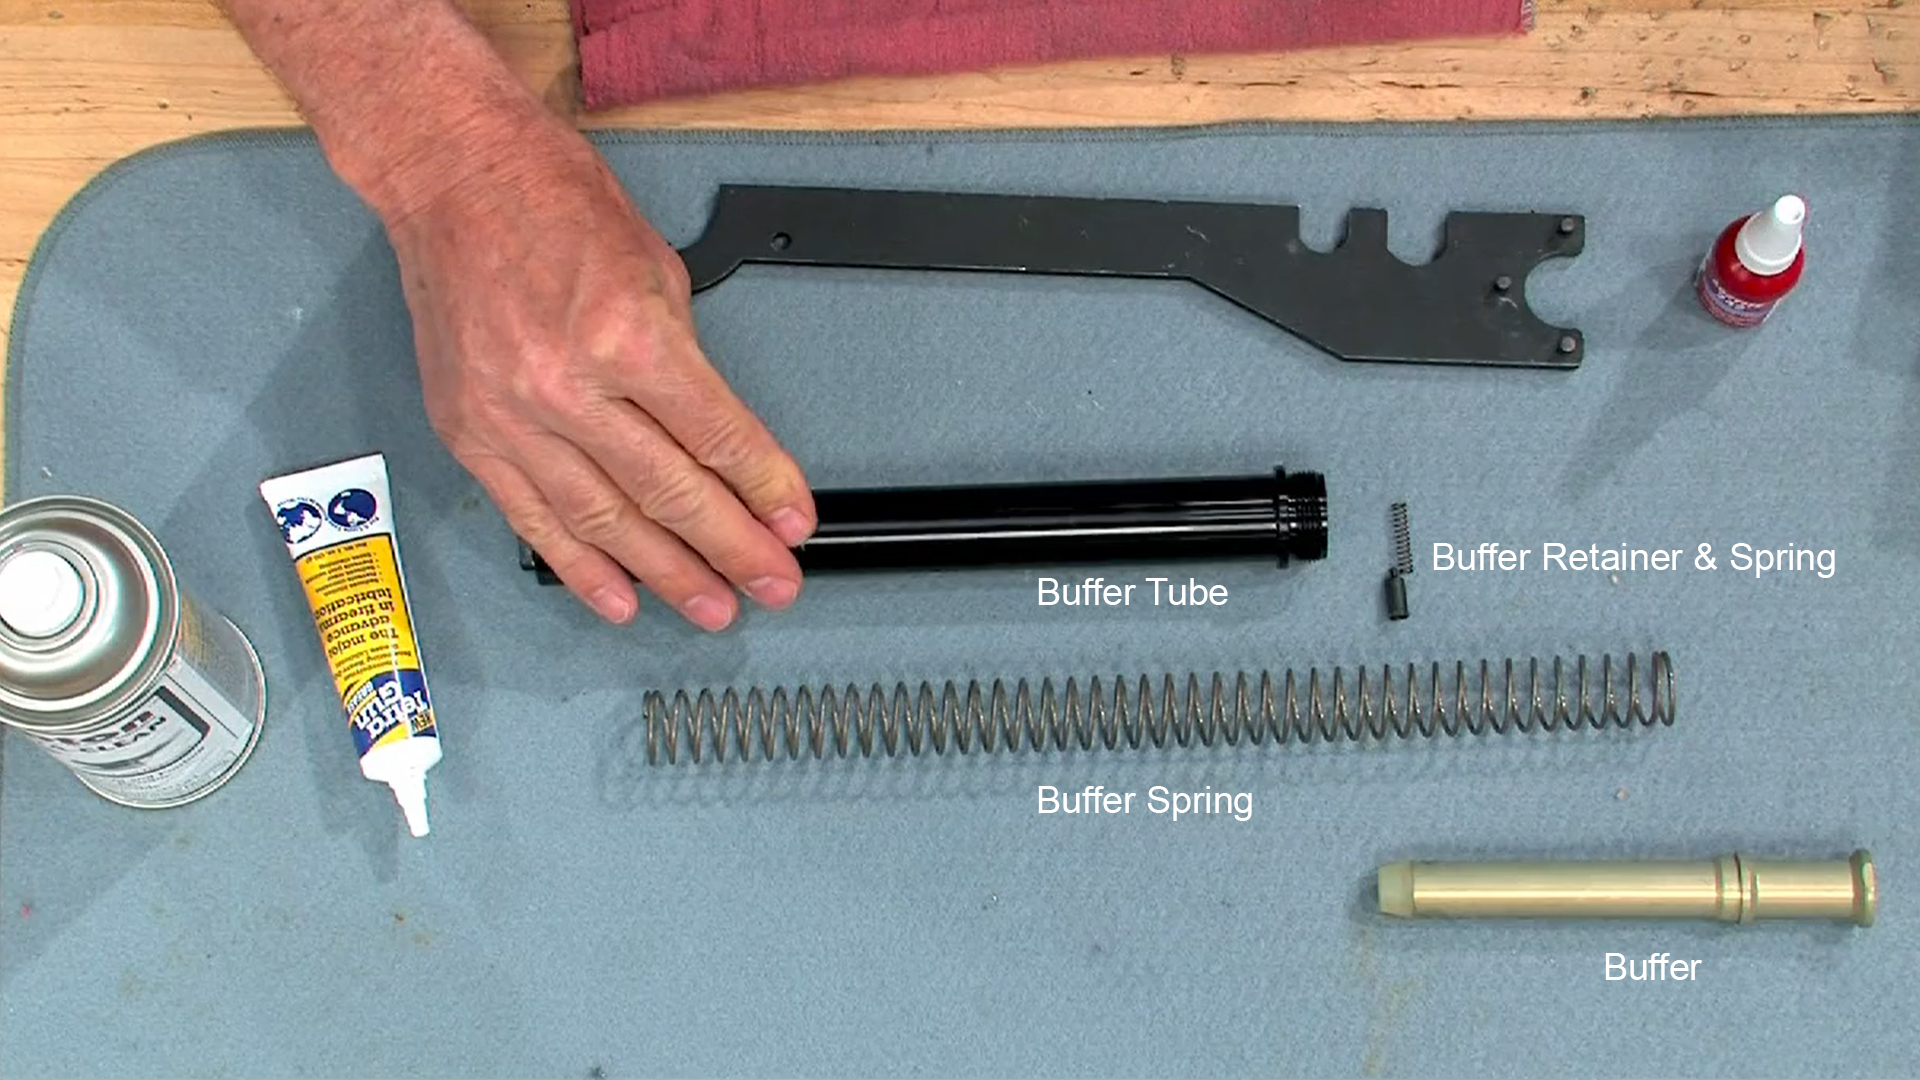
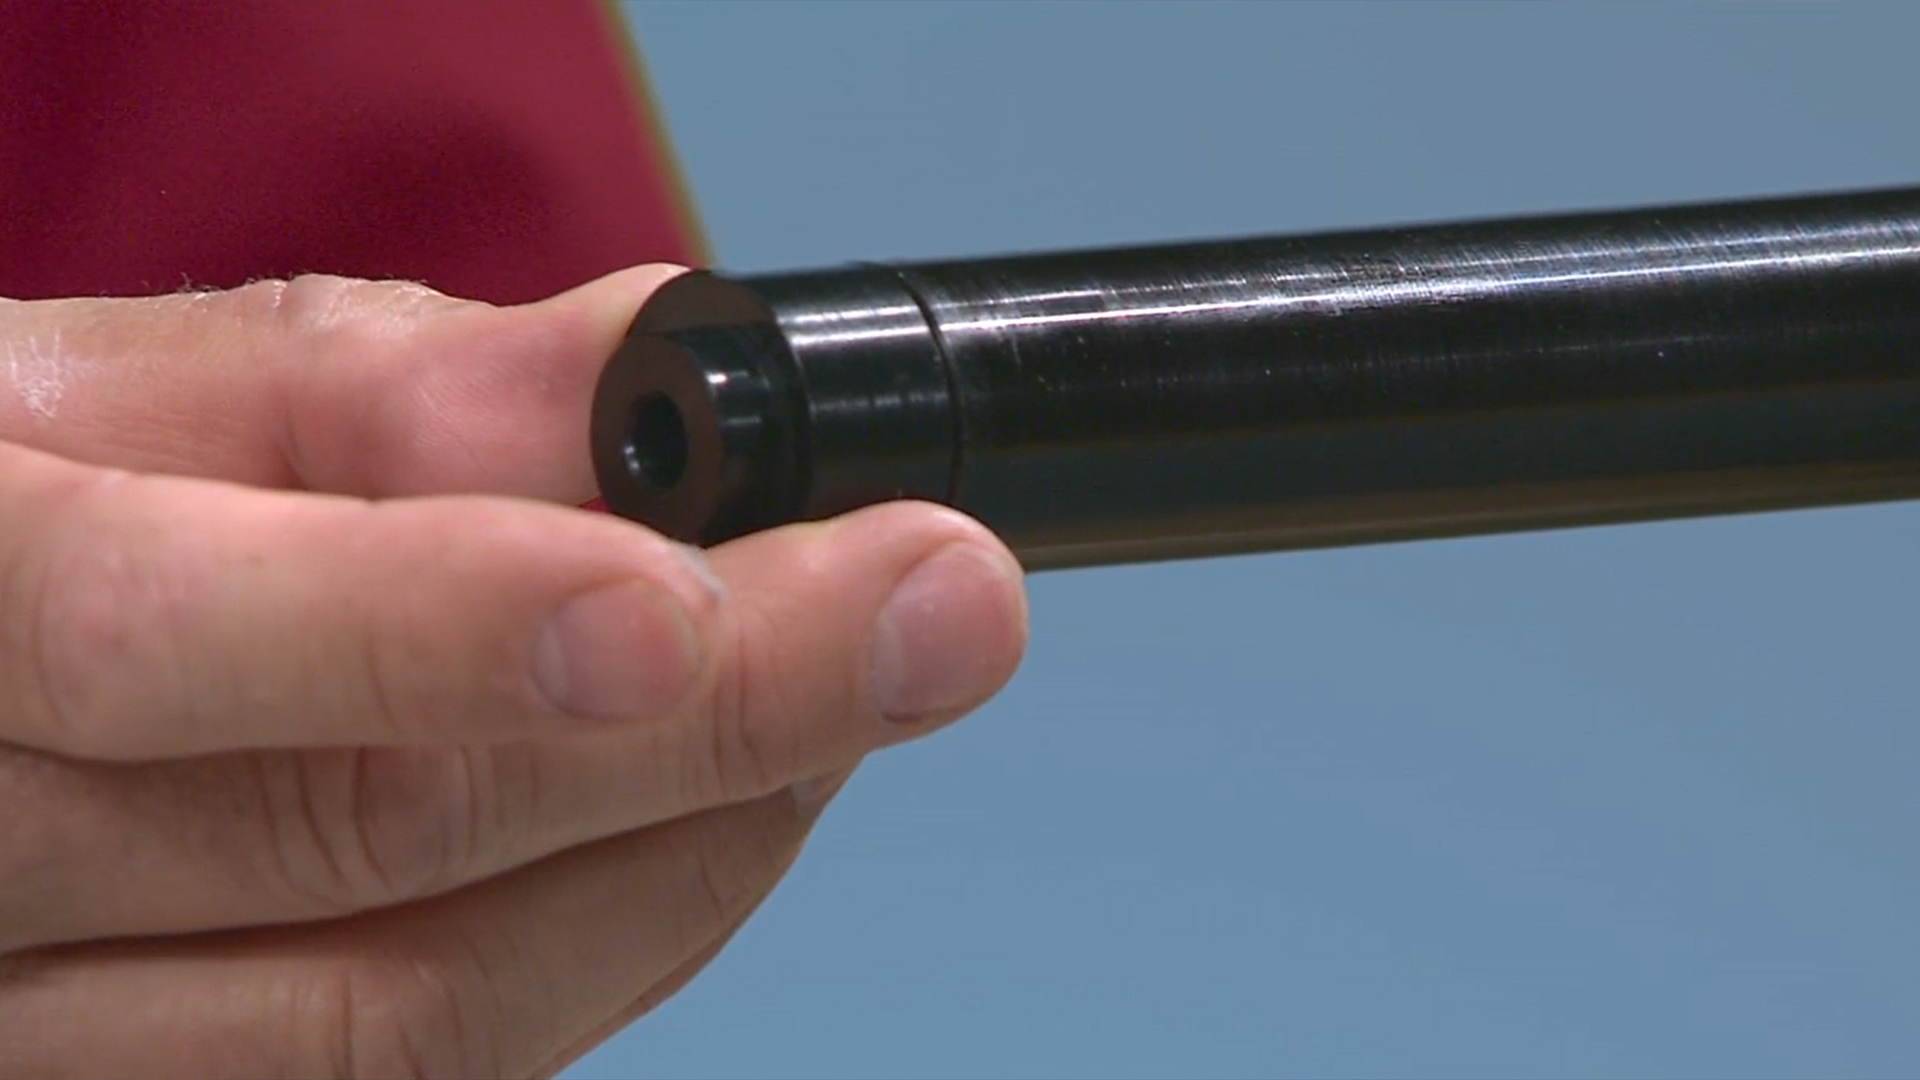
The assembly consists of the buffer tube, the buffer spring, the buffer, buffer retainer, and retainer spring. Remove any residue from the threads of the lower and the buffer tube with the degreaser. Apply some grease to the retainer spring and the retainer, along with a generous amount on the buffer spring and the buffer itself. Now place the retainer spring and retainer into position. Loctite 242 is typically recommended to secure the buffer tube to the lower. A little on both sets of threads works fine. Screw the buffer tube into position. Hold the retainer down for the last few turns.
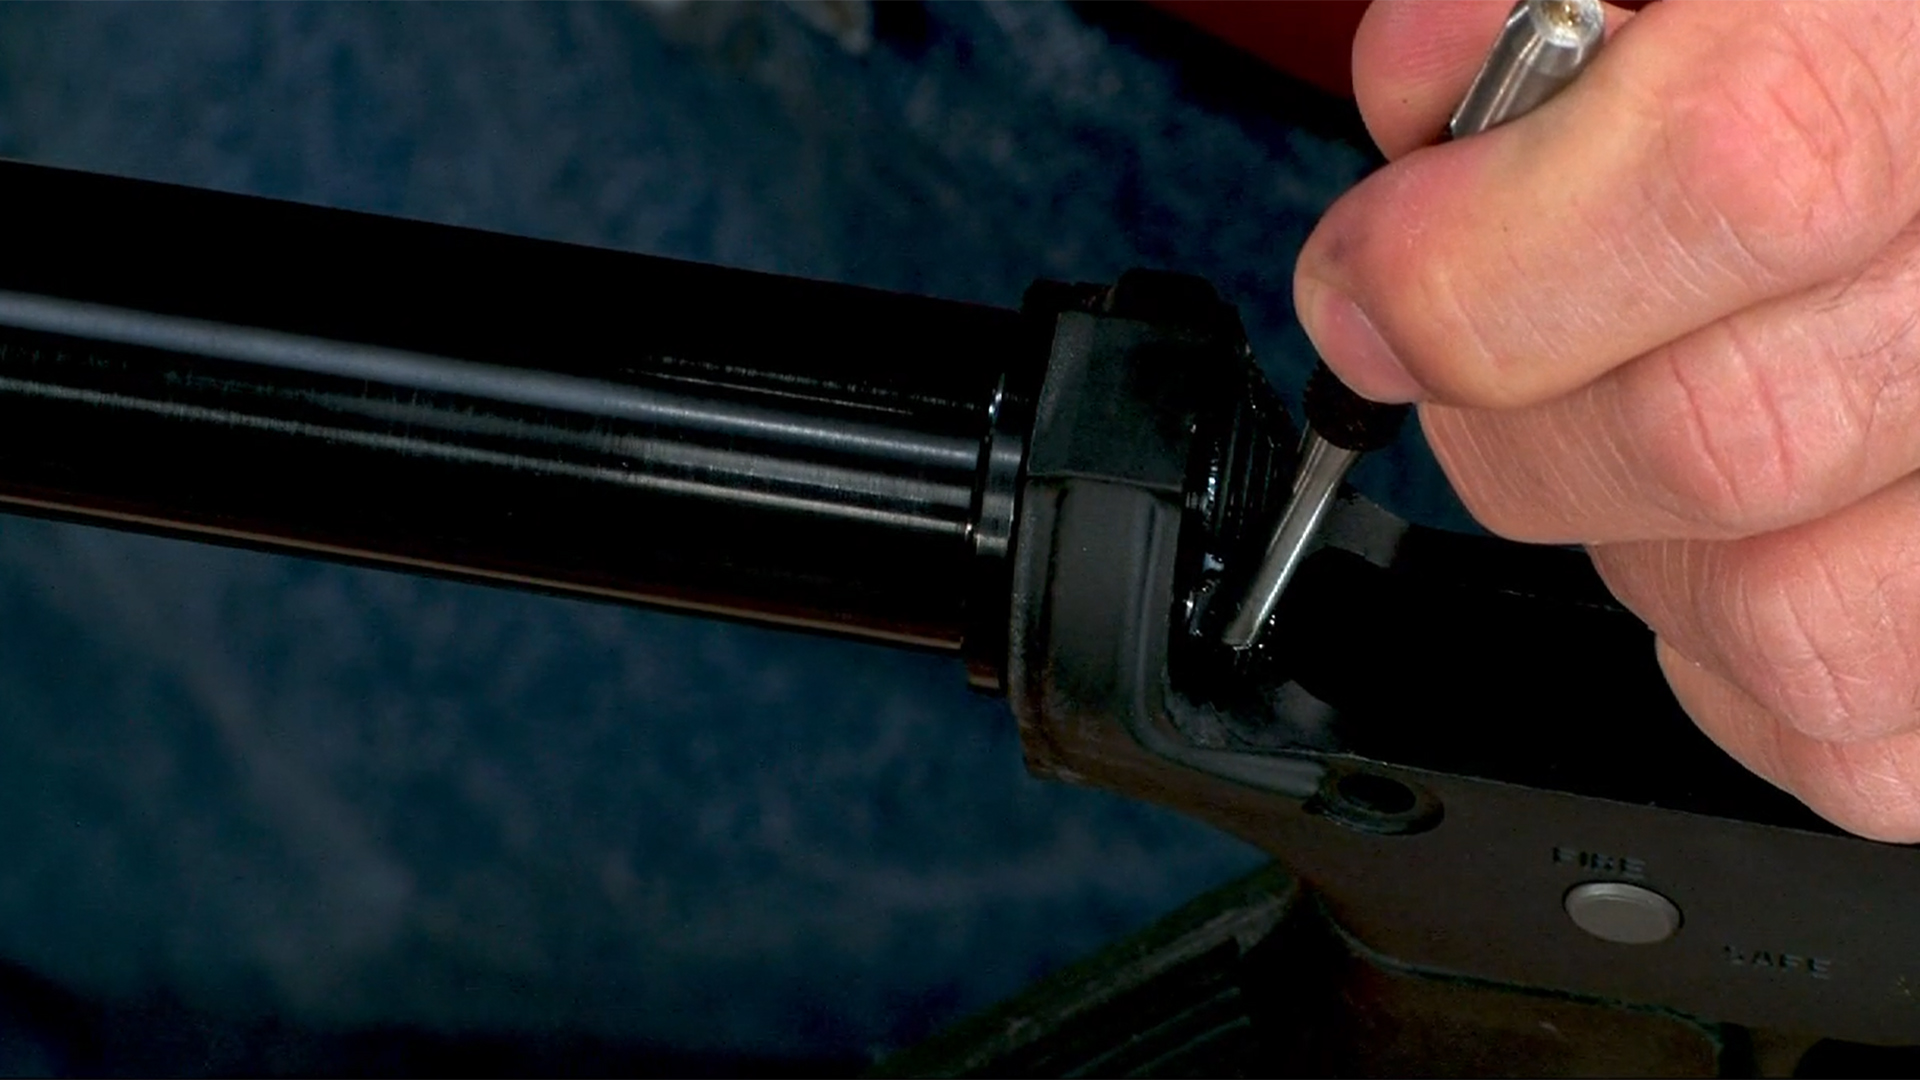
The buffer retainer must move freely up and down. Use a combo wrench to snug up the tube. Now slide or thread the buffer spring into the tube.

The buffer goes in next. The rattle you hear when you shake it is just a bunch of magic weights and spacers designed to counterbalance the impulse from the bolt and carrier when firing. Hold down the retainer and insert the buffer into the tube.
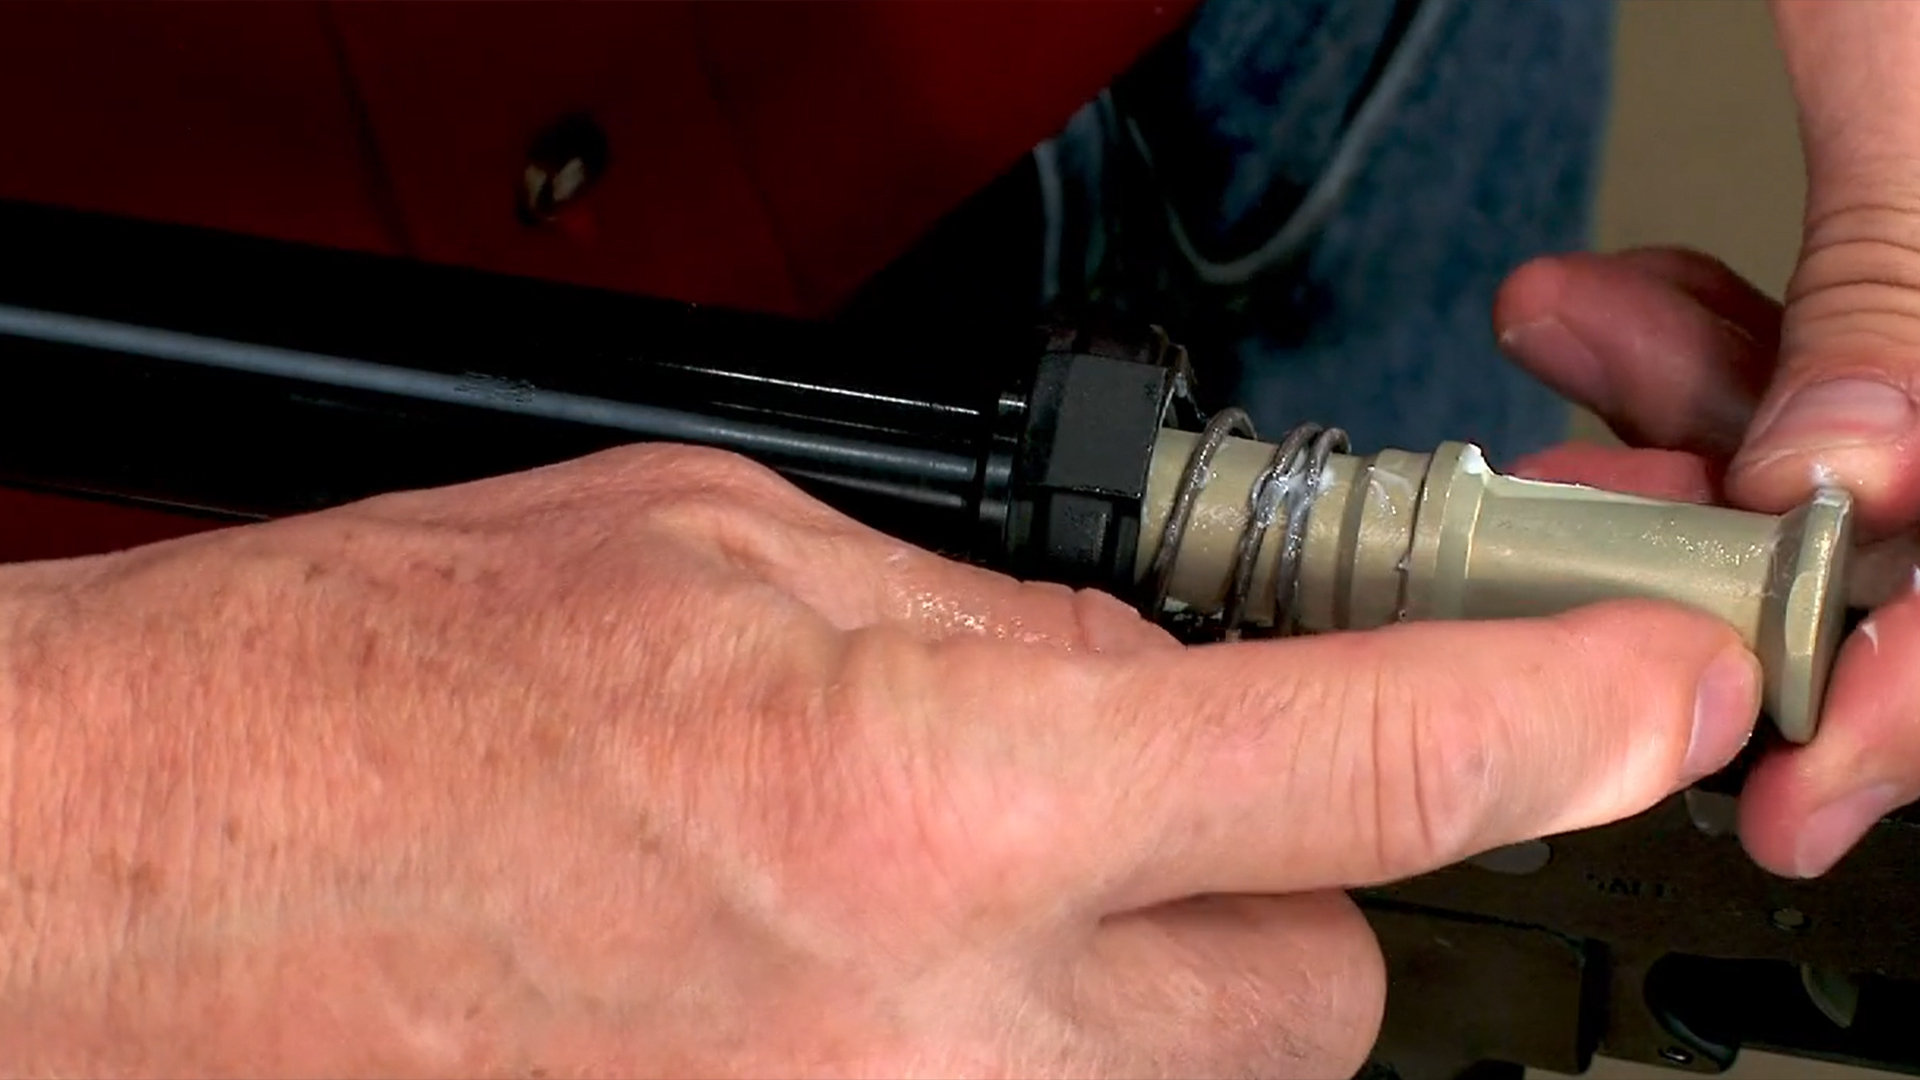
The retainer just keeps the buffer in the tube. Check to make sure that the buffer moves freely. If you’re installing a standard a2 style buttstock, you’ll need to add a spacer to the buffer tube.
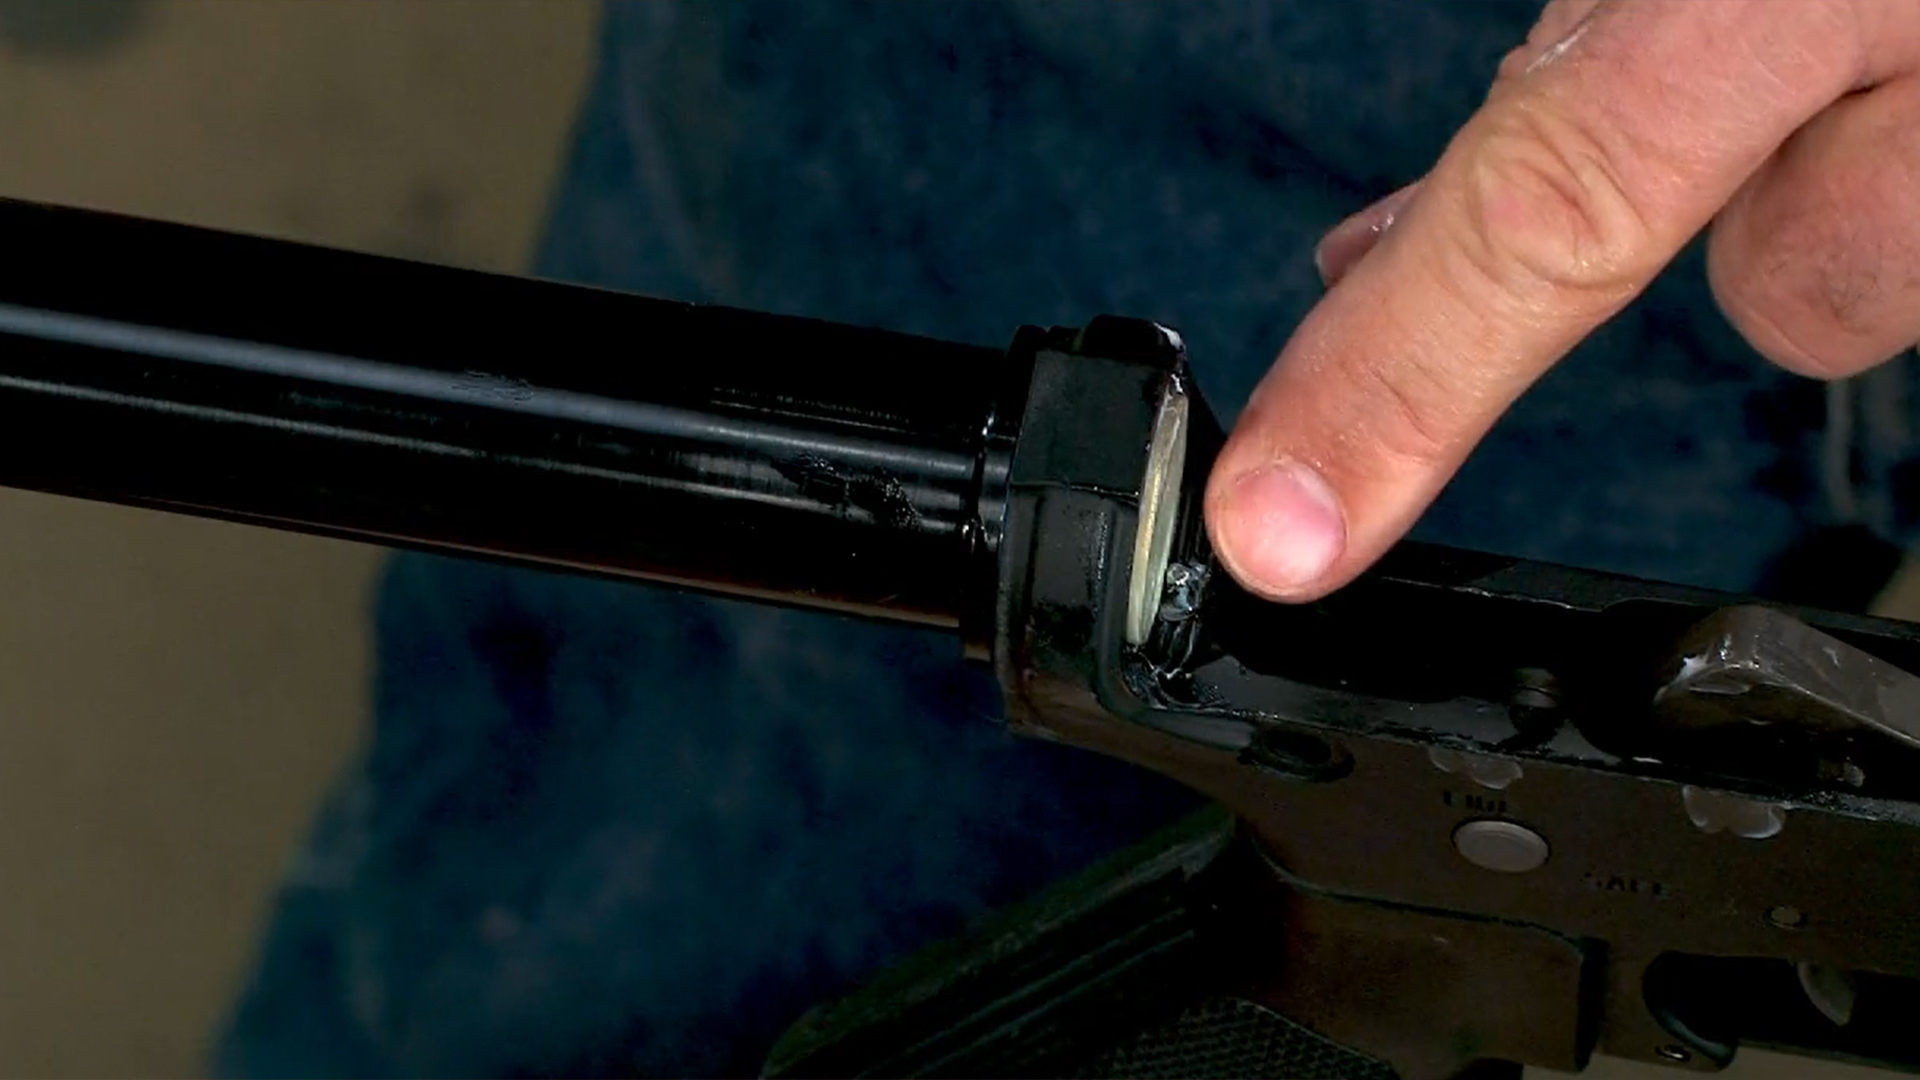
The takedown pin is also installed at this time as the spring and detent are held in place by the buttstock. Apply a little oil to the takedown pin and push it into the lower from the right side. Install the detent from the rear end followed by the spring, which should protrude slightly. Slide the buttstock over the buffer tube being careful not to bend the detent spring.
Now secure the butt plate to the stock, and that completes the assembly of the lower receiver.
Now let’s move on to the upper!